Hitachi VT-FX6404A Owner'S Manual Download Page 56


56

Important: 

Your timed recording settings take effect when you turn off the power on the VCR. 

USING THE VCR PLUS+ SYSTEM FOR RECORDING 

About the VCR Plus+ system 

This handy feature makes timed recording a snap. You don't need to enter the specific channel, date, time, or 
duration of a program. All you enter is its PlusCode programming number - a number of up to eight digits. This 
special code is easy to find in your favorite TV program guide or daily newspaper. Here's a sample page from TV 
Guide showing PlusCode numbers next to each program. 


Your local channels may be different from the VCR Plus+ channel codes. To get ready to record with the VCR 
Plus+ system you need to assign your local broadcast and cable channel numbers to the VCR Plus+ channel 
codes already stored in your VCR's memory. This is called channel setup and you do it using the on-screen Easy 
Guide System and the following step-by-step instructions. Then you will be ready to begin VCR Plus+ recording, 
also using the on-screen Easy Guide System. VCR Plus+' and PlusCode R are trademarks of Gemstar 
Development Corporation. 
 

Channel setup 

Before you begin 

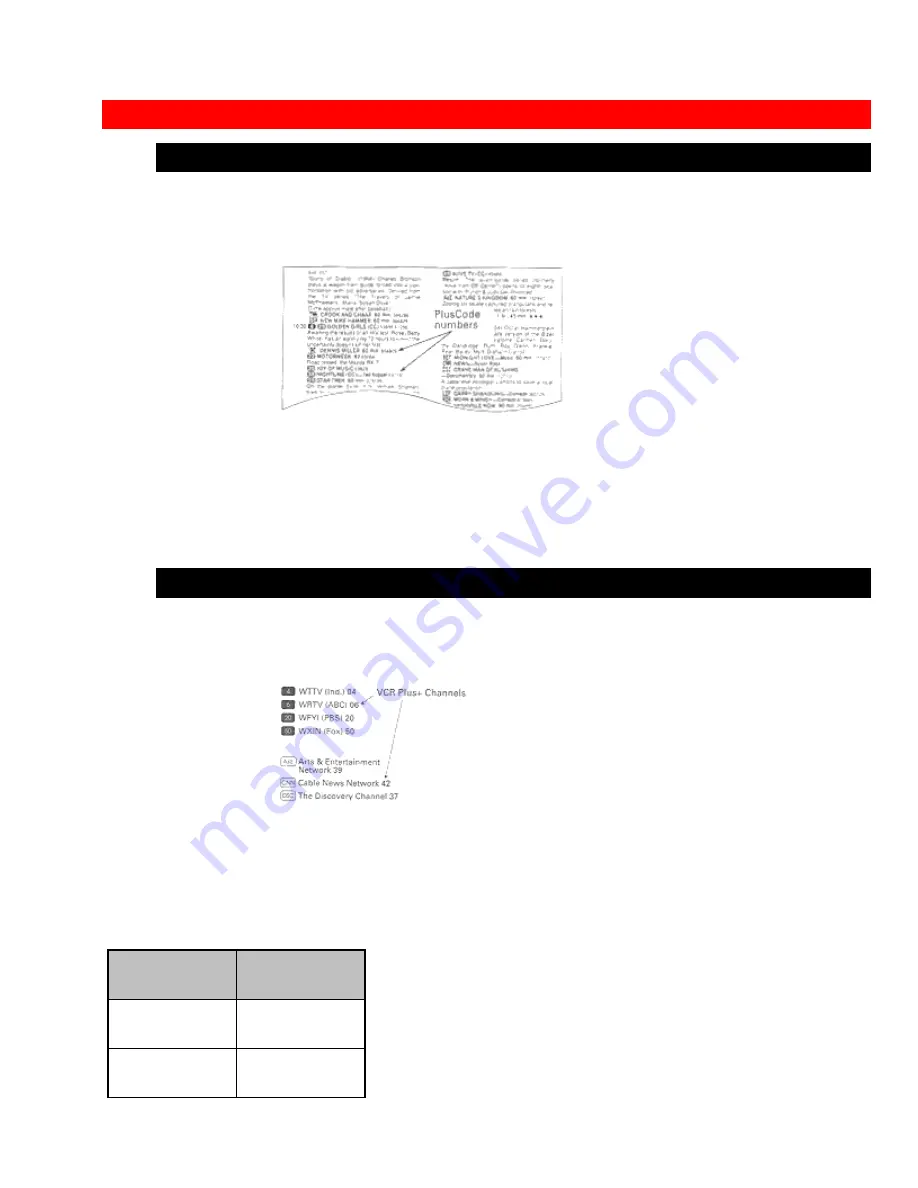
Look for a listing like this one in your local TV program guide or Sunday newspaper TV section.  Notice the 

small numbers to the right of the station name. 
These are the VCR Plus+ channel numbers that you will use in the channel setup procedure. 


2

 Make a list of the VCR Plus+ channel numbers and the channel numbers you are receiving them on. If there are 

any differences, 

YOUR

 channel numbers must be assigned to the corresponding VCR Plus+ numbers. (See 

Example) 

EXAMPLE 

VCR Plus+ 

Channel Number 

Channel Number 

You Receive


04 

(ind.) 

04 

06 

ABC 

06 

Summary of Contents for VT-FX6404A

Page 1: ...start recording on the tape Super rewind and fast forward Multi channel TV sound MTS 8 program 1 month preset recording Auto tracking system automatically adjusts the tracking so the picture is optimized Frequency synthesized tuner provides easy preset tuning of up to 68 broadcast TV channels and 125 cable channels VHS Hi Fidelity sound in playback On screen programming guide Easy cursor operation...

Page 2: ...eceived channels without using a cable box Hookups A B C or D 23 Auto blue setting 27 CABLE BOX SETUP 28 PLAYBACK 31 Rewinding the tape 32 Rewinding or fast forwarding a tape at high speed 33 To remove noise from the picture 33 SPECIAL PLAYBACK EFFECTS 34 Variable speed playback 34 Slow motion 35 Visual Search 36 Choosing a mode for audio playback 36 SHUTTLE CONTROL 37 Using the shuttle ring 37 US...

Page 3: ... control your cable box 67 INTEGRATING YOUR STEREO SYSTEM WITH YOUR VCR 67 Hookup 67 To record from stereo 68 COPYING TAPES FROM A CAMCORDER 69 Hook up 69 To copy from a camcorder 69 COPYING FROM ONE VCR TO ANOTHER VCR DUBBING 70 Hookup 70 To copy from one VCR to another VCR 70 PROBLEM GUIDE MAINTENANCE 71 Problem guide 72 Maintenance 72 Guide indications in VCR display and OSD screen 72 TECHNICAL...

Page 4: ...he careful attention devoted to quality standards in the manufacture of your video product safety is a major factor in the design of every instrument But safety is your responsibility too This page lists important information that will help to assure your enjoyment and proper use of a Video Cassette Recorder and accessory equipment Please read it carefully before operating your video product and k...

Page 5: ...s recommended by the video product manufacturer as they may cause hazards Caution Maintain electrical safety Powerline operated equipment or accessories connected to this unit should bear the UL listing mark or CSA certification mark on the accessory itself and should not have been modified so as to defeat the safety features This will help avoid any potential hazard from electric shock or fire If...

Page 6: ...mpt to service this video product yourself as opening or removing covers may expose you to dangerous voltage or other hazards Refer all servicing to qualified service personnel 18 Conditions Requiring Service Unplug this video product from the wall outlet and refer servicing to qualified service personnel under the following conditions a When the power supply cord or plug is damaged b If liquid ha...

Page 7: ...RACKING buttons Shuttle ring REC button AUDIO IN L mono R jacks VIDEO IN JACK VCR LCD Window Display power on in stop mode flashes during auto install RF03H RF Channel 3 RF04CH RF Channel 4 playback flashes during double speed play visual search reverse search slow play play pause and skip playback recording and timer recording flashes during record pause fast forward flashes during high speed fas...

Page 8: ...ny are missing or appear damaged consult your dealer Cable for connecting Batteries for remote this VCR to a TV control handset R6 VCR Customer Controls Item No Function 12 13 14 15 16 17 AUDIO IN L R jacks VIDEO IN jack IN FROM ANT signal input OUT TO TV signal out to TV VIDEO OUT jack AUDIO OUT L R jacks Remote Control Customer Controls ...

Page 9: ...tops play record function GUIDE to recall OSD menu DISP to recall on screen display PROGRAM programming button CLEAR clears time counter REC record button 100 ENT button VCR TV Device buttons let you set the remote to control one of the two devices VCR TV mode select button CH channel up down button PAUSE ENTER buttons Cursor buttons F FWD button fast forward or search PLAY button playback SUPER I...

Page 10: ... compartment lid to remove it Note When replacing the batteries remove the old batteries and keep the POWER button depressed for 10 seconds before inserting fresh batteries 2 Install batteries Align the positive and negative polarity marks on the batteries with those indicated on the remote control 3 Replace the lid Operating in the remote control ...

Page 11: ...ss the required button on the remote control Note If the remote does not work even at close range try replacing the batteries with two fresh AA batteries CASSETTE TAPES Types Only use video cassettes with the mark in this VCR The table shows the recording time of different cassettes To get the best quality picture record at standard recording speed SP This VCR does not record at the LP speed but i...

Page 12: ... video cassette gently into the slot on the front of the VCR The VCR automatically turns on Removal Press the STOP EJECT button on the VCR The cassette will come partially out of the compartment so you can pull it out The cassette can be ejected with the power on or off BASIC ANTENNA HOOKUP A WITH THIS HOOKUP YOU CAN WATCH AVAILABLE TV CHANNELS RECORD AND WATCH THE SAME CHANNEL RECORD ONE CHANNEL ...

Page 13: ... turn it off Press the PLAY button on front of the VCR Pressing the CHANNEL button alternates between channel 3 and channel 4 in the VCR s display Display the channel which is not used by a commercial channel in your area ADVANCED ANTENNA HOOKUP AV HOOKUP B WITH THIS HOOKUP YOU CAN WATCH AVAILABLE TV CHANNELS RECORD AND WATCH THE SAME CHANNEL RECORD ONE CHANNEL AND WATCH ANOTHER Caution Do not con...

Page 14: ... CABLE HOOKUP C WITH THIS HOOKUP YOU CAN WATCH AVAILABLE CABLE CHANNELS RECORD AND WATCH THE SAME CHANNEL RECORD ONE CHANNEL AND WATCH ANOTHER Caution Do not connect to the mains supply socket before connecting all leads ss page 17 ...

Page 15: ...utton on front of the VCR Pressing the CHANNEL button alternates between channel 3 and channel 4 in the VCR s display Display the channel which is not used by a commercial channel in your area ADVANCED CABLE HOOKUP AV HOOKUP D WITH THIS HOOKUP YOU CAN WATCH AVAILABLE CABLE CHANNELS RECORD AND WATCH THE SAME CHANNEL RECORD ONE CHANNEL AND WATCH ANOTHER Caution Do not connect to the mains supply soc...

Page 16: ...E CHANNELS RECORD AND WATCH THE SAME CHANNEL YOU CAN T RECORD ONE CHANNEL AND WATCH ANOTHER ALL CHANNEL SELECTIONS MUST BE MADE AT THE CABLE BOX BE SURE TO CONSULT YOUR CABLE BOX MANUAL FOR THE CABLE BOX OUTPUT CHANNEL Caution Do not connect to the mains supply socket before connecting all leads ss page 17 ...

Page 17: ...n channel 3 and channel 4 in the VCR s display Display the channel which is not used by a commercial channel in your area ADVANCED CABLE HOOKUP WITH CABLE BOX F WITH THIS HOOKUP YOU CAN WATCH AVAILABLE CABLE CHANNELS RECORD AND WATCH THE SAME CHANNEL YOU CAN T RECORD ONE CHANNEL AND WATCH ANOTHER ALL CHANNEL SELECTIONS MUST BE MADE AT THE CABLE BOX BE SURE TO CONSULT YOUR CABLE BOX MANUAL FOR THE ...

Page 18: ...YOU CAN WATCH AVAILABLE CABLE CHANNELS RECORD AND WATCH THE SAME CHANNEL RECORD ONE CHANNEL AND WATCH ANOTHER TO RECORD ALL CHANNEL SELECTIONS MUST BE MADE AT THE CABLE BOX BE SURE TO CONSULT YOUR CABLE BOX MANUAL FOR THE CABLE BOX OUTPUT CHANNEL Caution Do not connect to the mains supply socket before connecting all leads ss page 17 ...

Page 19: ... completely connecting all leads Please refer to page 10 to 16 on HOOKUP sections The VCR will be in the standby mode at this stage 2 Press the POWER button on the VCR to start the auto install This screen appears to show that the channel is being set The will flash in the VCR s display The VCR will automatically store channels received in your area It takes about 2 3 minutes ...

Page 20: ...ally switches to the STOP mode SETTING THE CLOCK Note An antenna or cable must be connected to the VCR before you begin this operation Tips 1 You ll need to set the clock when first hooking up your VCR and any time the power goes out for more than 1 hour When you first plug in the VCR or after a power outage the clock display will read on the TV display To set the clock Note Turn on the TV and sel...

Page 21: ...ll be set to English Press the cursor button to select LANGUAGE option and then press the cursor button for French or for Spanish 2 Press the cursor button to select the SETUP option and then press the ENTER button 3 Press the cursor button to select the CLOCK and then press the ENTER button 4 Press the or cursor button to change the hour The AM or PM can be select when you change the hour ...

Page 22: ...sor button to change the minutes 6 Press the cursor button to select MONTH and then press the or cursor button to change the month 7 Press the cursor button to select DAY and then press the or cursor button to change the day The correct day of the week will appear by itself ...

Page 23: ...ou go by pressing cursor button to select and press or cursor to change If you press or cursor button continuously the time or date is kept changing PRE TUNING THE VCR TUNER Note An antenna or cable must be connected to the VCR before you begin this operation Presetting the received channels without using a cable box Hookups A B C or D Press the POWER button to turn on the VCR 1 Turn on the TV and...

Page 24: ...enu will appear on the TV screen 3 Press the cursor button to select the SETUP option and press the ENTER button 4 Press the cursor button to select the CHANNEL and then press the ENTER button 5 Press the cursor button and then press the ENTER button ...

Page 25: ...s selected In this case select CATV2 in the receiving setup When automatic presetting of channels are finished Press the CH channel button or numbered buttons to check the channels you can receive Note If no channels have been set or a clear picture does not appear check the antenna or cable connection To add or erase channels The auto channel set procedure may memorize channels that are blank hav...

Page 26: ...the ENTER button 4 Use the cursor buttons to select CH LIST ADD ERASE and then press the ENTER button 5 Use the number buttons to select the number of the channel you want to add or erase 6 Press the STOP button to delete the channel or press the PLAY button to add it ...

Page 27: ...Turn on the TV and select the video channel 3 or 4 Or if you are hooked up with an audio video cable set the TV to AUX or VIDEO 2 Press the GUIDE button The main on screen menu will appear on the TV screen 3 Press the cursor button to select SETUP and then press the ENTER button ...

Page 28: ...ayback this function does not operate OFF The AUTO BLUE feature is switched off 5 Press the GUIDE button to end the setting CABLE BOX SETUP The following setup allows the VCR channel to automatically switch to the cable box output channel during delayed recording Note This setup should be performed if you receive all channels through a cable box Hookups E F or G 1 Turn on the TV and select the vid...

Page 29: ...e TV screen 3 Press the cursor button to select the SETUP option and then press the ENTER button 4 Press the cursor button to select the CHANNEL and then press the ENTER button 5 Press the cursor button to select CATV2 and then press the GUIDE button to end this setting ...

Page 30: ...ut channel usually 3 or 4 8 Press the cursor button to select VCR PLUS SETUP and then press the ENTER button 9 Press the ENTER button to answer YES to the question IS CABLE BOX BEING USED Or if you want to select NO press the cursor button and then the ENTER button If you select YES you need not operate VCR PLUS SETUP see page 44 During delayed recording the VCR channel will automatically switch t...

Page 31: ...record before the recording is scheduled to begin Note If you make a mistake when entering digits press the REW button to return the white dash Then press the or cursor button to enter the correct number PLAYBACK To playback a recorded tape 1 Turn on the TV and select the video channel 3 or 4 Or if you are hooked up with an audio video cable set the TV to AUX or VIDEO 2 Insert a recorded tape The ...

Page 32: ... by SQPB the inversion noise will appears on screen in STILL and SLOW mode Rewinding the tape When the video cassette reaches the end of the tape the VCR will stop and automatically rewind the tape If you press the POWER button while the tape is rewinding the power will not shut off until the tape has been completely rewound You may also rewind the tape manually at any time Manual Rewind 1 Press t...

Page 33: ...ton then press it again To stop the tape press the STOP button Note During super rewind fast forward there will be an interval of 5 seconds between the time the STOP button is pressed and the tape actually stops This is designed to protect the tape To stop the tape earlier press the REW or F FWD button to restore the normal rewind fast forward speed then press the STOP button To remove noise from ...

Page 34: ...ate auto tracking simply eject the tape and reinsert it into the VCR SPECIAL PLAYBACK EFFECTS Variable speed playback Still Playback Pause Press the PAUSE button on the remote control to still the tape during play The picture will freeze You may see some minor noise or interference on the screen This is normal To resume play press the PLAY button or PAUSE button again ...

Page 35: ...during the PAUSE mode first set the VCR to the SLOW mode by pressing the 4 button during playback and then press the CH or button on the remote control to minimize the noise bars see page 26 If the screen jitters during PAUSE press the CH or button to minimize the jitters Slow motion 1 Press the PLAY button 2 Press the SLOW button to slow the playback speed 3 Press the PLAY button to return to pla...

Page 36: ... and hold it you can search backward or forward through the tape at a higher speed while viewing it Press PLAY and REW then hold REW for backward search at a higher speed Press PLAY and F FWD then hold F FWD for forward search at a higher speed Release REW or F FWD to return to normal playback Choosing a mode for audio playback The VCR records the same audio on both the Hi Fi and linear tracks on ...

Page 37: ...to playback sound recorded on the Hi Fi track and for normal use Select LINEAR to play back the sound recorded on the linear monaural track Also if the audio sounds distorted or unusual or there is no audio select LINEAR 5 Press the GUIDE button to end the setting SHUTTLE CONTROL Using the shuttle ring The shuttle feature lets you control all the playback functions PLAY PAUSE SLOW MOTION and SEARC...

Page 38: ...ith these tapes Fast forward rewind slow play Insertion and ejection of cassettes USING THE SUPER INDEX FEATURE What is SUPER INDEX SUPER INDEX allows you to quickly search for a program or a scene you want to view or the point from which you want to start recording on tape with the following four functions INDEX SEARCH You can locate the beginning of a recorded program using the INDEX feature Eac...

Page 39: ...rogram that begins at that spot NOTE Tape bar will not appear correctly if the tapes which have scratches or are slack are being used 2 If this is the program you were looking for press the PLAY button for normal playback To stop the index search before an index mark is reached press the STOP button Note If there are no index marks on the tape the VCR will just rewind to the beginning or fast forw...

Page 40: ...earched for The blank square in the tape bar shows the current tape position The tape remaining time appears on the screen and VCR display during BLANK SEARCH When a blank is detected the tape will automatically rewind to the beginning of the blank Notes When a cassette without a safety tab is inserted the warning screen will appear on the TV screen for several seconds and the cassette will be eje...

Page 41: ...view while scanning pictures Hold down the VIEW SKIP BLANK button during rewind The tape will be visually scanned in the reverse direction while the button is held Hold down the VIEW SKIP BLANK button during fast forward The tape will be visually scanned in the forward direction while the button is held When the button is released the tape will rewind or fast forward again or Skipping unnecessary ...

Page 42: ...e DISP button a second time to see just the time counter Notes The linear time counter operates only if there is something recorded on the tape The counter changes to 0 00 00 when the tape is ejected Press the DISP button a third time to see the tape remaining time Note Immediately after the tape is inserted will appear 2 minutes after playback or recording is started the tape remaining time is di...

Page 43: ...THE TIME COUNTER To find specific sections on a tape Indexing with the Time Counter You can set the time counter to memorize a certain point in the video programming and you can return to that point automatically 1 Press the DISP button two or three times The counter will appear in the TV screen 2 Begin recording or playing back a tape 3 At the point that you want to go back to press the CLEAR but...

Page 44: ...nter reads 0 00 00 RECORDING A PROGRAM Before you record Note The cassette safety tab must be in place in order to record The VCR must be hooked up properly for recording See the Simple Hookups at the beginning of this manual Copyright infringement warning Most television programs and films are copyrighted This means that someone has legal rights governing the reproduction and distribution of this...

Page 45: ...e tape The power comes on automatically and the tape indicator lights on the display If a cassette without its safety tab is inserted playback starts automatically and you cannot complete the record operation 3 Press the TAPE SPEED button to select SP standard play for the best picture quality or EP extended play for the longest recording time on a single tape 4 Press the CH button or the number b...

Page 46: ...afety tab is inserted the warning screen will appear on the TV screen for several seconds and the cassette will be ejected automatically Press the PAUSE button to set the VCR to the recording pause mode Press the button again to re start recording If you stay in PAUSE mode for more than 5 minutes the VCR automatically switches to STOP mode to protect the tape If you press the REC button and the ca...

Page 47: ... set the VCR for recording press the VCR TV button The VCR indicator disappears Now you will be viewing through your TV only 2 Switch channels using your TV controls or the VCR remote if it s programmed to control your TV see page 41 Notes You can check on the recording by pressing VCR TV again This will switch you back to viewing through the ...

Page 48: ...s the PAUSE button to stop the recording temporarily 2 Press the CH button or number buttons to change the channel to the one you prefer 3 Press the PAUSE button to continue recording Automatic Indexing Your VCR will automatically create an invisible INDEX mark every time you press the REC button while recording During playback the Index Search feature will let you move through a tape that has sev...

Page 49: ...SAP the SA indicator will display on your TV screen You can set the VCR to record a second audio program by activating the SAP option How to set the SAP option 1 Press the GUIDE button 2 Press the cursor button to select the SETUP option and then press the ENTER button 3 Press the cursor button to select AUDIO and then press the ENTER button ...

Page 50: ...ll see a stereo indicator on the TV screen Set to MONO if the stereo signal is weak and the sound is too noisy Note When you select MONO sound is recorded as mono even when a channel broadcasts in stereo DELAYED RECORDING Setting the VCR to record later Note The cassette safety tab must be in place in order to record With the delayed recording feature you can set this VCR so that it automatically ...

Page 51: ...ng using the on screen Easy Guide System 1 Insert blank or erasable tape The power comes on automatically If a cassette without its safety tab is inserted playback starts automatically and timed record won t operate 2 Turn on the TV and select the video channel 3 or 4 Or if you are hooked up with an audio video cable set the TV to AUX or VIDEO 3 Press the PROGRAM button twice for delayed recording...

Page 52: ...f the week Monday through Friday WEEKLY Records a show at the same day and time every week 4 Press the ENTER button to bring up the screen for One Time Recording EXAMPLE Set the VCR to record one time a program on Channel 8 that starts at 6 00 PM and records for 30 minutes on 7 10 99 at the EP recording speed 5 Press the or cursor button to change the hour of the start time The AM or PM can be sel...

Page 53: ...s the or cursor button to change the minutes If you have installed a cable box the cable box output channel will appear in the CH column 9 Press the cursor button to select the channel and then press the or cursor button to change the channel If you want to record from an external equipment press the or cursor button to select L1 instead of the channel number 10 Press the cursor button to select t...

Page 54: ...the recording date and then press the or cursor button to change the date 12 Press the PROGRAM button to set the program in memory Note If program is overlap the VCR gives you an error message that disappears from the screen in about 5 ...

Page 55: ...to insert a cassette with safety tab intact The VCR will automatically give a warning display on the screen 5 minutes before timer recording is to start When you have set up all the timed recordings you want Don t forget to load a videocassette with the safety tab still attached to record on If you have installed a cable box turn on the cable box and select the channel you want to record on the ca...

Page 56: ... the VCR Plus channel codes already stored in your VCR s memory This is called channel setup and you do it using the on screen Easy Guide System and the following step by step instructions Then you will be ready to begin VCR Plus recording also using the on screen Easy Guide System VCR Plus and PlusCode R are trademarks of Gemstar Development Corporation Channel setup Before you begin 1 Look for a...

Page 57: ...ough a cable box Hookups E F or G please refer to page 23 cable box setup in First Time Setup section The following operation is not necessary VCR Plus setup Channel setup The following shows the procedure you should perform when you are receiving the Cable News Network channel 42 with the VCR Plus system on channel 38 Example VCR Plus Channel Number Channel Number You Receive 42 38 Matching Broad...

Page 58: ...ation is not necessary 5 Press the cursor button to select NO and then press the ENTER button A small arrow points to a blank in the CHANNEL column Note If your broadcast channel number is the same as the VCR Plus Channel in your TV listing do not enter any number 6 Press the CH button to move up and down through the channel list until you reach VCR Plus CH42 7 Press the number buttons to assign y...

Page 59: ... all channels that need to be assigned 9 Press the GUIDE button to end the setup procedure You are ready to begin delayed recording with the VCR plus system Using the VCR Plus system to record a program by using TV screen 1 Insert a blank or erasable tape The power comes on automatically When a cassette without its safety tab is inserted playback starts automatically and VCR Plus recording won t o...

Page 60: ...rd Note This number can be up to eight digits If you enter a wrong digit press the CLEAR button and enter the correct one 4 Press the ENTER button to store the PlusCode number in the VCR s memory Types of Delayed Recordings ONE TIME Records one show at a particular date and time DAILY Records a show at the same time every day of the week Monday through Friday WEEKLY Records a show at the same day ...

Page 61: ...on or TAPE SPEED to choose recording speed SP standard play or EP extended play The screen will display all the details of the program you chose Check the CH number to make sure it is the right one If not you need to check your VCR Plus channel setup again If you have installed a cable box see page 23 the cable box output will appear in the CH column 7 Review the screen to be sure everything is se...

Page 62: ... up all the timed recordings you want Don t forget to load a videocassette With the safety tab still attached to record on If you have installed a cable box see page 23 turn on the cable box and select the channel you want to record on the cable box before recording starts Important Your timed recording settings take effect when you turn off the power on the VCR Caution of VCR Plus Recording After...

Page 63: ...r the PROGRAM REVIEW option and then press the ENTER This brings up the screen setting for the first program If you want to clear this program press the button to remove this program 4 Each time pressing the button to cycle through all the programs you have preset The screen will display the next program if there are more or it will switch back to the main menu ...

Page 64: ...o end PROGRAMMING THE VCR REMOTE TO CONTROL YOUR TV The VCR remote control can be programmed to control many TV brands that are remote controlled 1 Turn on the TV 2 Point VCR remote control toward TV 3 Press and hold the TV button ...

Page 65: ... 2 Toshiba 7 Mitsubishi CH Sony 3 Gold star 2 8 JVC 100 ENT Magnavox 4 Panasonic 2 9 Sharp 1 VOL UP Sanyo 5 RCA 0 Sharp 2 AVX Note If your TV brand is not listed on the Set Up Chart try all the buttons listed in the chart until the TV changes channels If the TV channel does not change you won t be able to program the remote for your TV Using the VCR remote to control your TV 1 Press the TV button ...

Page 66: ... You can easily change channels 1 Turn on the cable box 2 Point VCR remote control toward cable box 3 Press and hold the CATV button 4 Press the number button corresponding to your cable box as shown in the set up chart The cable box channel will change to confirm that the remote control has been set Cable Box Press CATV and this Cable Box Press CATV and this ...

Page 67: ... cable box Using the VCR remote to control your cable box 1 Press the CATV button on remote control 2 Point VCR remote control toward cable box 3 Press buttons corresponding to the functions available on your cable box remote control INTEGRATING YOUR STEREO SYSTEM WITH YOUR VCR Hookup When your VCR is connected to a stereo system you can Make high quality audio only recordings for up to 6 hours on...

Page 68: ...hown on page 36 of RECORDING OPERATIONS section Stereo vs mono sound Select VCR recording speed SP or EP as shown on page 33 of RECORDING OPERATIONS section Basic recording steps 1 Press the AVX button on remote control so that L line on the TV display 2 Turn on the stereo and start the selection you wish to record 3 Press the REC button on VCR or REC button on the remote control to start recordin...

Page 69: ...If your camcorder is not stereo has only one audio plug connect it into the AUDIO IN L input on the back of the VCR It is not necessary to connect the S VIDEO jack To copy from a camcorder BEFORE YOU BEGIN Connect the camcorder s AV output cable to the audio video jacks on the back of your VCR 1 Press the AVX button twice on remote control to display L line on the TV display ...

Page 70: ...on the TV 4 When you see the part of the Camcorder tape you wish to copy press the PAUSE button again to release pause and start copying the camcorder tape Press the STOP button to finish recording COPYING FROM ONE VCR TO ANOTHER VCR DUBBING Hookup If you have two VCRs you may use one VCR to record a tape that is being played back in the other VCR To copy from one VCR to another VCR ...

Page 71: ... on VCR 1 The VCR will go into Record Pause 3 Press the PLAY button on VCR 2 You will see the taped program being played on the TV 4 When you see the part of the program you wish to record press the PAUSE button on VCR 1 again to release pause and start recording Press the STOP button to finish recording PROBLEM GUIDE MAINTENANCE ...

Page 72: ...te Snowy picture in playback Snow or picture noise is normal during search still and slow Playback Head cleaning may be required Tape is worn or of inferior quality adjust tracking controls Snowy picture in normal TV viewing Check antenna or cable connections Clock shows on the TV display Power has been interrupted reset the clock Reset the clock Erratic VCR display Push the reset switch with a sh...

Page 73: ...atically Insert a cassette with safety tab intact TECHNICAL SPECIFICATIONS Format VHS Video Signal System NTSC color EIA standard Record Playback System Video 4 head Audio VHS Hi Fi stereo record playback system Tape Speed 33 35 mm sec SP 16 67 mm sec LP playback only 11 12 mm sec EP RF Input UHF VHS 75 ohm Tuner USA 181 channel tuning ability 125 cable channels Canada 178 channel tuning ability 1...

Page 74: ...out notice Hitachi Service Hotline Authorized Hitachi service facilities are available throughout the US and Canada For the location nearest to you call the Hitachi Service Hotline at one of these numbers In the continental U S A DIAL TOLL FREE 7 days a week 24 hours a day 1 800 HITACHI 1 800 448 2244 You must state your zip code when calling In Canada MONTREAL 514 956 9882 ...

Reviews: