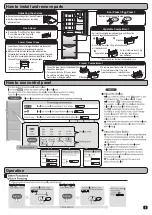
Filling the pure water until the
“FULL” level then closed by water
supply cover.
Push the tank into the case
until it locked at the setting line.
For a first installed, allow 24 hours for
the refrigerator to cool down and make ice.
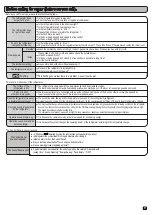
Notice
Water filter
It is normal that a noise is generated
when ice made or ice dropped into the ice box.
2. While pressing the knob,
remove the water filter from
the bottom of the case.
1. Remove the case from
the lid by turning it in the
direction as shown below.
Do not use kitchen soap or bleaching agent.
Using the ice maker for the first time :
Do not fill hot water into the tank (Tank Heat-resistance temperature :
Do not put anything, such as frozen food, ice cream other than ice in the ice box.
Do not touch ice lever detector or ice tray with your hands, you may get injured.
For ice-maker not intended to be connected to the water supply.
Water Tank should be cleaned every week for reasons of hygiene.
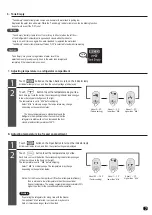
First, check the Automatic Ice Maker is in operation.
If you do not intend to use the Automatic
Ice Maker, turn it off
Wiping off smudges immediately is highly recommended. It is also recommended to
clean the areas of the refrigerator which is not clearly in view once a year.
Use soft cloth with lukewarm water to wipe off smudges. If it is difficult to remove
smudges, use diluted, ph-balanced washing liquid.
1. Do not splash water to the doors and refrigerator body.
3. If the cooking oil smears on the refrigerator, please wipe if off
immediately. The plastic parts might be cracked.
2. Do not use following : Polishing powder,
soap powder, oil, boiling water, brush,
acid, benzene, thinner, alcohol and
alkaline detergent, etc.
It may cause electric shock or a fire.
It may cause damaged door surface.
It may cause cracked plastic parts.
It may cause refrigerant leakage because of tube rust.
It may result in rusty door surface.
Do not do the following, since parts and paint may be damaged.
Neatly clean the door gasket, because it gets dirty easily.
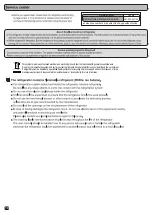
Even if the power plug is plugged in immediately after being unplugged, the compressor will not run for 10 minutes. However,
if the inside is not cold, it will start running in approximately 30 seconds.
1. Unplug the refrigerator.
2. Take out all the food.
3. Wipe the refrigerator clean.
4. If any droplets remain on the surface of the parts, wipe them.
5. Return all parts to their original locations.
6. Check and clean the power plug, cord and outlet.
7. Plug the power cord into the outlet.
1. When in operation.
2. To stop the operation, press
the “Ice Maker” button.
3. When restarting operation.
As seen in the figure below, press the central front part of the lid to lift it up.
(Do not open the lid by nails.)
To close the lid, make sure that the grips at the back are still holding the lid,
then close the lid down in the direction as shown below.
Using a clean sponge or soft cloth and a neutral detergent in warm water, hand wash, rinse and dry all removable parts and interior surfaces throughly.
Throw away the first full ice box of Ice cubes. Odor or dust may adhere on it.
If water tank was dropped, make sure that water is not leaking from the tank.
Do not fill other liquid, any beverages such as juice, cola, beer etc, into the water tank.
Fill with potable water only.
Caution
Notice
Notice
Notice
Cleaning the Water Tank
Turning on/off the Automatic Ice Maker Function
Cleaning (Clean the refrigerator once a month)
The water filter is deform easily; therefore do not stab it with sharp stick.
3. Wash the water filter
with soft sponge.
Ice maker will stop automatically when
Ice box is full and it will start again
automatically when ice cubes in the ice box is
reducing or empty.
FULL
Water tank set line
(FRONT)
Ice detection lever
knob
lid
case
Ice cube box
Ice tray
Ice scoop
How to use Automatic Ice Maker
Cleaning
Caution
Summary of Contents for R-SG32FPG
Page 11: ......
Page 12: ...HRPK1083A_INST BK 315L G 16 A ...


