-32-
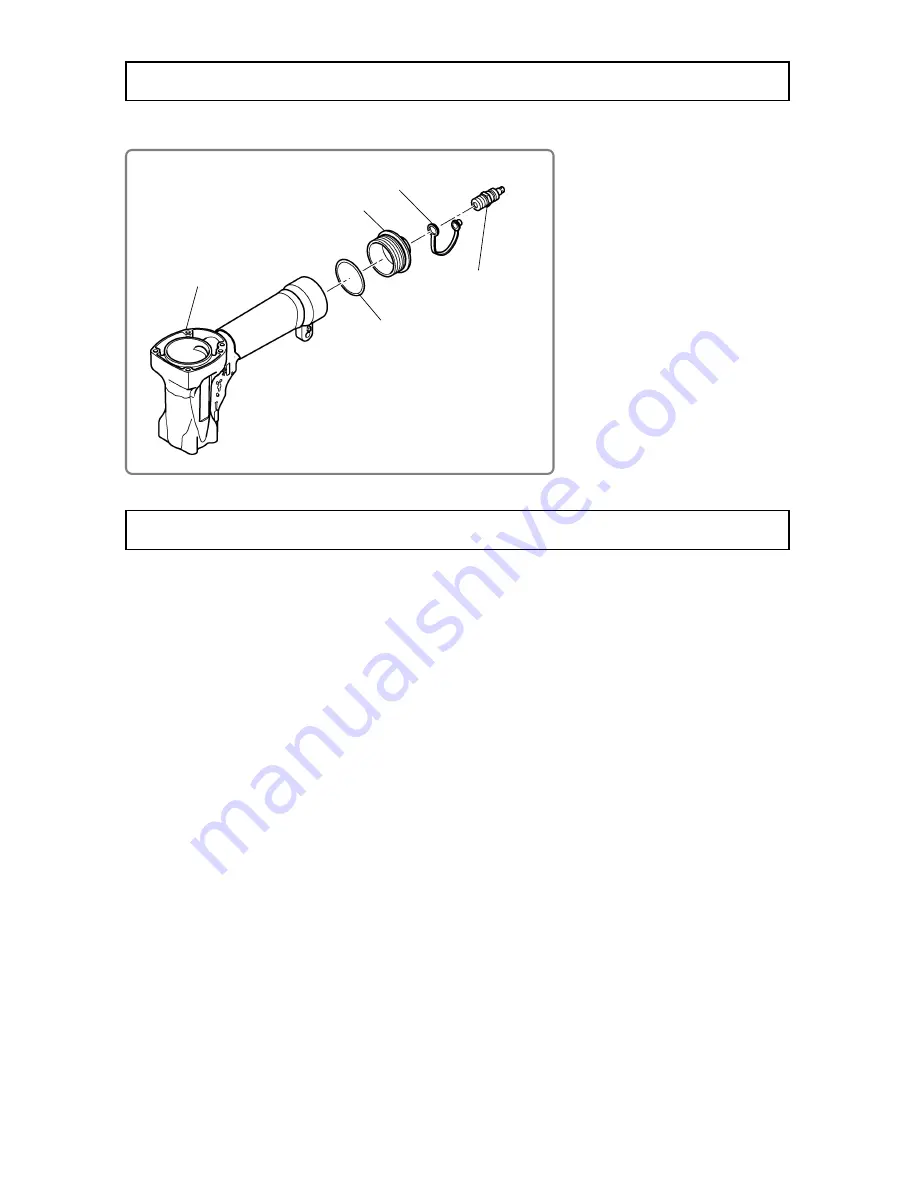
Air Plug L-PT 1/4
[62]
(left-handed thread)
O-Ring (I.D 37.2)
[59]
Cap
[60]
(left-hand thread)
Dust Cap
[61]
Body Ass'y
[39]
[Tools required]
•
Wrench (width: 21 mm)
(1) Disassembly
•
The Cap
[60]
is unified with an
M42 left-handed thread and
can be removed by using a
wrench.
(2) Reassembly
•
Conduct reassembly by
reversing the disassembly
procedure. Apply grease the
to O-Ring (I.D 37.2)
[59]
at
reassembly.
1. Check and confirm the following before connecting compressed air to the nailer:
•
Tightening torque of respective screws
•
The Plunger
[93]
slides smoothly.
•
The Adjuster
[74]
can be rotated smoothly by hand.
•
The Trigger
[69]
is locked and you cannot pull it when the Lock Knob
[80]
is in the "Lock" position.
•
You can pull the Trigger
[69]
smoothly when the Lock Knob
[80]
is in the "Free" position.
•
Press Pushing Lever (A)
[55]
against a piece of wood and make sure it slides smoothly.
•
Press Nail Stopper (A)
[122]
and Nail Stopper (B)
[124]
respectively with your fingers and make sure
both return smoothly.
•
Press the Knob
[24]
of the air duster valve section by your fingers and make sure the Plunger
[30]
moves smoothly.
•
Turn the Change Knob
[44]
and make sure the size of the ejection port varies correctly.
2. Connect compressed air to the nailer and confirm the following:
•
No air leaks from any part of the nailer.
•
The nailer is inactive when you pull the Trigger
[69]
while the Lock Knob
[80]
is in the "Free position."
The nailer does not work when Pushing Lever (A)
[55]
is pressed against a piece of wood.
•
Open the Nail Guide
[121]
, make empty shoots at 12 bar {12 kgf/cm
2
} in this state, and make sure the
Feed Piston
[105]
moves steadily.
•
Nail at 12 bar {12 kgf/cm
2
} and make sure the Piston (H)
[16]
returns completely after nailing.
•
Nail at 12 bar {12 kgf/cm
2
}. Make sure there are no missing or bent nails.
NOTE: Turn the Adjuster [74] knob to the lowest sink position for test nailing.
•
Pull the Trigger
[69]
, press Pushing Lever (A)
[55]
against a piece of wood, and make sure you can
nail continuously. Press Pushing Lever (A)
[55]
against a piece of wood, pull the Trigger
[69]
, and
make sure you can nail each time you pull the Trigger
[69]
.
•
Press the Knob
[24]
of the air duster valve section and make sure air jets out from the nozzle.
Disassembly and Reassembly of the Cap Section
Checks after Reassembly


