background image

— 91 —

Español

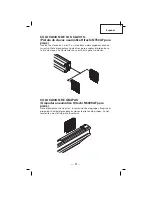
COLOCACION DE LOS CLAVOS:

(Pistola de clavos neumática Hitachi NT50AF para 

pisos)

Inserte los clavos en L o en T en el extremo del cargador como se 

muestra. Hale el propulsor hacia atrás para acoplar el propulsor a 

la tira de clavos. La herramienta ya está lista para funcionar.

COLOCACION DE GRAPAS

(Grapadora neumática Hitachi N5009AF para 

pisos)

Hale el propulsor hacia atrás. Inserte una tira de grapas. Empuje el 

propulsor hacia delante para accionar la prensa de grapas. La her‑

ramienta ya está lista para funcionar.

Summary of Contents for N5009AF

Page 1: ... to handle this tool who has not reviewed this manual DANGER El uso incorrecto de esta pistola de clavos puede ocasionar lesiones graves o la muerte Este manual contiene información importante acerca de la seguridad del producto Lea y comprenda este manual antes de usar la pistola de clavos No permita nunca el uso de esta herramienta por parte de alguien que no haya leído este manual PELIGRO L uti...

Page 2: ... STANDARDS 49 ACCESSOIRES FACULTATIFS 49 Page UTILISATIONS 49 AVANT DE COMMENCER 49 ENVIRONNEMENT DE TRAVAIL 49 ALIMENTATION EN AIR 50 LUBRIFICATION 52 SOINS PAR TEMPS FROID 52 ESSAI DE L OUTIL 52 RÉGLAGE DE LA PRESSION D AIR 54 CHARGEMENT DES ATTACHES 54 FONCTIONNEMENT DE L OUTIL 56 MODES D UTILISATION 57 POSE DE LAMES DE BOIS EMBOUVETÉES 59 ENTRETIEN ENTRETIEN ET INSPECTION 61 SERVICE ET RÉPARAT...

Page 3: ...tlined in the SAFETY section of this Manual and in the sections which contain the operation and maintenance instructions Hazards that must be avoided to prevent bodily injury or machine damage are identified by DANGERS and WARNINGS on the Tool and in this Manual Never use this Tool for applications other than those specified in this Manual DEFINITIONS OF SIGNAL WORDS DANGER indicates an imminently...

Page 4: ...st enforce the use of safety glasses by the Tool operator and others in work area 2 NEVER USE OXYGEN OR OTHER BOTTLED GASES EXPLOSION MAY OCCUR Never use oxygen combustible gases or any other bottled gases as a power source for the Tool Use of the above gases is dangerous as the Tool will explode Use only clean dry regulated compressed air WARNING 3 NEVER POINT TOOL AT YOURSELF OR OTHERS IN WORK A...

Page 5: ... exceeds 200 psi 13 7 bar 14 kgf cm2 as the Tool can burst 7 ALWAYS WEAR EAR AND HEAD PROTECTION Always wear ear protection to protect your ears from loud noise Always wear head protection conforming to ANSI Z89 1 1986 to protect your head from flying objects 8 STORE TOOL PROPERLY When not in use the Tool should be stored in a dry place Keep out of reach of children Lock the storage area 9 KEEP WO...

Page 6: ... trigger operates properly Never use the Tool unless the safety trigger is operating properly otherwise the Tool could drive a fastener unexpectedly Do not tamper with or remove the safety trigger otherwise the safety trigger becomes inoperable 15 KEEP ALL SCREWS AND COVERS TIGHTLY IN PLACE Keep all screws and covers tightly mounted Check their condi tion periodically Never use the Tool if parts a...

Page 7: ...NERS FROM BOTH SIDES OF A WALL AT THE SAME TIME The fasteners can be driven into and through the wall and hit a person on the opposite side 22 CHECK FOR LIVE WIRES Avoid the risk of severe electrical shock by checking for live electrical wires that may be hidden by walls floors or ceilings Turn off the breaker switch to ensure there are no live wires 23 NEVER CARRY TOOL BY HOSE 24 DO NOT OVERREACH...

Page 8: ... that makes you drowsy 29 HANDLE TOOL CORRECTLY Operate the Tool according to the Manual Never allow the Tool to be operated by children individuals unfamiliar with its operation or unauthorized personnel 30 NEVER USE TOOL FOR APPLICATIONS OTHER THAN THOSE SPECIFIED IN THIS MANUAL 31 HANDLE TOOL CAREFULLY Because of high air pressure in the Tool cracks in the surface are dangerous To avoid this do...

Page 9: ...lling the safety trigger Hitting the Tool with the safety interlock engaged will severely damage the safety mechanism and the Tool This abuse and damage is not covered by the warranty EMPLOYER S RESPONSIBILITIES 1 Ensure that this MANUAL is available to operators and person nel performing maintenance 2 Ensure that Tools are used only when operators and others in work area are wearing EYE PROTECTIO...

Page 10: ...eration of the Tool Some illustrations in this Manual may show details or at tachments that differ from those on your own Tool NAME OF PARTS English BODY RAM CAP QUICK CONNECT MALE DRIVER GUIDE PLATE NOSE DRIVER BLADE PISTON O RING PISTON O D PUSHER SHOE BASE SHOE MAGAZINE HANDLE SAFETY TRIGGER NT50AF ...

Page 11: ... 11 English BODY RAM CAP QUICK CONNECT MALE DRIVER GUIDE PLATE NOSE DRIVER BLADE PISTON O RING PISTON O D PUSHER SHOE BASE SHOE MAGAZINE HANDLE SAFETY TRIGGER N5009AF ...

Page 12: ...Air Consumption 058 ft3 cycle 80 psi 1 64 ltr cycle 5 5 bar 1 64 ltr cycle 5 6 kgf cm2 Air Inlet 3 8 NPT Thread Model N5009AF Operating Pressure 70 90 psi 4 8 6 2 bar 4 9 6 3 kgf cm2 Actuation Hammer Actuated with Safety Interlock Diensions Length x Height x Width 18 x 18 3 4 x 3 1 8 457mm x 476mm x 79mm Weight 9 1 lbs 4 1 kg Staple Capacity 150 Staples Air Consumption 058 ft3 cycle 80 psi 1 64 lt...

Page 13: ...rs for the NT50AF N5009AF The use of any other fasteners can result in tool mal function and or fastener breakdown leading to serious injuries Dimensions of nails NT50AF Dimensions of staples N5009AF Min Max 15 gauge staples 1 2 13mm 07 1 8mm 1 1 2 38mm 2 50mm Min Max 16 gauge T L nails 2 50mm 23 5 80mm 12 3 15mm 06 1 53mm 26 6 60mm 1 1 2 38mm 1 3 16 30mm ...

Page 14: ...5 degree angle The orientation of the fastener is as depicted above Fastener Application Chart FASTENER APPLICATION T G FLOORING THICKNESS 2 T Nail L Nail Staple Angle Fastener onto 5 8 3 4 under layment over joist construction Surface face Fas tener onto 5 8 3 4 underlayment over joist construction 3 8 1 2 9 16 5 8 3 4 33 32 1 1 2 T Nail L Nail Staple Angle Fastener onto 5 8 3 4 underlay ment ove...

Page 15: ...Shoe Code No 330389 2 Nail Set for T and L Nails NT50AF Code No 330328 Note Accessories are subject to change without any obligation on the part of HITACHI APPLICATIONS For installation of tongue and groove solid wood and engineered hardwood flooring BEFORE OPERATION Read over section titled SAFETY pages 4 9 Make sure of the following before operation WORKING ENVIRONMENT WARNING No flammable gas l...

Page 16: ...d hoses or from the effects of dirt and water in the system Restricted air flow will prevent the tool from receiving an adequate volume of air even though the pressure reading is high The results will be slow operation jamming miss feeds or reduced driving power Before evaluating tool problems for these symptoms trace the air supply from the tool to the supply source for restrictive connectors swi...

Page 17: ...ystem The supply hose should contain a fitting that will provide quick disconnect ing from the male plug on the Tool 4 Hose Coupling Install a male plug on the Tool which is free flowing and which will release air pressure from the Tool when disconnected from the supply source This Tool uses a 3 8 NPT male plug The in side diameter should be 275 7mm or larger The fitting must be capable of dischar...

Page 18: ...ry Too much oil will only collect inside the Tool and will be noticeable in the exhaust cycle COLD WEATHER CARE For cold weather operation near and below freezing the moisture in the air line may freeze and prevent Tool operation We recom mend the use of WINTER FORMULA air tool lubricant NEW MATIC Winter Formula or equivalent or permanent anti freeze ethylene glycol as a cold weather lubricant CAU...

Page 19: ...ion breakage to prevent improper driving of fas teners and or to prevent damage to the Tool and Flooring Before actually beginning the fastening work test the Tool by using the check list below Conduct the tests in the following order If abnormal operation occurs stop using the Tool and contact a Hitachi authorized service center immediately 1 Adjust the air pressure to 70 psi 4 8 bar 4 9 kgf cm2 ...

Page 20: ...ces sarily over stresses the Tool LOADING FASTENERS WARNING When loading fasteners into the Tool 1 Do not contact the ram cap 2 Do not depress the safety trigger and 3 Keep the Tool pointed downward TO PREVENT ACCIDENTAL INJURIES Never place a hand or any other part of the body in Tool dis charge area of Tool while the air supply is connected Never point the Tool at anyone else Never engage in hor...

Page 21: ... of the magazine as shown Pull pusher assembly back to engage pusher to strip of Nails The Tool is now ready to operate STAPLE LOADING Hitachi N5009AF Pneumatic Flooring Stapler Pull pusher back Insert a clip of staples Push pusher forward to engage the staple clip The Tool is now ready to operate ...

Page 22: ... operation of the safety mechanism The safety trigger is a safety device and should only be pulled when the Tool is in proper position on the work surface and before the ram actuator is struck with the mallet Do not tie or tape down the safety trigger as the Tool could discharge if dropped on the plunger The Tool will not operate unless the trigger is pulled before striking the ram actuator with t...

Page 23: ... higher Check all hoses before connecting to ensure that they are free from dirt grit or particles that could alter the performance of the tool An airline Filter and In Line Air Regulator adjustable to 125 psi max are required NEVER use a defective tool Replace worn or damaged parts immediately Be sure that the Safety Trigger and operating mechanisms operate correctly and that all screws and seals...

Page 24: ... hammer could damage tool and or internal parts DO NOT HIT THE TOOL HARD This Tool is pneumatically powered and requires only actuation by depressing the safety trigger and tapping the ram head Note The NT50AF Pneumatic Flooring Nailer and N5009AF Pneu matic Flooring Stapler will not drive a fastener if the ram cap is struck by hammer and the safety trigger is not depressed The NT50AF Pneumatic Fl...

Page 25: ...ng Industry NWFA NOFMA and MFMA install felt vapor barrier and use chalk line to identify location of subfloor nails prior to racking wood to be installed This will help prevent hitting subfloor nails which can cause damage to the driver blade and jamming Place the grooved edge of the first row of flooring towards the wall on the side of the room from which you are starting Face nail first four 4 ...

Page 26: ...pler and their use please contact us at 866 775 9429 Should you require detailed information regarding wood flooring installation we suggest you contact National Oak Flooring Manufacturers Association 901 526 5016 Visit their web site http www nofma org or National Wood Flooring Association 800 422 4556 Visit their web site http www woodfloors org or Maple Flooring Manufacturers Association Inc 84...

Page 27: ...oad all of the fasteners from the magazine Make sure there are no fasteners in the guide chamber Reconnect the air source to the Tool While squeezing the safety lever push the ram down and hold for three 3 seconds and release Load fasteners and proceed with the operation of the Tool 2 Inspecting the Magazine o DISCONNECT THE AIR HOSE o Clean the magazine Remove dust or wooden tips which may have a...

Page 28: ...be carried out by an Hitachi Authorized Service Center This Parts List will be helpful if presented with the tool to the Hitachi Authorized Service Center when requesting repair or other maintenance In the operation and maintenance of power tools the safety regulations and standards prescribed in each country must be observed MODIFICATIONS Hitachi Power Tools are constantly being improved and modi...

Page 29: ... HITACHI Maintenance Chart ACTION WHY HOW Drain air line filter daily Prevent accumulation of moisture and dirt Open manual petcock Keep lubricator filled Keep the Tool lubri cated Fill with Hitachi pneu matic tool lubricant Clean filter element then blow air through filter in direction oppo site to normal flow Prevent clogging of filter with dirt Follow manufacturer s instructions Clean magazine ...

Page 30: ...on is cracked worn Contact Hitachi for replacement Frame cap leaks air Damaged seal Contact Hitachi for replacement Loose cap screws Tighten and recheck Failure to cycle Air supply restriction Check air supply equipment Tool dry lack of lubri cation Use Air Tool Lubricant Worn head valve O rings Contact Hitachi for replacement Lack of power slow to cycle Tool dry lack of lubri cation Use Air Tool ...

Page 31: ...supply equipment Loose magazine nose screws Tighten all screws Fasteners too short for tool Use only recommend ed fasteners Bent fasteners Discontinue use of these fasteners Wrong size fasteners Use only recommend ed fasteners Broken chipped driver Contact Hitachi for replacement Dry dirty magazine Clean lubricate Use Air Tool Lubricant Worn magazine Contact Hitachi for replacement Fasteners jam i...

Page 32: ... 32 English Model NT50AF Exploded View x4 x4 x2 x4 x2 51 50 44 39 38 36 35 49 48 47 46 45 45A 52 x4 x2 x4 37 x2 x2 42 43 40 41 53 54 55 55A x4 x3 58 61 59 66 69 68 67 ...

Page 33: ...le Con stant Force Spring 36 330364 Constant Force Spring 37 330365 Magazine Spacer Stand Off x2 Item No Part No Description 38 330366 Spindle Cap 39 330367 Screw Con stant Force Spring 40 330368 Pusher Finger 41 330369 Spring Com pression 42 330370 Pusher Bracket 43 330371 O Ring Pusher Pivot Pin 44 330372 Pusher Pivot Pin 45 45A 330373 Screws Foot Magazine x4 46 330374 Foot 47 330375 Spring Pin ...

Page 34: ...ded View 1 2 3 3A 4 5 5A 6 7 8 9 10 11 12 13 14 15 16 17 18 19 20 22 27 21 28 23 24 25 26 29 3 3A 31 30 33 32 x4 x4 x4 x2 x2 51 50 37 34 34A 35 38 36 39 40 49 48 47 46 45 45A 52 53 54 55 55A x4 x3 x4 x2 x2 x2 41 58 61 59 66 69 68 67 ...

Page 35: ...62 Screw Maga zine Stand Off x2 35 330461 Screw Pusher Stop 36 330364 Constant Force Spring 37 330365 Magazine Spacer Stand Off x2 Item No Part No Description 38 330462 Staple Guide Unit 39 330367 Screw Con stant Force Spring 40 330463 Pusher Finger 41 330464 Screws Nose Magazine x2 42 Not Assigned 43 Not Assigned 44 Not Assigned 45 45A 330373 Screws Foot Magazine x4 46 330374 Foot 47 330375 Sprin...

Page 36: ...e ce manuel et dans les sections qui contiennent les directives d utilisation et d entretien Les situations à éviter pour prévenir les blessures et les bris d équipement portent la mention DANGER ou AVERTISSEMENT sur l outil et dans le présent manuel Ne jamais utiliser l outil à des fins autres que celles indiquées dans ce manuel DÉFINITION DES TERMES DE SIGNALISATION DANGER attire l attention sur...

Page 37: ...re conformes à la norme ANSI Z87 1 de l American National Standards Institute et fournir une protec tion avant et latérale contre les particules projetées L employeur doit veiller à ce que l utilisateur de l outil et les autres personnes présentes dans l aire de travail portent des lunettes de sécurité 2 NE JAMAIS UTILISER DES BOUTEILLES D OXYGÈNE OU D AUTRES GAZ COMPRIMÉS UNE EXPLOSION POURRAIT S...

Page 38: ...igt sur la gâchette de sécurité car un clou pourrait être éjecté par accident et causer des blessures Toujours tenir l outil par la poignée pendant son transport 5 LE CHOIX DU MODE DE DÉCLENCHEMENT EST IMPORTANT Lire attentivement la page 57 sur les MODES D UTILISATION 6 NE PAS DÉPASSER 90 lb po2 6 2 bars 6 3 kgf cm2 Ne pas dépasser la pression d air maximale recom mandée 90 lb po2 6 2 bars 6 3 kg...

Page 39: ...il devrait leur être interdit 12 SE VÊTIR DE FAÇON APPROPRIÉE Ne pas porter des vêtements amples ou des bijoux car ils pour raient être happés par les pièces mobiles Le port de gants de caoutchouc et de chaussures antidérapantes est recommandé pour le travail à l intérieur Recouvrir les cheveux longs 13 NE JAMAIS UTILISER SUR L OUTIL UN RACCORD NON MUNI D UN DISPOSITIF DE DÉCOMPRESSION Si un racco...

Page 40: ...0 mm de l orifice de sortie Si une attache est déviée ou qu elle bute contre le point d entrée une blessure grave pour rait survenir 18 POSITIONNER L OUTIL CORRECTEMENT SUR LA PIÈCE À FIXER Ne pas enfoncer une attache par dessus une autre attache ou alors que l outil est en position penchée l attache pourrait rico cher et causer une blessure 19 PRENDRE GARDE DES DÉCLENCHEMENTS DOUBLES DUS AU RECUL...

Page 41: ...TE D AIR EN MAINTENANT LE DOIGT SUR LA GÂCHETTE L outil pourrait être actionné quand il sera rebranché à une source d alimentation en air 27 DÉBRANCHER LA CONDUITE D AIR DANS LES SITUATIONS SUIVANTES 1 avant l entretien et l inspection 2 avant de charger des attaches 3 pour débloquer l outil s il s est enrayé 4 quand l outil n est pas utilisé 5 quand l utilisateur quitte l aire de travail 6 pour t...

Page 42: ...le frapper contre un objet dur de l érafler ou de l engraver Ma nipuler l outil avec soin 32 ENTRETENIR L OUTIL RÉGULIÈREMENT Garder l outil propre et lubrifié pour préserver son bon fonc tionnement et éviter les problèmes 33 UTILISER EXCLUSIVEMENT DES PIÈCES DES ACCESSOIRES ET DES ATTACHES FOURNIS OU RECOMMANDÉS PAR HITACHI Les pièces accessoires et attaches non autorisés peuvent an nuler la gara...

Page 43: ... gés Ce dommage n est pas couvert par la garantie AVERTISSEMENT RESPONSABILITÉS DE L EMPLOYEUR 1 Veiller à ce que ce MANUEL soit tenu à la disposition des utilisa teurs et du personnel d entretien 2 Veiller à ce que les utilisateurs et les autres personnes présentes dans l aire de travail portent toujours des LUNETTES DE SÉCU RITÉ quand les outils sont utilisés 3 Faire appliquer le port obligatoir...

Page 44: ...s illustrations de ce manuel peuvent contenir des détails ou des pièces qui diffèrent de ceux qui apparaissent sur votre outil NOM DES PIÈCES CORPS PERCUTEUR RACCORD RAPIDE MÂLE PLAQUE DU GUIDE D ENTRAÎNEMENT NEZ LAME D ENTRAÎNEMENT PISTON JOINT TORIQUE PISTON D E POUSSOIR BASE DE SABOT SABOT CHARGEUR POIGNÉE GÂCHETTE DE SÉCURITÉ NT50AF ...

Page 45: ...Français CORPS PERCUTEUR RACCORD RAPIDE MÂLE PLAQUE DU GUIDE D ENTRAÎNEMENT NEZ LAME D ENTRAÎNEMENT PISTON JOINT TORIQUE PISTON D E POUSSOIR BASE DE SABOT SABOT CHARGEUR POIGNÉE GÂCHETTE DE SÉCURITÉ N5009AF ...

Page 46: ...ir 0 058 pi3 cycle à 80 lb po2 1 64 L cycle à 5 5 bars 1 64 L cycle à 5 6 kgf cm2 Prise d air Filetage NPT 3 8 po Modèle N5009AF Pression de fonctionnement 70 90 lb po2 4 8 6 2 bars 4 9 6 3 kgf cm2 Actionnement Actionnement par maillet avec système de verrouillage de sécurité Dimensions longueur x hauteur x largeur 457 mm x 476 mm x 79 mm Poids 4 1 kg Contenance 150 broches Consommation d air 0 05...

Page 47: ...009AF L emploi de toute autre attache peut entraîner le mauvais fonctionnement de l outil ou la rupture de l attache ce qui pourrait causer des blessures graves Dimensions des clous NT50AF Dimensions des broches N5009AF Min Max Broches de calibre 15 1 2 po 13mm 07 po 1 8mm 1 1 2 po 38mm 2 po 50mm Min Max 2 po 50mm 23 po 5 80mm 12 po 3 15mm 06 po 1 53mm 26 po 6 60mm 1 1 2 po 38mm 1 3 16 po 30mm Clo...

Page 48: ...ée ci dessus Tableau de sélection des attaches ATTACHE UTILISATION ÉPAISSEUR DU BOIS EMBOUVETÉ Clou en T clou en L broche de 2 po Attache d angle dans la sous couche de 5 8 po 3 4 po re couvrant les solives Attache de face dans la sous couche de 5 8 po 3 4 po re couvrant les solives 3 8 po 1 2 po 9 16 po 5 8 po 3 4 po 33 32 po Clou en T clou en L broche de 1 1 2 po Attache d angle dans la sous cou...

Page 49: ... de 9 16 po 3 4 po no de code 330389 2 Ensemble pour clous en T et en L NT50AF no de code 330328 Remarque Les accessoires peuvent être changés sans obligation pour HITACHI UTILISATIONS Pour la pose de revêtements de plancher embouvetés en lames et en panneaux AVANT DE COMMENCER Lire la section intitulée SÉCURITÉ pages 37 43 Faire les vérifications suivantes avant de commencer ENVIRONNEMENT DE TRAV...

Page 50: ...si des saletés ou de l eau sont présentes dans le système Un débit limité empêchera l outil de recevoir un volume d air suffisant même si la pression est élevée Cela peut causer un fonction nement moins puissant plus lent ou erratique ou encore enrayer l outil En présence de l un de ces problèmes avant de diagnos tiquer l outil passer en revue le circuit d alimentation en air en partant de l outil...

Page 51: ... Le raccord de la conduite d alimentation doit permettre le dé branchement rapide du raccord mâle de l outil 4 Raccord de conduite Installer sur l outil un raccord mâle à circulation libre qui lais sera s évacuer la pression d air quand l outil est débranché de la source d alimentation Cet outil utilise un raccord mâle NPT de 3 8 po Le raccord doit avoir un diamètre intérieur de 0 275 po 7 mm ou p...

Page 52: ...e de sortie SOINS PAR TEMPS FROID Pendant l utilisation près du point de congélation ou sous le point de congélation l eau présente dans la conduite d alimentation peut geler et couper l arrivée d air Nous recommandons l utilisation du lubrifiant pour outils pneumatique par temps froids NEW MATIC Winter Formula ou un produit équivalent ou d un antigel perma nent ethylèneglycol ATTENTION Ne pas ent...

Page 53: ...l ni le plancher Avant de commencer à insérer des attaches vérifier l outil à l aide de la liste de contrôle ci dessous Effectuer la vérification dans l ordre suivant En cas de fonctionnement anormal cesser d utiliser l outil et com muniquer immédiatement avec un centre de service agréé par Hitachi 1 Régler la pression d air à 70 lb po2 4 8 bars 4 9 kgf cm2 M Brancher la conduite d air M Ne pas ch...

Page 54: ...ISSEMENT Voici quelques précautions à prendre lors du chargement de l outil 1 ne pas heurter le percuteur 2 ne pas appuyer sur la gâchette de sécurité 3 pointer l outil vers le bas AFIN DE PRÉVENIR LES BLESSURES Ne jamais mettre la main ou une autre partie du corps devant la sortie de l outil quand la conduite d alimentation de l outil est branchée Ne jamais pointer l outil en direction d une autr...

Page 55: ...amener le poussoir de façon à l engager sur la bande de clous L outil est maintenant prêt pour l utilisation CHARGEMENT DES BROCHES Brocheuse pneumatique à plancher N5009AF d Hitachi Tirer le poussoir vers l arrière Insérer une bande de broches Ramener le poussoir vers l avant pour engager la bande de bro ches L outil est maintenant prêt pour l utilisation ...

Page 56: ...ctée accidentelle ment Ne pas tenter de manipuler le mécanisme de sécurité La gâchette de sécurité doit être enfoncée uniquement quand l outil est en position sur la surface de travail et avant que le maillet frappe le percuteur Ne pas attacher ni enrubanner la gâchette de sécurité Cela pourrait entraîner le déclenchement accidentel de l outil s il tombe sur le piston L outil ne fonctionne pas si ...

Page 57: ...a pression de fonctionnement nominale de la conduite doit être d au moins 150 lb po2 10 4 bars 10 6 kgf cm2 ou 150 pour cent de la pression maximale produite par la source d alimentation selon la valeur la plus élevée Vérifier chaque conduite avant de la brancher afin de s assurer qu elle est exempte de saletés ou de particules qui pourraient modifier le rendement de l outil Un filtre d air et un ...

Page 58: ...osition pour éjecter l attache ÉVITER DE DONNER DES COUPS PUISSANTS SUR L OUTIL une force statique de 40 kg suffit à l actionner Cette force est facilement atteint avec un léger coup de maillet Si la lame est gauchie ou arquée frapper plus fort sur le percuteur pour la redresser Éviter de toujours cogner à pleine volée car les coups de marteau abusifs à répétition peuvent endommager l outil ou ses...

Page 59: ...ique utilisée n abiment pas le fini Cette vérification doit être effectuée avant chaque projet à cause des différences entre les revêtements et du changement d état de l outil Après avoir dressé le plancher et prévu l espace de dilatation recommandé par l industrie du plancher en bois NWFA NOFMA et MFMA installer un feutre pare vapeur et indiquer l emplacement des clous de fixation du sous planche...

Page 60: ...ur utilisation communiquez avec nous en composant le 866 775 9429 Pour obtenir des instructions détaillées sur la pose des planchers en bois voici où vous pouvez vous adresser National Oak Flooring Manufacturers Association 901 526 5016 Visitez leur site web http www nofma org ou National Wood Flooring Association 800 422 4556 Visitez leur site web http www woodfloors org ou Maple Flooring Manufac...

Page 61: ...on Enlever toutes les attaches du chargeur S assurer qu il ne reste plus d attaches dans la chambre du guide volet Rebrancher la source d alimentation Appuyer sur la gâchette de sécurité maintenir le percuteur abaissé pendant trois 3 secondes puis le relâcher Charger des attaches et continuer d utiliser l outil 2 Inspection du chargeur V DÉBRANCHER LA CONDUITE D AIR V Nettoyer le chargeur Enlever ...

Page 62: ...un outil mé canique Hitachi doit être confiée à un centre de service agréé par Hitachi Présenter cette liste de pièces lors de la remise de l outil au centre de service pour une réparation ou une mesure d entretien Lors de l utilisation et de l entretien d un outil mécanique il faut observer les règlements de sécurité et les normes applicables dans chaque pays MODIFICATIONS Les outils mécaniques H...

Page 63: ...recommandées par Hitachi Tout outil de qualité aura un jour ou l autre besoin de réparations et certaines pièces devront être remplacées par suite de l usure normale Pour que la cloueuse pneumatique à plancher NT50AF et la bro cheuse pneumatique à plancher N5009AF donnent un rendement optimal il est recommandé de procéder à leur entretien préventif REMARQUE Les spécifications peuvent être modifiée...

Page 64: ...évient l obturation du filtre Suivre les instructions du fabricant Nettoyer le chargeur et le mécanisme d alimentation Prévient les coince ments Nettoyer quotidien nement avec un jet d air Préserve le bon fonctionnement de la gâchette de sécurité Améliore la sécurité de l utilisateur et favorise l utilisation efficace de l outil Nettoyer quotidien nement avec un jet d air Lubrifier l outil après u...

Page 65: ... réparer l outil Le coussin de piston est fissuré ou usé Communiquer avec Hi tachi pour faire réparer l outil Le cadre capuchon laisse échapper de l air Un joint est endom magé Communiquer avec Hi tachi pour faire réparer l outil Les vis du capuchon sont desserrées Serrer les vis et vérifier de nouveau Le cycle d éjection ne se produit pas L alimentation en air est restreinte Vérifier l équipement...

Page 66: ... avec Hi tachi pour faire réparer l outil Le passage de l air dans les raccords rapides est restreint ou inadéquat Remplacer les raccords rapides Le joint torique est usé Communiquer avec Hi tachi pour faire réparer l outil L outil est sec Il n est pas lubrifié suffisam ment Utiliser du lubrifiant pour outils pneuma tiques Le ressort du poussoir est endommagé Communiquer avec Hi tachi pour faire r...

Page 67: ...pour faire réparer l outil Les attaches bloquent dans l outil Le canal d entraînement est usé Communiquer avec Hi tachi pour faire réparer l outil Les attaches ne sont pas de la bonne taille Utiliser les attaches recommandées Les attaches sont déformées Cesser d utiliser ces attaches Les vis du nez du char geur sont desserrées Serrer toutes les vis Le dispositif d entraînement est brisé ou fissuré...

Page 68: ... 68 Français Modèle NT50AF Vue éclatée x4 x4 x2 x4 x2 51 50 44 39 38 36 35 49 48 47 46 45 45A 52 x4 x2 x4 37 x2 x2 42 43 40 41 53 54 55 55A x4 x3 58 61 59 66 69 68 67 ...

Page 69: ...6 330364 Ressort à force constante 37 330365 Entretoise sépara teur de chargeur x2 38 330366 Capuchon d arbre No No d article de pièce Description 39 330367 Vis ressort à force constante 40 330368 Doigt de poussoir 41 330369 Ressort compres sion x2 42 330370 Ferrure de poussoir 43 330371 Joint torique axe d articulation du poussoir 44 330372 Axe d articulation du poussoir 45 45A 330373 Vis pied ch...

Page 70: ... éclatée 1 2 3 3A 4 5 5A 6 7 8 9 10 11 12 13 14 15 16 17 18 19 20 22 27 21 28 23 24 25 26 29 3 3A 31 30 33 32 x4 x4 x4 x2 x2 51 50 37 34 34A 35 38 36 39 40 49 48 47 46 45 45A 52 53 54 55 55A x4 x3 x4 x2 x2 x2 41 58 61 59 66 69 68 67 ...

Page 71: ... Vis entretoise de chargeur x2 35 330461 Vis butée de pous soir 36 330364 Ressort à force constante 37 330365 Entretoise sépara teur de chargeur x2 No No d article de pièce Description 38 330462 Unité de guidage des broches 39 330367 Vis ressort à force constante 40 330463 Doigt de poussoir 41 330464 Vis nez chargeur 42 Non attribué 43 Non attribué 44 Non attribué 45 45A 330373 Vis pied chargeur x...

Page 72: ...dad están señaladas en la sec ción de SEGURIDAD de este manual y en las secciones que con tienen las instrucciones sobre el funcionamiento y mantenimiento Los peligros que se deben prevenir para evitar lesiones físicas o daños a la maquinaria están señalados como PELIGROS y ADVER TENCIAS en la herramienta y en este manual No use nunca esta herramienta para aplicaciones que no sean las especificada...

Page 73: ...mienta y otras personas en el área de trabajo usen gafas de seguridad 2 NUNCA USE OXIGENO NI OTROS GASES EMBOTELLADOS SE PUEDE PRODUCIR UNA EXPLOSION Nunca use oxígeno gases combustibles ni otros gases embotellados como fuente de energía para la herramienta El uso de los gases mencionados anterior mente es peligroso ya que la herramienta explotará Use sólo aire comprimido limpio seco y regulado AD...

Page 74: ...la herramienta puede explotar 7 SIEMPRE USE PROTECCION PARA LA CABEZA Y LOS OIDOS Siempre use protección para los oídos para protegerlos del ruido fuerte Siempre use protección conforme a la ANSI Z89 1 1986 para la cabeza para protegerla de los objetos en vuelo 8 GUARDE ADECUADAMENTE LA HERRAMIENTA Cuando no se esté usando la herramienta debe guardarse en un lugar seco Manténgala fuera del alcance...

Page 75: ...sión de la herramienta cuando se desconecte del acoplador 14 REVISE LA SEGURIDAD ANTES DE USARLA Asegúrese de que el gatillo de seguridad funciona correcta mente Nunca use la herramienta si el gatillo de seguridad no funciona correctamente de lo contrario la herramienta podría disparar un sujetador inesperadamente No altere ni retire el gatillo de seguridad ya que puede impedir que el mismo fun ci...

Page 76: ...ebotar debido al retro ceso al clavar y se pudiera disparar un segundo sujetador no deseado que pudiera ocasionar lesiones 20 NO CLAVE SUJETADORES EN TABLAS DELGADAS NI CERCA DE ESQUINAS Y BORDES DE LA PIEZA DE TRABAJO Los sujetadores pudieran atravesar o desviarse de la pieza de trabajo y herir a alguien 21 NO DISPARE NUNCA SUJETADORES DESDE AMBOS LADOS DE UNA PARED A LA VEZ Los sujetadores pudie...

Page 77: ...lugar 7 Se la entregue a otra persona Nunca intente despejar un atasco o reparar la herramienta sin haber desconectado antes la manguera de aire de la herramien ta y sin haber retirado los sujetadores restantes de la misma La herramienta no se debe dejar desatendida jamás para evitar que las personas que no estén familiarizadas con la misma la manipulen y se lastimen a sí mismas 28 MANTENGASE ALER...

Page 78: ...iones y mal funcio namiento Solamente el personal entrenado el distribuidor o empleador deberán reparar la herramienta 34 NUNCA MODIFIQUE NI ALTERE LA HERRAMIENTA De hacerlo puede alterar el funcionamiento y puede ocasionar lesiones personales INSTRUCCIONES IMPORTANTES DE SEGURIDAD PARA EL USO DE LAS HERRAMIENTAS PARA PISO NT50AF Y N5009AF ADVERTENCIA 1 NUNCA use un martillo con la cabeza floja o ...

Page 79: ...los operarios y personas presentes en el área de trabajo usen GAFAS DE SEGURIDAD 3 Exigir que los operarios y otras personas en el área de trabajo usen GAFAS DE SEGURIDAD 4 Mantener las herramientas en un estado de funcionamiento seguro 5 Dar un mantenimiento adecuado a las herramientas 6 Garantizar que las herramientas que necesitan reparaciones no se usen antes de ser reparadas CONSERVE ESTE MAN...

Page 80: ...e este manual pueden mostrar detalles o accesorios que difieren de los de su propia herramienta NOMBRE DE LAS PIEZAS Español CUERPO CASQUILLO DEL MARTINETE CONEXIÓN RÁPIDA MACHO PLACA DE LA GUÍA DEL PROPULSOR BOCA CUCHILLA PROPULSORA PISTÓN ARO TÓRICO DIÁMETRO EXTERNO DEL PISTÓN PROPULSOR BASE DE LA SUELA SUELA CARGADOR MANGO GATILLO DE SEGURIDAD NT50AF ...

Page 81: ...SQUILLO DEL MARTINETE CONEXIÓN RÁPIDA MACHO PLACA DE LA GUÍA DEL PROPULSOR BOCA CUCHILLA PROPULSORA PISTÓN ARO TÓRICO DIÁMETRO EXTERNO DEL PISTÓN PROPULSOR BASE DE LA SUELA SUELA CARGADOR MANGO GATILLO DE SEGURIDAD N5009AF ...

Page 82: ...3 ciclo a 80 PSI 1 64 ltr ciclo a 5 5 baras 1 64 ltr ciclo a 5 6 kgf cm2 Entrada de aire Rosca NPT de 3 8 pulgada Modelo N5009AF Presión de funcionamiento 70 90 PSI 4 8 6 2 baras 4 9 6 3 kgf cm2 Acción Accionada mediante martillo y con cierre de seguridad Dimensiones Largo x alto x ancho 18 x 18 3 4 x 3 1 8 pulgadas 457 mm x 476 mm x 79 mm Peso 9 1 lbs 4 1 kg Capacidad de grapas 150 grapas Consumo...

Page 83: ... la NT50AF N5009AF El uso de otros sujetadores puede ocasionar el funcionamiento incorrecto de la herramienta y o la ruptura de sujetadores lo que puede provocar lesiones graves Dimensiones de los clavos NT50AF Dimensiones de grapas N5009AF Min Max Grapas de calibre 15 1 2 13mm 07 1 8mm 1 1 2 38mm 2 50mm Min Max Clavos en T y en L de calibre 16 2 50mm 23 5 80mm 12 3 15mm 06 1 53mm 26 6 60mm 1 1 2 ...

Page 84: ...ación de sujetadores SUJETADOR APLICACION GROSOR DEL PISO DE R Y L Clavo en T clavo en L grapa de 2 pulgadas Coloque el sujetador en ángulo en la base de piso de 5 8 3 4 pulgada sobre la cons trucción de viga Coloque el sujetador de frente en la base de piso de 5 8 3 4 pulgada sobre la construcción de viga 3 8 1 2 9 16 5 8 3 4 33 32 pulgadas Clavo en T clavo en L grapa de 1 1 2 pulgadas Coloque el...

Page 85: ... Código No 330389 2 Juego de clavos para clavos en T y en L NT50AF Código No 330328 NotA Los accesorios están sujetos a cambios sin obligación alguna por parte de HITACHI APLICACIONES Para la instalación de pisos de madera procesada y pisos de madera sólida de ranura y lengüeta ANTES DEL FUNCIONAMIENTO Lea completamente la sección titulada SEGURIDAD páginas 73 78 Antes de usarla asegúrese de lo si...

Page 86: ...acelerar el desgaste y la corrosión de la herramienta Drénela diariamente V El volumen de aire es tan importante como la presión de aire El volumen de aire suministrado a la herramienta puede no ser apropiado si las mangueras y acopladores tienen un tamaño menor o debido a los efectos del polvo y el agua en el sistema El flujo de aire restringido evitará que la pistola reciba el volu men de aire a...

Page 87: ...onamiento para asegurarse que funciona adecuadamente Lubricador El lubricador suministra un rocío de aceite a la herramienta Revise el lubricador antes del funcio namiento para garantizar el suministro adecuado del lubricante Use el lubricante para herramientas neumáticas de Hitachi 3 Manguera de aire Las mangueras de aire deben tener una presión de funciona miento mínima de 150 PSI 10 4 baras 10 ...

Page 88: ...ncionamiento débil y requeriría un mantenimiento frecuente de la herramienta Si no se usa un lubricador en la línea de aire añada aceite en el acoplador de aire de la herramienta una o dos veces al día mientras la usa Sólo se necesitan unas gotas de aceite cada vez El exceso de aceite se acumulará dentro de la herramienta y se notará en el ciclo de escape CUIDADO EN CLIMAS FRIOS Para el funcionami...

Page 89: ...r deformación o rotura y evitar la inserción incorrecta de los clavos y o los daños a la herramienta y el piso Antes de comenzar realmente la labor de clavado pruebe la herramienta usando la lista siguiente Realice las pruebas en el orden siguiente Si se observa un funcionamiento anormal deje de usar la herra mienta y comuníquese inmediatamente con un centro de servicio autorizado por Hitachi 1 Aj...

Page 90: ...LOCACION DE SUJETADORES ADVERTENCIA Al colocar los sujetadores en la herramienta 1 No haga contacto con el casquillo del martinete 2 No presione el gatillo de seguridad y 3 Mantenga la herramienta apuntando hacia abajo PARA PREVENIR LESIONES ACCIDENTALES No coloque nunca las manos ni cualquier parte del cuerpo en el área de descarga cuando la herramienta esté conectada a la fuente de aire No apunt...

Page 91: ...stra Hale el propulsor hacia atrás para acoplar el propulsor a la tira de clavos La herramienta ya está lista para funcionar COLOCACION DE GRAPAS Grapadora neumática Hitachi N5009AF para pisos Hale el propulsor hacia atrás Inserte una tira de grapas Empuje el propulsor hacia delante para accionar la prensa de grapas La her ramienta ya está lista para funcionar ...

Page 92: ...onando adecuadamente ya que podría producirse el disparo accidental de un sujetador No interfiera con el fun cionamiento correcto del mecanismo de seguridad El gatillo de seguridad es un dispositivo de seguridad y sólo debe halarse cuando la herramienta esté en posición adecuada sobre la superficie de trabajo y antes de golpear el martinete accionador con el mazo No amarre ni coloque tiras adhesiv...

Page 93: ...ra los objetos extraños No use nunca un martillo con la cabeza floja o el mango astillado Use solamente sujetadores de Hitachi Las mangueras de aire deberán tener una presión de funcio namiento mínima de 150 PSI o un 150 por ciento de la presión máxima que pueda producir el sistema de aire lo que sea mayor Revise todas las mangueras antes de conectarlas para garan tizar que no tengan suciedad polv...

Page 94: ...el martillo Si no sale ningún sujetador en el primer intento de funcionamiento repita el golpe del martillo Esto garantizará que la cuchilla pro pulsora pistón se reajusten adecuadamente para permitir que la cuchilla propulsora pistón estén en la posición correcta para inser tar el sujetador NO APLIQUE DEMASIADA FUERZA A LA HERRAMIENTA La fuer za estática de 90 lbs es suficiente para operar la her...

Page 95: ...abados cuando se use con el accesorio de suela para pisos preacabados sin embargo se debe tener precaución para asegurar que el acabado no sea dañado por la herramienta Para todas las instalaciones de pisos se recomienda que se pruebe la herramienta en una sec ción para asegurar que la herramienta y la técnica de uso no dejan marcas en el acabado Este procedimiento deberá seguirse antes de cada tr...

Page 96: ...os pasos se brindan como una guía sencilla para la técnica apropiada de clavado Si se encontrara ante una situación que no se menciona aquí o tuviera preguntas adicionales sobre la pistola de clavos neumática NT50AF para pisos o sobre la grapadora neumática N5009AF para pisos y su uso contáctenos por favor llamando al 866 775 9429 Si necesita una información detallada sobre la instalación de pisos...

Page 97: ...ador Asegúrese que no haya sujetadores en la cámara de la guía Conecte nuevamente la herramienta a la fuente de aire Mientras presiona la palanca de seguridad empuje el martinete hacia abajo sosténgalo unos tres 3 segundos y libérelo Cargue nuevamente los sujetadores y proceda con el funciona miento de la herramienta 2 Inspección del cargador V DESCONECTE LA MANGUERA DE AIRE V Limpie el cargador R...

Page 98: ...chi deben ser realizadas por un centro de servicio autori zado por Hitachi Esta lista de piezas será de gran ayuda si se entrega junto con la herramienta al centro de servicio autori zado por Hitachi cuando solicite una reparación u otra labor de mantenimiento En el funcionamiento y el mantenimiento de las herramientas de potencia se deben cumplir las regula ciones y normas de seguridad requeridas...

Page 99: ...as por Hitachi para la reparación Todas herramientas de calidad requieren con el tiempo el servicio o reemplazo de piezas debido al desgaste producido por el uso normal Para lograr un rendimiento óptimo de la pistola de clavos neumáti ca NT50AF para pisos y la grapadora neumática N5009AF para pisos se recomienda el mantenimiento preventivo NOTA Las especificaciones están sujetas a cambio sin oblig...

Page 100: ...de suciedad en el filtro Siga las instrucciones del fabricante Limpie el cargador y el mecanismo de entrada de sujetadores Evitar los atascos Sóplelo para limpiarlo diariamente Mantenga el funciona miento adecuado del gatillo de seguridad Velar por la seguridad del operario y el fun cionamiento eficiente de la herramienta Sóplelo para limpiarlo diariamente Lubrique la herra mienta después de cada ...

Page 101: ...agrietado Comuníquese con Hitachi para el reem plazo El cojinete del pistón está agrietado des gastado Comuníquese con Hitachi para el reem plazo La estructura el cas quillo tiene un escape de aire Sello dañado Comuníquese con Hitachi para el reem plazo Tornillos del casquillo sueltos Ajústelos y revíselos Falla al completar el ciclo Restricción en el sumi nistro de aire Revise el equipo de sumini...

Page 102: ... para el reem plazo Restricción de aire flujo de aire inadecua do a través del enchufe y el tapón de desco nexión rápida Reemplace los acopla dores de desconexión rápida El aro tórico del pistón está desgastado Comuníquese con Hitachi para el reem plazo Herramienta seca falta de lubricación Use el lubricante para herramientas neumáti cas El resorte del propul sor está dañado Comuníquese con Hitach...

Page 103: ...muníquese con Hitachi para el reem plazo Sujetadores atascados en la herramienta El canal del propulsor está desgastado Comuníquese con Hitachi para el reem plazo Sujetadores de tamaño equivocado Use solamente los sujetadores recomen dados Sujetadores torcidos Deje de usar esos sujetadores Los tornillos de la boca del cargador están sueltos Ajuste todos los torni llos El propulsor está roto o asti...

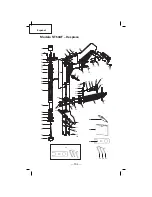
Page 104: ... 104 Modelo NT50AF Despiece Español x4 x4 x2 x4 x2 51 50 44 39 38 36 35 49 48 47 46 45 45A 52 x4 x2 x4 37 x2 x2 42 43 40 41 53 54 55 55A x4 x3 58 61 59 66 69 68 67 ...

Page 105: ...o Resorte de fuerza constante 36 330364 Resorte de fuerza constante No de No de artículo pieza Descripción 37 330365 Separador espacia dor del cargador x2 38 330366 Casquillo del huso 39 330367 Tornillo _ Resorte de fuerza constante 40 330368 Vástago del propulsor 41 330369 Resorte Compresión 42 330370 Soporte del propulsor 43 330371 Aro tórico Pasador pivotante del propul sor 44 330372 Pasador pi...

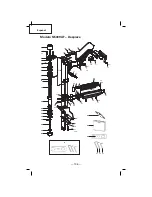
Page 106: ...espiece 1 2 3 3A 4 5 5A 6 7 8 9 10 11 12 13 14 15 16 17 18 19 20 22 27 21 28 23 24 25 26 29 3 3A 31 30 33 32 x4 x4 x4 x2 x2 51 50 37 34 34A 35 38 36 39 40 49 48 47 46 45 45A 52 53 54 55 55A x4 x3 x4 x2 x2 x2 41 58 61 59 66 69 68 67 ...

Page 107: ...o Casquillo del mango x2 34 330362 Tornillo Separador del cargador x2 35 330461 Tornillo Tope del propulsor No de No de artículo pieza Descripción 36 330364 Resorte de fuerza constante 37 330365 Separador espacia dor del cargador x2 38 330462 Unidad de la guía de grapas 39 330367 Tornillo Resorte de fuerza constante 40 330463 Vástago del propulsor 41 330464 Tornillos Boca Cargador x2 42 Sin asigna...

Page 108: ...tercity Tower A 15 1 Konan 2 chome Minato ku Tokyo 108 6020 Japan Distributed by Hitachi Koki U S A Ltd 3950 Steve Reynolds Blvd Norcross GA 30093 Hitachi Koki Canada Co 450 Export Blvd Unit B Mississauga ON L5T 2A4 812 Code No Printed in China ...

Reviews: