17
Initial Setup & Home Menu
Home
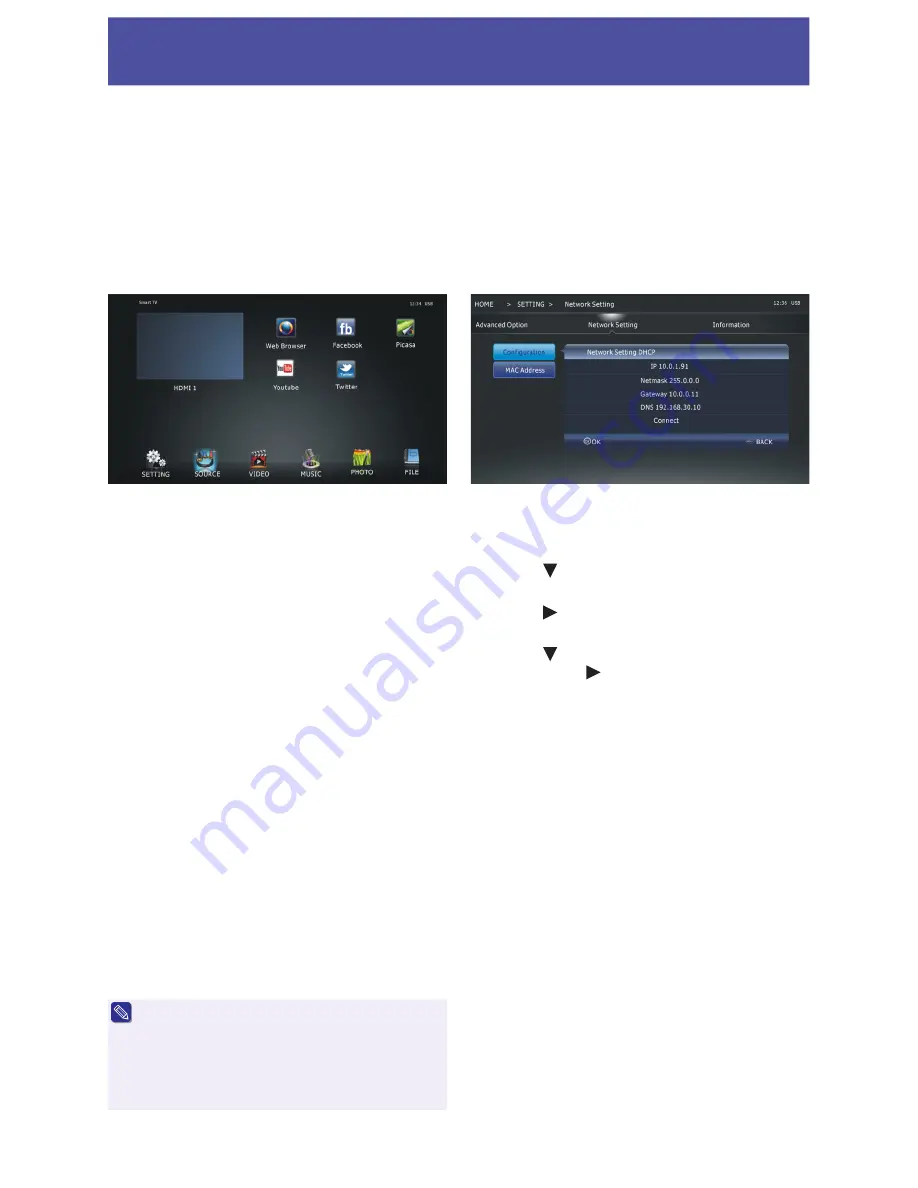
Press “HOME” to enter the home menu. There are
some shortcuts in the desktop:
SETTING
- Change main TV setting, including:
Advanced Option:
Menu Language - Change the menu language
Time Zone - Change the time zone of your place.
(Note 1)
Network Setti ng:
Menu for configuring the Net-
work settings.
Information
: Show information about the TV set.
SOURCE
: Op en the input source list to select
and switch between ATV, DTV, AV,
Component, PC and HDMI inputs.
VIDEO:
Playback videos from USB
MUSIC
: Playback music from USB
PHOTO
: View photos from USB.
FILE:
View text files from USB
- Launch the Facebook application
Picasa
- Launch the Picasa application
- Launch the Twitter application
Web Browser
- Open the web browser
•
Web Browser only supports HTML5 video.
•
Facebook, Picasa & Twitter require an accunt
to use, and may not have the same features
and functions available as when accessed via a
computer.
•
Web Browser, Facebook, Picasa, Youtube &
Twitter require access to the internet for use.
Network setting
Wired Network
Plug the network cable to the LAN socket.
Press “HOME” to enter the home page.
Press the “ ” key to select the SETTING item,
then press “OK” to open the SETTING page.
Press the “ ” key to select the “Network Setting”,
then press “OK” to open the page.
Press the “ ” key to select the “Configuration”
item, then press “ ” to enter into the page.
Select the “Connect” item, press “OK” to test the
status.
Web Browser
Function Shortcuts
While in Web Browser mode, use the following
remote control buttons to perform actions.
MENU
: Open/Close on-screen Keyboard.
EXIT
: Quit the Web Browser.
P+ / P-
: Page up/down.
Direction Arrows:
Move on-screen cursor.
OK
: Enter / Select field or button.
1
: Next page
6:
Settings
2
: Previous page
7:
History
3:
Stop loading page
8:
Bookmarks
4:
Refresh page
9:
Bookmark manager
5:
Home page
Initial setup
The first time you power on the TV, a setup wizard will be displayed. Please follow the wizard:
Step 1. Select the language you need.
Step 2. Select the time zone of you place. (Note 1)
Step 3. Select the picture mode you like.
Step 4. Select the tuner mode. Press “OK” to scan the program.
Summary of Contents for LE42EC06AU
Page 27: ...27 Memo ...
Page 28: ...EC06AU UM 01 ...


