Hitachi L19DK04U Instructions For Use Manual Download Page 5

English   

- 4 -

 Power Source 

 The TV set should be operated only from a  220-240 
V AC, 50 Hz  outlet.  

 Power Cord

 Do not place the set, a piece of furniture, etc. on the 
power cord (mains lead) or pinch the cord. Handle the 
power cord by the plug. Do not unplug the appliance 
by pulling from the power cord and never touch the 
power cord with wet hands as this could cause a short 
circuit or electric shock. Never make a knot in the cord 
or tie it with other cords. The power cords should be 
placed in such a way that they are not likely to be 
stepped on. A damaged power cord can cause fi re or 
give you an electric shock. When it is damaged and 
needs to be replaced, it should be done by qualifi ed 
personnel. 

This TV receiver is supplied with a moulded mains 
plug. The mains plug must not be cut off, as it may 
contain a special radio interference fi lter, the removal 
of which could lead to impaired performance. If you 
wish to extend the lead, obtain an appropriate safety 
approved extension lead or consult your dealer. 

Observe the manufacturers instructions when 
connecting extension leads to the set. Check the fuse 
rating on the new plug; this should be fi tted with a 5 
Amp fuse which conforms to either ASTA or BSI 
(BS1362) approvals, these are easily identifi able by 

either the 

ASA

or 

 symbols. If you are in any doubt 

about the installation of an extension lead, please 
consult a competent electrician.

Warning

 Do not leave your TV in standby or operating mode 
when you leave your house. 

 Disconnecting the Device 

The mains plug is used to disconnect TV set from 
the mains and therefore it must remain readily 
operable. 

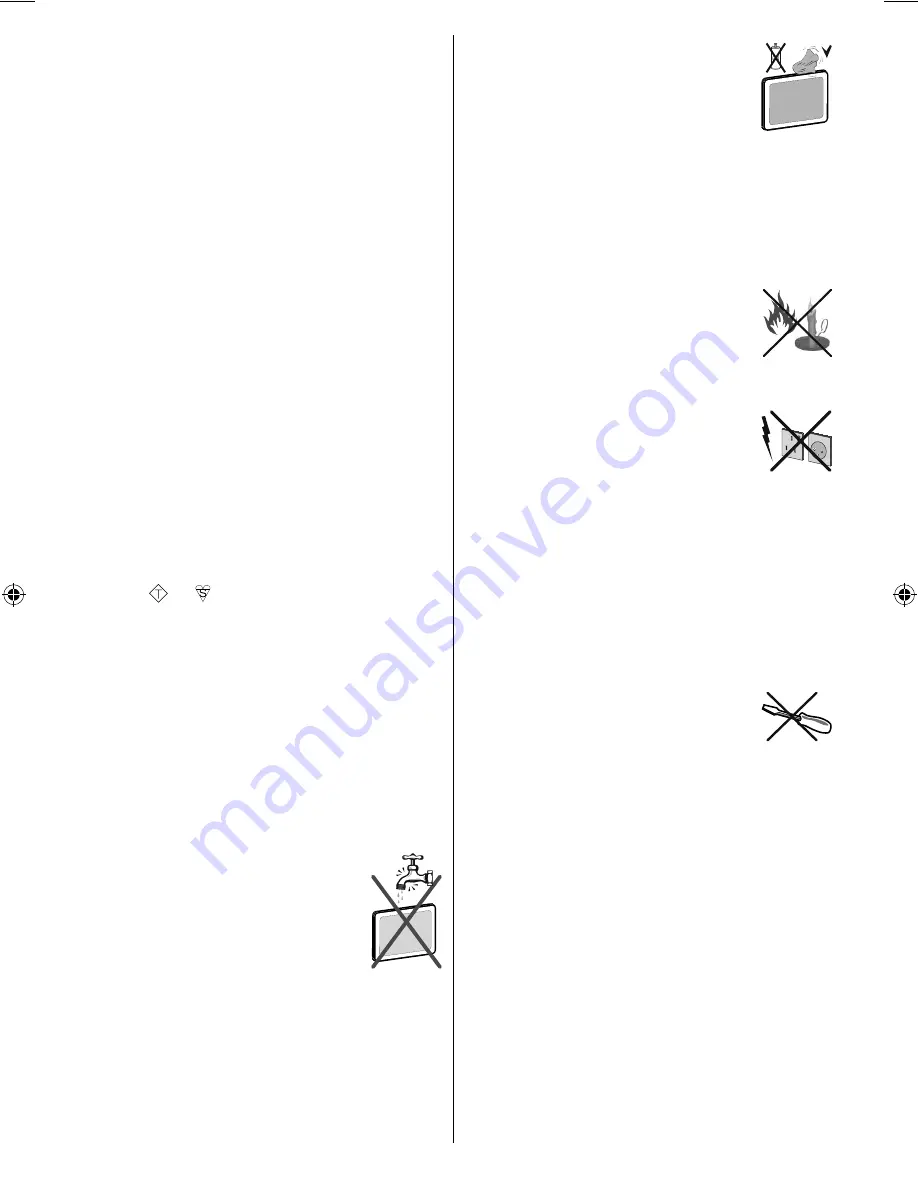
 Moisture and Water 

 Do not use this device in a humid and 
damp place (avoid the bathroom, the 
sink in the kitchen, and near the washing 
machine). Do not expose this device to 
rain or water, as this may be dangerous 
and do not place objects fi lled with liquids, 
such as fl ower vases, on top. Avoid from 
dripping or splashing.

If any solid object or liquid falls into the cabinet, unplug 
the TV and have it checked by qualifi ed  personnel 
before operating it any further.  

 Cleaning 

 Before cleaning, unplug the TV set 
from the wall outlet. Do not use liquid or 
aerosol cleaners. Use soft and dry cloth.  

 Ventilation 

 The slots and openings on the TV set are intended for 
ventilation and to ensure reliable operation. To prevent 
overheating, these openings must not be blocked or 
covered in anyway. 

 Heat and Flames 

 The set should not be placed near to open 
fl ames and sources of intense heat such 
as an electric heater. Ensure that no open 
fl ame sources, such as lighted candles, 
are placed on top of the TV. Batteries 
should not be exposed to excessive heat 
such as sunshine, fi re or the like. 

 Lightning 

Before a storm and lightning  or when going 
on holiday, disconnect the power cord and 
aerial lead from the wall sockets.    

 Replacement Parts 

 When replacement parts are required, make sure that 
the service technician has used replacement parts, 
which are specifi ed by the manufacturer or have the 
same specifi cations as the original one. Unauthorized 
substitutions may result in fi re, electrical shock or 
other hazards.  

  Servicing 

 Please refer all servicing to qualified 
personnel. Do not remove the cover 
yourself as this may result in an electric 
shock. 

 Waste Disposal 

 Instructions for waste disposal:

• Packaging and packaging aids are recyclable and 

should principally be recycled. Packaging materials, 
such as foil bag, must be kept away from children.

• Batteries, including those which are heavy metal-

free, should not be disposed of with household 
waste. Please dispose of used battery in an 
environment friendly manner. Find out about the 
legal regulations which apply in your area.

• Cold cathode fluorescent lamp in LCD PANEL 

contains a small amount of mercury; please follow 
the local laws or regulations for disposal. 

00_MB46_[GB]_(01-TV)_1900UK_IDTV_NICKEL15_19843W_10070652_50178361.indd   4

00_MB46_[GB]_(01-TV)_1900UK_IDTV_NICKEL15_19843W_10070652_50178361.indd   4

06.10.2010   15:41:32

06.10.2010   15:41:32

Summary of Contents for L19DK04U

Page 1: ...p or usage issues For any TV set up or usage issues Technical Helpline No 0845 604 0105 Technical Helpline No 0845 604 0105 Lines are open 9am 8pm Monday to Saturday and 11am 5pm Sunday Calls charged at local rate Lines are open 9am 8pm Monday to Saturday and 11am 5pm Sunday Calls charged at local rate ...

Page 2: ...Water 4 Cleaning 4 Heat and Flames 4 Lightning 4 Replacement Parts 4 Servicing 4 Waste Disposal 4 Information for Users in European Union Countries 5 Headphone Volume 5 Installation 5 LCD Screen 5 Connection to a Television Distribution System Cable TV etc from Tuner 5 Overview of the Remote Control 6 LCD TV and Operating Buttons 7 Viewing the Connections Back Connectors 7 Viewing the Connections ...

Page 3: ...ME 2000 XP Vista Windows 7 Game Mode Introduction Thank you for choosing this product This manual will guide you for the proper operation of your TV Before operating the TV please read this manual thoroughly Please do keep this manual in a safe place for future references This device is intended to receive and display TV programs The different connection options make an additional expansion of the...

Page 4: ...tilation leave a free space of at least 10 cm all around the set To prevent any fault and unsafe situations please do not place any objects on top of the set Use this device in moderate climates 10 cm 10 cm 10 cm Safety Precautions Please read the following recommended safety precautions carefully for your safety SOME DOS AND DON TS ON THE SAFE USE OF EQUIPMENT This equipment has been designed and...

Page 5: ...may be dangerous and do not place objects filled with liquids such as flower vases on top Avoid from dripping or splashing If any solid object or liquid falls into the cabinet unplug the TV and have it checked by qualified personnel before operating it any further Cleaning Before cleaning unplug the TV set from the wall outlet Do not use liquid or aerosol cleaners Use soft and dry cloth Ventilatio...

Page 6: ...ected to the protective earthing of the building installation through the mains connection or through other apparatus with a connection to protective earthing and to a television distribution system using coaxial cable may in some circumstances create a fire hazard Connection to a cable distribution system has therefore to be provided through a device providing electrical isolation below a certain...

Page 7: ... 14 Source selection 15 Red Sound Menu Channel List in DTV 16 mode Green Picture Menu Subtitle On off in DTV 17 mode Yellow Feature Current language in DTV 18 mode Menu On off 19 Blue Install Favourite mode in DTV mode 20 OK Select analogue TV mode Hold in TXT 21 mode Channel List DTV mode Cursor right Subpage in TXT mode 22 Cursor down TXT Downpage 23 Volume up 24 Volume down 25 Mute 26 Teletext ...

Page 8: ... YPbPr signal connection with a device that has component output Connect the YPbPr to PC cable between the PC INPUT on the TV and the component video outputs of your device S PDIF Coaxial Out 3 outputs digital audio signals of the currently watched source Dolby D Audio is bypassed while in media browser mode only RF Input connects to an antenna or a cable system 4 Note that if you use a media reco...

Page 9: ...bPr sound connection in such a case use an appropriate audio cable between the connected device s audio outputs and the TV s audio inputs Note If you connect a device to the TV via the VIDEO or PC YPbPr cable you should also connect your device with an audio cable to the AUDIO INPUTS of the TV to enable audio Headphone jack is used for connecting an external headphone to the 5 system Connect to th...

Page 10: ...y using the USB input of the TV This feature allows you to display play music photo or video files stored in a USB stick It is possible that certain types of USB devices e g MP3 Players may not be compatible with this TV You may back up your files before making any connections to the TV set in order to avoid any possible data loss Note that manufacturer will not be responsible for any file damage ...

Page 11: ...socket Use a SCART cable as shown below HDMI input Scart socket YPbPr to PC cable optional Component audio inputs DVD Player Note These methods of connection perform the same function but in different levels of quality It is not necessary to connect by all three methods Using Side AV Connectors You can connect a range of optional equipment to your LCD TV Possible connections are shown below Note t...

Page 12: ...ownload or Timer is active Input Selection Once you have connected external systems to your TV you can switch to different input sources Press SOURCE button on your remote control for directly changing sources or Select Source option from the main menu by using or button Use then or button to highlight an input and press button to select Note With the or buttons you can set Off or On When Off is s...

Page 13: ...No option highlight the item by using or buttons and press the OK button The IDTV will automatically tune to the UHF or VHF for EU countries transmission channels searching for digital terrestrial TV broadcasts and displaying the names of channels found This process will take about a few minutes After Automatic Search is completed the following message asking for analogue channel search appears on...

Page 14: ...tton again to disable subtitle function If Subtitle is on and a language option is set pressing the button causes the following warning message display on the screen for UK only Digital Teletext for UK only Press the button The digital teletext information appears Operate it with the coloured buttons cursor buttons and OK button The operation method may differ depending on the contents of the digi...

Page 15: ...t Press or buttons to select the channel that will be moved Press or buttons to select the Move item on Channel List menu Following OSD will be displayed next to OK item to indicate that enter a number by using the numeric buttons on the remote control and press OK to confirm Note If you enter the same programme number of the channel that you want to move channel services will be replaced Do you w...

Page 16: ...avourites To set a favourite you should highlight the Favourites item at the bottom of the Channel List menu Then press OK button and Edit Favourite List menu appears on the screen How to Add a Channel to a Favourites List By pressing or buttons highlight the channel that you want to add to the favourite list By pressing OK button the highlighted channel is added to the Favourite List F icon indic...

Page 17: ...p Pleaseset theCAMbyenteringtheIDTVmenu ConditionalAccess then pressing the OK button CAM set up menu is not displayed when it is not required Toseetheviewingcontractinformation enterIDTV press the MENU button thenhighlightConditionalAccessand press the OK button When no module is inserted No Conditional Access module detected message appears on the screen Refer to the module instruction manual fo...

Page 18: ...ed Maturity Lock optional If you set Country option as UK in the first time installation Maturity Lock option will not be visible This setting is available only for EU countries When set this option gets the maturity information from the broadcast and if this maturity level is disabled does not show video audio Menu Lock In menu lock you can set locking for all menus or the Installation Menu to re...

Page 19: ...In order to display subtitles properly use this setting to select a movie subtitle language By pressing or button select the desired language option Guide By pressing or buttons change the guide language Current Audio if audio language is supported change the audio language by pressing or buttons Subtitle if subtitle is backed up alter the subtitle language with or buttons The chosen language will...

Page 20: ...ach valid channel number signal level and signal quality are shown on the screen In both manual and auto search any existing channel in the database is not re stored to avoid redundant duplicates of that channel Clear Service List This setting is visible only when the Country option is set to Denmark Sweden Norway or Finland Use this setting to clear channels stored Press or button to select Clear...

Page 21: ...ill be displayed You can play music picture and video files from a USB memory stick Note If you plug USB stick while in analogue mode the TV will automatically switch to digital TV mode Note Some USB compliant devices may not be supported Note If the USB stick is not recognized after power off on or First Time Installation first plug the USB device out and power off on the TV set Plug the USB devi...

Page 22: ...itle language See the section Movie Subtitle in Language Settings for selecting Movie Subtitle language Press STOP button to switch back to previous menu Analogue TV Menu System Picture Menu Mode For your viewing requirements you can set the related mode option Press or button to select Mode Press or button to choose from one of these options Natural Cinema User and Dynamic You can adjust to mode ...

Page 23: ...ted between 50 and 50 Headphone Mute Press or buttontoselectHeadphoneMute Press or button to set Headphone Mute as On or Off If you want to mute Headphone sound please change to Headphone Mute function to On Also when the TV is in mute you can use this feature to activate or deactivate headphone sound Sound Mode Press or buttontoselectSoundMode Using or button youcanselectMono Stereo DualIorDualII...

Page 24: ... Language Press or button to select TXT Language Use or button to change TXT Language to West East Cyrillic Turk Gre Arabic or Persian Ext Out Press or button to select Ext Out Use or button to set the Ext Out as On or Off Note For copying from a DVD or VCR device you should choose desired source from source menu and turn On to EXT Out from feature menu Ext Out should be On in order to use Timers ...

Page 25: ... see all the programmes in TV mode except for the AV modes By cursor action programme selection is done automatically Name To change the name of a programme select the programme and press the RED button The first letter of the selected name will be highlighted Press or button to change that letter and or button to select the other letters By pressing the RED button you can store the name Move Sele...

Page 26: ...anding in dot intensive presentations like spreadsheets or paragraphs or text in smaller fonts Select Dot Clock item by using or buttons Use or button to adjust the value PC VGA Picture Menu For adjusting PC picture items do the following Press or button to select the second icon PC Picture menu appears on the screen Contrast Brightness Colour Temperature and Game Mode settings in this menu are id...

Page 27: ...ble if your broadcaster supports Teletext system transmits information such as news sports and weather on your TV Note that if the signal degrades for example in poor adverse weather conditions some text errors may occur or the teletext mode may be aborted Teletext function buttons are listed below Teletext Mix Activates teletext mode when pressed once Press again to place the teletext screen over...

Page 28: ...ay degrade when two peripherals are connected to the TV at the same time In such a case disconnect one of the peripherals No Picture Is the aerial connected properly Are the plugs connected tightly to the aerial socket Is the aerial cable damaged Are suitable plugs used to connect the aerial If you are in doubt consult your dealer No Picture means that your TV is not receiving a transmission Have ...

Page 29: ... Ver Ver Hz Hor KHz 1 640 480 60 31 5 VESA 2 640 480 72 37 9 VESA 3 640 480 75 37 5 VESA 4 800 600 56 35 2 VESA 5 800 600 60 37 9 VESA 6 800 600 70 43 8 7 800 600 72 48 1 VESA 8 800 600 75 46 9 VESA 9 832 624 75 49 7 MAC 10 1024 768 60 48 4 VESA 11 1024 768 70 56 5 VESA 12 1024 768 72 57 7 13 1024 768 75 60 0 14 1152 864 75 67 5 VESA 15 1152 870 75 68 9 MAC 16 1280 768 60 47 7 VESA 17 1366 768 60 ...

Page 30: ...60Hz O HDMI 1 480I 60Hz O 480P 60Hz O 576I 50Hz O 576P 50Hz O 720P 50Hz O 720P 60Hz O 1080I 50Hz O 1080I 60Hz O 1080P 24Hz X 1080P 25Hz X 1080P 30HZ X 1080P 50HZ O 1080P 60HZ O X Not Available O Available Note In some cases a signal on the LCD TV may not be displayed properly The problem may be an inconsistency with standards from the source equipment DVD Set top box etc If you do experience such ...

Page 31: ... 422 420 Grayscale Progressive JPEG Up to 4 Mega pixel Support format 444 440 422 420 Grayscale External Subtitles srt Support Text File Format but do not support Picture File Format smi sub psb ass Note Necessary bitrates for some video types are higher than USB limits For this reason some video types cannot be played Products Battery Information for Users on Disposal of Old Equipment and Batteri...

Page 32: ...on COFDM with 2K 8K FFT mode FEC all DVB modes Video MP ML PAL 4 3 16 9 Audio MPEG Layer I II 32 44 148kHz NUMBER OF PRESET CHANNELS 200 CHANNEL INDICATOR On Screen Display RF AERIAL INPUT 75 Ohm unbalanced OPERATING VOLTAGE 220 240V AC 50 Hz AUDIO German Nicam Stereo AUDIO OUTPUT POWER WRMS 10 THD 2 x 2 5 POWER CONSUMPTION W 45 W max 1 W Standby PANEL 19 wide display Panel Contrast 1000 1 DIMENSI...

Page 33: ...D CD R CD RW MP3 JPEG MPEG playback NTSC PAL playback according to disc content LPCM audio via coaxial and optical digital audio outputs optional Multi Audio up to 8 support According to disc content Multi Subtitle up to 32 support According to disc content Multi Angle up to 9 support According to disc content 8 level parental control Fast forward and rewind in 5 different speeds 2x 4x 8x 16x 32x ...

Page 34: ...any substance like glue remove before using it Do not expose the disc to direct sunlight or heat sources such as hot air ducts or leave it in a car parked in direct sunlight as the temperature can rise quickly and damage the disc After playing store the disc in its case On cleaning Before playing clean the disc with a cleaning cloth Wipe the disc from the center out Do not use solvents such as ben...

Page 35: ...ia the remote control While playing a file you should press STOP button three times to eject Overview of the Remote Control Standby 1 Numeric buttons 2 Return back 3 Language selection Set language 4 Display time DVD menu 5 Clear 6 Stop 7 No function 8 Rapid Reverse 9 Rapid advance 10 Info 11 Zoom 12 Repeat 13 Root 14 Menu 15 Title 16 OK Select 17 Navigation Buttons 18 Subtitle 19 Angle 20 Search ...

Page 36: ...r mode selection during playback Press repeatedly to switch between modes LANG Audio language X X MENU Displays TV menu OK SELECT Enter View Play REPEAT Displays repeat options RETURN Returns back to the previous menu if available ROOT Goes back to the root folder if available SEARCH MODE Direct selection of scenes or time Selects the desired file Selects the desired file SUBTITLE Subtitle on off ...

Page 37: ...back to the initial settings If a language is selected not supported by the 7 disc the subtitle language will automatically be set to the disc s priority language Usually a circulation will happen while switching 8 to another language that is you can cancel the subtitle by pressing this button a number of times until Subtitle Off appears on the screen When the power is turned on or the disc is 9 r...

Page 38: ...ing The picture quality is poor DVD Make sure the DVD disc surface is not damaged Scratch fingerprint etc Clean the DVD disc and try again See instructions described in Notes on Discs to clean your disc properly Ensure that the DVD disc is in the drawer with the label uppermost A damp DVD disc or condensation may effect the equipment Wait for 1 to 2 hours in Stand by to dry the equipment Disc does...

Page 39: ...city than a single 1 2 mm thick disc Since the two thin discs are adhered to each other there is the potential to achieve double sided play sometime in the future for even longer duration play Subtitles These are printed lines appearing at the bottom of the screen which translate or transcribe the dialogue They are recorded on the DVD discs Time Number This indicates the playtime which has elapsed...

Page 40: ... id eo d u e to D o lb y D ig i tal an d M P E G 2 S y s tem Var io u s s c r een an d au d io fu n c t io n s c a n b e eas ily s el ec t ed t h r o u g h th e o n s c r een m enu A n L P is r ec o r d ed as an an alo g s ig n al w ith m o r e d is t o rtio n C D is r e c o r d e d as a D ig ita l S ig n al w ith b et ter au d i o q u ality les s d is t o r t io n an d les s d et erio rat io n o ...

Page 41: ... 2 for this TV set DVB T functionality information This DVB receiver is only suitable for use in the country which it was designed to be used in Although this DVB receiver conforms to the latest DVB specifications at the time of manufacture we cannot guarantee compatibility with future DVB transmissions due to changes that may be implemented in broadcast signals and technologies Some digital telev...

Page 42: ... subject of unauthorised modifications or alterations or has been the subject of commercial use In the event of a problem with the product within the guarantee period please return it to your nearest store If the item is shown to have had an inherent defect present at the time of sale the store will provide you with a replacement Your statutory rights remain unaffected Guarantor Home Retail Group ...

Page 43: ... Aerial RF Socket wall socket wall socket Aerial RF Lead Aerial RF Lead It is recommended that a scart lead should be fitted between your TV and VCR to enhance your picture and sound quality Scart leads are essential if you have a stereo TV and VCR and wish to obtain stereo sound from your equipment These leads can be purchased from your Hitachi dealer or any good High Street electrical retailer S...

Page 44: ...onnector lead Device to TV wall socket Aerial RF Lead Aerial RF Socket High Definition Your LCD Television is capable of displaying High Definition pictures from devices such as a High Definition Satellite Receiver or DVD Device These devices must be connected via the HDMI or VGA Socket VGA input can be used via VGA to YPbPr cable TFT LCD TV Scart Lead to AV 1 on TV Note These three methods of con...

Page 45: ... the set will be in standby and the indicator on the front of the set will illuminate red insert plug European plug and switch on insert plug UK plug SIDE VIEW MENU INFO EPG FAV PRESETS SUBTITLE RETURN SOURCE SLEEP SCREEN LANG RC1900 Programme Up Volume Up Volume Down Programme Down To select a programme number To enter the main menu For navigation of the menus ...

Page 46: ...ed on for the first time the menu for the language selection appears on the screen The message Welcome please select your language is written in all language options sequentially in the menu on the screen By pressing or buttons highlight the language you want to set and press OK After the language selection menu the following message appears on the screen Do you want to start an automatic channel ...

Page 47: ... OK button on the remote control DVD cannot be operated unless user selects DVD mode how to watch a DVD Switch the TV on 1 2 Insert a DVD disc into the DVD player 3 4 Select the preferred menu item from DVD disc menu when it s displayed and press SELECT Press SOURCE button on Remote Control and select DVD 50178407 ...

Page 48: ...www hitachidigitalmedia com 50178361 ...

Reviews: