
--- 9 ---
8-2. Reassembly
Put the parts together in the reverse order of disassembly, with the precautions given below.
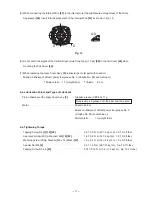
(1) Generously lubricate the teeth of the Gear
[18]
and the Pinion
[5]
with grease. Rub grease onto the teeth with
your fingers so that the grease reaches each tooth bottom. Note that the Gear
[18]
and the Pinion
[5]
may
wear at a faster rate if under-lubricated.
(2) Be sure to soak the inner diameter of the Felt Packing
[22]
with machine oil. Otherwise, its dust-sealing
function will fail to work properly, resulting in an earlier damage of the Ball Bearing 6201VVCMPS2L
[21]
.
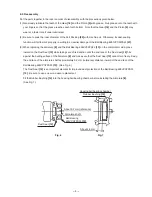
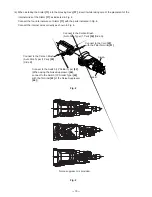
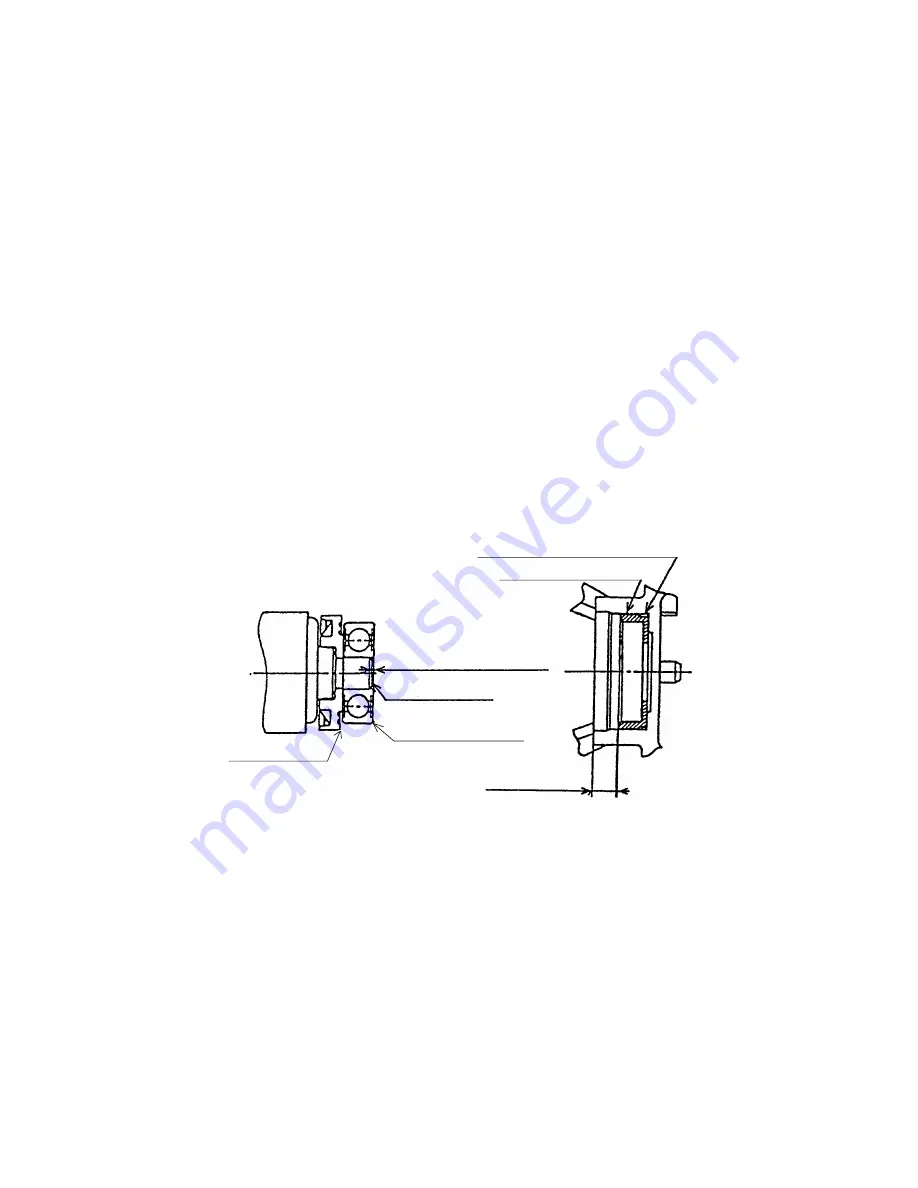
(3) When replacing the Armature
[8]
and the Ball Bearing 626VVC2PS2L
[13]
on the commutator side, press
inward on the Dust Seal
[12]
while taking care of its direction until the end face of the Dust Seal
[12]
hits
against the butting surface of the Armature
[8]
and make sure that the Dust Seal
[12]
cannot turn freely. Keep
the end face of the armature shaft approximately 0.2 mm (reference) distance inward of the end face of the
Ball Bearing 626VVC2PS2L
[13]
. (See Fig. 6.)
The Dust Seal
[12]
is an important element for improved dust protection of the Ball Bearing 626VVC2PS2L
[13]
. Be sure to use a new one upon replacement.
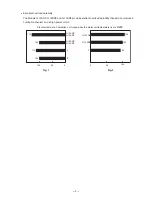
Fit the Rubber Bushing
[14]
into the housing ball bearing chamber before installing the Armature
[8]
.
(See Fig. 7.)
About 0.2 mm (reference)
Housing ball bearing chamber
Rubber Bushing
[14]
Armature shaft
Ball Bearing
626VVC2PS2L
[13]
Dust Seal
[12]
About 4.5 mm
Fig. 6
Fig. 7
Summary of Contents for G 13SR3
Page 30: ......