background image

11 

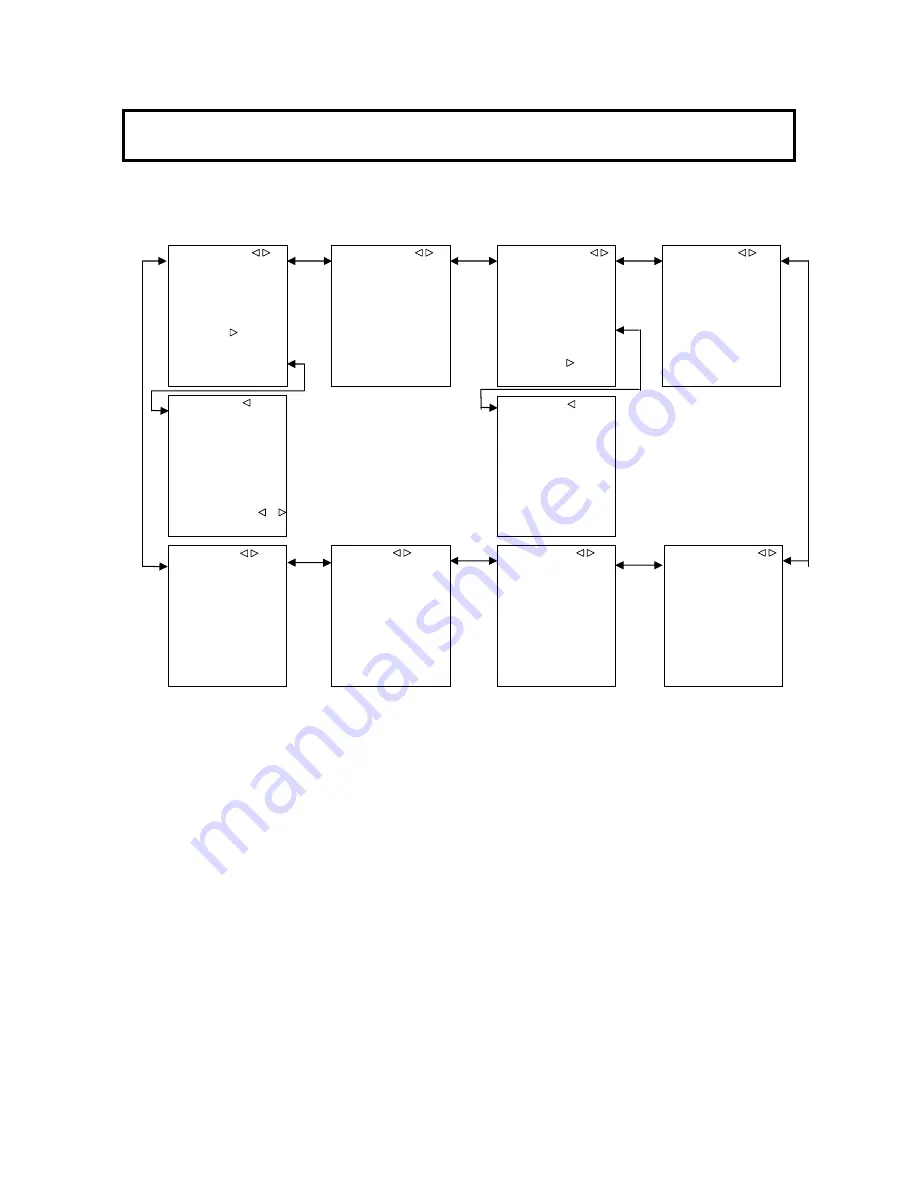
Function menu


To display CCU menu, turn on color bars and then press FUNC button of the camera control panel. 


Camera menu 

To display camera menu, press FUNC button when color bars off. The contents of camera menu depend on 
camera type. Please refer to the camera operating instructions. 


■RETURN SELECT 
 
    RET.CH            SELECT 
      CH1              :RET.A1 
      CH2              :RET.A2 
      CH3              :RET.A3 
      CH4              :RET.A4 

 
CA HD-SDI2:RET.B1 
 

      ASSIGNMENT : 
 

■ASSIGNMENT 
 
      SELECT    TYPE 
      RET.A1      :1080i 
      RET.A2      :1080i 
      RET.A3      :1080i 
      RET.A4      :1080i 

RET.B1      :1080i 
RET.B2      :1080i 

■MIC GAIN 
 
    MIC1              :-60dB 
    MIC2              :-60dB 


■SYSTEM TIMING 
 
    HD H PHASE :      0(        0) 
    SD SDI H P :        0(        0) 
    GL H PHASE:    108( 1728) 

■SD DTL 
 
    SD DTL          :ON 
    H GAIN          :      0 
    V GAIN          :      0 
    H CRISP        :-128 
    V CRISP        :-128 
    DTL FREQ      :5MHz 
    LEVEL DEP    :-128 
    LEV DEP SLP:-128 
                                       

■PIX DISPLY 
 
    FILTER          :ON 
    ECC                :ON 
    IRIS                :ON 


■TIME/DATE 
 
    DATE DISP    :Y.M.D 
    TIME DISP    :ON 
    YEAR              :12 
    MONTH            :01 
    DAY                :01 
    HOUR              :12                               
    MINUTE          :00 
 
    SET DATA      :PUSH        +       

■CU-FUNCTION 
 
    BUZZER          :ENABLE 
    SDI AUDIO    :OFF 
    CCU ID          :    1 
    CABLE MODE:HYBRID 
    SYS FORMAT      1080i 
                                  59.94Hz 

    TIME/DATE:    '12.01.01 

                                      12:00 

■OUTPUT SELECT 
 

HIGH SPEED : 1080i 
HD1[1/2]        : 1080i 
HD/SD1[1/2] : 1080i 
HD/SD2[1/2] : 1080i 
WFM/PIX        : 1080i 
 
ACPEST[SD] : 16:9 


■SD MASKING 
 
    SD MASKING    :OFF 
     
    R-G:      0      R-B:      0 
    G-B:      0      G-R:      0 
    B-R:      0      B-G:      0 
   
    SD MATRIX      :ON 
                                       

Summary of Contents for CU-HD1500

Page 1: ...CAMERA CONTROL UNIT CU HD1500 OPERATING INSTRUCTIONS Please read these operating instructions carefully for proper operation and keep them for future reference ...

Page 2: ...important for you to keep for your convenience and protection These numbers appear on the nameplate located on he bottom of the product Please record these numbers in the spaces provided below and retain this manual for future reference Model No Serial No ...

Page 3: ...e to equipment Caution notes indicate any condition or practice which if not strictly observed or remedied could result in damage or destruction of the equipment NOTE Notes indicate an area or subject of special merit emphasizing either the product s capabilities or common errors in operation or maintenance WARNING TO REDUCE THE RISK OF FIRE OR ELECTRIC SHOCK DO NOT EXPOSE THIS COLOR CAMERA TO RAI...

Page 4: ...sive force and uneven surfaces may cause the product and cart combination to overturn 10 Ventilation Slots and openings in the cabinet are provided for ventilation and to ensure reliable operation of the product and to protect it from overheating and these openings must not be blocked or covered The openings should never be blocked by placing the product on a bed sofa rug or other similar surface ...

Page 5: ...ervice personnel under the following conditions a When the power supply cord or plug is damaged b if liquid has been spilled or objects have fallen into the product c If the product has been exposed to rain or water d If the product does not operate normally by following the operating instructions Adjust only those controls that are covered by the operating instructions as an improper adjustment o...

Page 6: ...em Wagen Stand Dreifuß Träger oder Tisch verwenden der vom Hersteller empfohlen oder mit dem Erzeugnis verkauft worden ist Für jegliche Anbringung sollten die Anweisungen des Herstellers befolgt werden und das vom Hersteller empfohlene Anbringungszubehör sollte verwendet werden 9 Eine Kombination von Erzeugnis und Wagen sollte vorsichtig bewegt werden Schneller Halt übermäßige Krafteinwirkung und ...

Page 7: ...Art auf das Erzeugnis verschütten 17 Entflammbare und explosive Substanzen Vermeiden Sie Verwendung dieses Erzeugnisses an Orten mit Gasen bzw entflammbaren oder explosiven Substanzen in der direkten Umgebung 18 Starke stöße oder Vibrationen Setzen Sie das Erzeugnis beim Transport nicht starken Stößen oder Vibrationen aus 19 Wartung Versuchen Sie nicht dieses Erzeugnis Selbst zu warten da Sie sich...

Page 8: ...e den Wartungstechniker nach der Vollendung von Wartung oder Reparaturarbeiten an diesem Erzeugnis um die Durchführung von Sicherheitsprüfungen um zu bestimmen daß das Erzeugnis im angemissenen Betriebszustand ist 23 Anbringung an der Wand oder an der Decke Das Erzeugnis sollte nur entsprechend den Empfehlungen des Herstellers an einer Wand oder an der Decke angebracht werden 24 Wärme Das Erzeugni...

Page 9: ...bricant 9 L appareil monté sur son chariot devra être déplacé avec précaution Des arrêts brusques une force excessive et des surfaces irréguliéres pourraient provoquer le renversement de l ensemble appareil chariot 10 Ventilation Les fentes et les ouvertures du coffret sont prévues pour la ventilation ainsi que pour garantir un fonctionnement en toute sécurité de l appareil et le protéger de toute...

Page 10: ...t confier les réparations á un personnel qualifié dans les cas suivants a Lorsque le cordon d alimentation ou sa fiche sont endommagés b Si du liquide s est renversé sur l appareil ou que des objets sont tombés dedans c Si l appareil a été exposé á la pluie ou á l eau d Si l appareil ne fonctionne pas normalement lorsqu on observe les instructions d utilisation Ne régler que les commandes couverte...

Page 11: ...ct in a residential area is likely to cause harmful interference in which case the user will be required to correct the interference at his own expense WARNING Changes or modifications not expressly approved by Hitachi Kokusai Electric responsible for compliance could void the user s authority to operate the equipment For Canada This product does not exceed the class A class B limits for radio noi...

Page 12: ......

Page 13: ... 1 Warnings and cautions when using 2 Facility names and functions 4 System Configuration 7 Function menu 10 Cable check Warning indication 17 Backup battery replacement 18 Service information 19 External View 30 Specifications 31 ...

Page 14: ......

Page 15: ... SD SDI PIX OUT x1 Embedded audio available HD SDI or SD SDI RET In x4 for Viewfinder HD SDI or SD SDI RET In x2 for Floor Monitor Analog inputs PROMPT IN x1 GL IN x1 High performance down converter High speed line conversion technology yields high resolution in the SD picture Due to the use of an independent and separate processor located in the CCU detail can be adjusted for the SD video outputs...

Page 16: ...ations Impaired performance and damage can be caused Extremely hot or cold locations exceeding 0 to 40 C such as in enclosed vehicles Subject to strong vibration Humid or dusty locations Salt spray or corrosive gases Strong electromagnetic fields e g near TV or radio transmitters Where exposed to rain When connecting and disconnecting cables grasp the connector by the body not the attached cable C...

Page 17: ...nique for handling 1 Cable Connector Receptacle 1 FCF Fiber Cable Female 2 FCM Fiber Cable Male 3 FCFR Female Receptacle 4 FCMR Male Receptacle 2 Maintenance tool information 1 Cleaning Stick CANARE CLETOP 2 5 2 0 2 CLEANING KIT Fiber optical cable assembly manufacture CANARE has Cleaning kit for the optical fiber cable connector available Detail is in URL http www canare co jp ...

Page 18: ... is available Press the switch for three seconds or more to turn off the camera power 5 GL ON LED Lights during genlock operation Note When a different frame rate signal is input for genlock the LED blinks and the signal is ignored 6 R TALLY LED Lights at red tally input or when CALL signal is sent from camera 7 G TALLY LED Lights at green tally input 8 CALL button Press to call the camera 9 INTER...

Page 19: ...om HD SDI2 connector on CA HF1500 Selected by only CCU menu Important notice 17 PROMPT connectors BNC Input analog video signal for the prompter The signal is sent to PROMPT out connector on CA HF1500 18 Genlock connectors BNC Input tri level sync signal or black burst signal for genlock operation 19 REMOTE 1 2 3 connector Connect the optional camera control panel or setup control unit 20 Fiber co...

Page 20: ...9 TALLY OUT connector Contact outputs for tally signals 30 TALLY CONTACT VOLTAGE The TALLY input can be contact or voltage supply Set the TALLY switches according to the systems connected to the COMMUNICATION connector on rear panel 31 Receiver Level LED Front The strength of the arriving light signal via fiber cable is indicated by position of lighting LED Indicate the receiver level approximatel...

Page 21: ...t signal The CABLE CHECK LED lights OK when the optical fiber cable is normal The intercom system is available when the CCU POWER switch is ON Note When operation mode is changed from MAIN mode to STBY mode wait for 10 seconds to restart the camera power Camera Head SK HD1500 Optical Fiber Cable Camera control unit CU HD1500 Remote Control Unit RU 1500 Camera Adaptor AC input CA HF1500 2 Camera st...

Page 22: ...3 The menu of CU HD1500 is displayed 4 CABLE MODE of a CU FUNCTION menu is set as SINGLE The selection only of the time of STBY mode CAM POWER OFF is attained 5 A power supply is inputted into the DC IN connector of CA HF1500 6 PWR SW of CA HF1500 is set as EXT CU FUNCTION MENU SCREEN Camera Head SK HD1500 Optical Cable SINGLE Camera control unit CU HD1500 Remote Control Unit RU 1500 Camera Adapto...

Page 23: ...crophone adaptor MH 1000 9 inch Viewfinder VF L9HD VF L90HD 5 inch Viewfinder VF HD500 Viewfinder adaptor AT 90 Setup control unit SU 1000 Tripod adaptor TA Z3 Portable Zoom Lens Studio adaptor SA 1000 Large Box Lens Small Box Lens Viewfinder adaptor AT 550 Viewfinder adaptor AT 951 Lens Mounter LM C1000 for Canon LM F1000 for Fujinon Portable Zoom Lens Carrying case CL 1000 Memory card SD card fo...

Page 24: ...t the camera control panel RU 1500 or the setup control unit SU 1000 to the CU HD1500 to display the function menus on PIX video output The function menus include the CCU menu to adjust the CU HD1500 and the camera menu to adjust a camera ...

Page 25: ...080i RET B1 1080i RET B2 1080i MIC GAIN MIC1 60dB MIC2 60dB SYSTEM TIMING HD H PHASE 0 0 SD SDI H P 0 0 GL H PHASE 108 1728 SD DTL SD DTL ON H GAIN 0 V GAIN 0 H CRISP 128 V CRISP 128 DTL FREQ 5MHz LEVEL DEP 128 LEV DEP SLP 128 PIX DISPLY FILTER ON ECC ON IRIS ON TIME DATE DATE DISP Y M D TIME DISP ON YEAR 12 MONTH 01 DAY 01 HOUR 12 MINUTE 00 SET DATA PUSH CU FUNCTION BUZZER ENABLE SDI AUDIO OFF CC...

Page 26: ... 12 1 Sets the CCU ID This ID is required for the SETUP CONTROL UNIT to identify group of CCU SYS FORMAT Displays the TV format TIME DATE Moves to the TIME DATA submenu Item Setting Factory setting Description DATE DISP OFF Y M D M D Y D M Y Y M D Sets the order of date display If set OFF the date is not displayed TIME DISP OFF ON ON Sets the time display When ON is selected the CU FUNCTION menu d...

Page 27: ...hen CA HF1500 RET switch is set to 1 CH2 RET A1 RET A2 RET A3 RET A4 RET A2 Assigns the return video signal to CH2 selected when CA HF1500 RET switch is set to 2 CH3 RET A3 Assigns the return video signal to CH3 selected when CA HF1500 RET switch is set to 3 CH4 RET A4 Assigns the return video signal to CH4 selected when CA HF1500 RET switch is set to 4 CA HD SDI2 RET B1 RET B2 RET B1 Assigns the ...

Page 28: ...m via MIC REMOTE connector the sign is also displayed there and this menu is not available MIC GAIN MIC1 60dB MIC2 60dB Item Setting Factory setting Description HD H PHASE 128 512 to 127 511 0 Adjusts HD SDI output phase locally SD SDI H P 128 256 to 127 255 0 Adjusts SD SDI output phase locally GL H PHASE 128 2048 to 127 2047 108 1728 Adjusts whole system phase against genlock signal SYSTEM TIMIN...

Page 29: ...MHz 8MHz 5MHz Set the detail frequency to emphasize LEVEL DEP 128 to 127 128 Adjusts the detail level on dark area of image LEV DEP SLP 128 to 127 128 Adjusts the slope of detail effect on dark area of image SD MASKING SD MASKING OFF R G 0 R B 0 G B 0 G R 0 B R 0 B G 0 SD MATRIX ON Item Setting Factory setting Description SD MASKING OFF ON OFF Enable the linear masking effect specialized for SDTV ...

Page 30: ... displayed at the lower center of the screen The display depends on the optical filter position ECC_FILTER A 3200K B 4300K C 5600K D 6300K E 8000K Displays ECC filter information with optical filter 1 PIX OUT camera status display 1 3200K A 3200K F8 0 Optical filter ECC filter Lens iris ...

Page 31: ...HECK CAMERA POWER CAMERA CABLE SINGLE LED OPEN lights Cable is not connected Camera power defaults to off and camera power switch is rendered inoperative Cable mode is Selected the SINGLE Screen CCU FAN ALARM FAN warning of CCU The internal fan is stopped or the rotating speed is lowered Screen CAMERA FAN ALARM FAN warning of camera head or camera adaptor The adaptor internal fan is stopped or the...

Page 32: ...battery should be replaced and the date and time should be adjusted at the TIME DATE menu WARNING Be sure to replace the battery with a type CR2032 lithium battery Using another type of battery can damage the camera and pose a fire hazard Also be sure to dispose of the depleted battery as prescribed by local ordinance e g return it to the dealer Do not dispose of the battery with combustible waste...

Page 33: ... female RDED 9S LNA 4 40 55 Combined connector 9pin D sub male Application circuit example Plug CCU mainframe Internal circuit Pin Signal 1 MIC GND 2 MIC H IN 3 MIC C IN Pin Signal 1 TALK C 2 TALK H 3 RECEIVE C 4 RECEIVE L H 5 RECEIVE R H Pin Signal 1 12V output 2 DATA input 3 DATA output 4 DATA ground Pin 1 2 3 4 5 6 7 8 9 Pin Signal 1 R TALLY 1 2 R TALLY 2 3 G TALLY 1 4 G TALLY 2 5 6 7 NC 8 24V ...

Page 34: ... 7 PD IN C 2W NC 8 PD IN H 2W NC 9 ENG OUT C 2W OUT IN C 10 ENG OUT H 2W OUT IN H 11 ENG SHIELD 12 ENG IN C 2W NC 13 ENG IN H 2W NC 14 GND 15 16 NC 17 TALLY COMMON TALLY COMM 18 G TALLY IN G TALLY IN 19 R TALLY IN R TALLY IN 20 NC 21 PGM2 IN C 22 PGM2 IN H 23 PGM SHIELD 24 PGM1 IN C 25 PGM1 IN H Pin 1 2 3 4 5 6 7 8 9 10 11 12 13 14 15 16 17 18 19 20 21 22 23 24 25 17 18 19 TALLY COMM Contact Volta...

Page 35: ...C REMOTE connector Pin 1 2 3 4 5 6 7 8 9 10 11 12 13 14 15 Pin Signal 1 5V OUT 200mA max 2 TALLY GND 3 G TALLY OUT 4 R TALLY OUT 5 MIC1 GAIN CTL2 6 MIC1 GAIN CTL1 7 MIC1 GAIN CTL0 8 MIC SEL1 9 GND 10 11 NC 12 MIC2 GAIN CTL2 13 MIC2 GAIN CTL1 14 MIC2 GAIN CTL0 15 MIC SEL2 CTL0 CTL1 CTL2 MIC AMP GAIN Hi Hi Hi 70dB Lo Hi Hi 60dB Hi Lo Hi 50dB Lo Lo Hi 40dB Hi Hi Lo 30dB Lo Hi Lo 20dB Hi Lo Lo 10dB Lo...

Page 36: ...422 RTS RS 232C 8 TX_RS422 CTS RS 232C 9 NC Pin Signal 1 2 WFM CTL0 3 WFM CTL1 4 WFM CTL2 5 WFM CTL3 6 WFM CTL4 7 WFM CTL5 8 WFM CTL6 9 WFM CTL7 10 11 12 13 14 15 SHIELD Pin 1 2 3 4 5 6 7 8 9 10 11 12 13 14 15 MODE Analog PIX OUT Analog WFM OUT CTL0 CTL1 CTL2 CTL3 CTL4 CTL5 CTL6 CTL7 R R R Lo Hi Hi Hi Hi Hi Hi Hi G G G Hi Lo Hi Hi Hi Hi Hi Hi B B B Hi Hi Lo Hi Hi Hi Hi Hi ENC ENC ENC Hi Hi Hi Lo H...

Page 37: ...0V 50 60Hz U U S A AC 117V 60Hz E Europe AC 230V 50Hz Procedure 1 Loose two screws and lift the front panel slightly and then pull it open 2 Set two switches to supplied AC power voltage according to the diagram Inside of front panel 100V 117V 230V Screw Screw Front panel ...

Page 38: ...24 Service information Intercom system setting CUH1200 MAIN SW3 No 6 RTS Clear com 1 2 3 4 O N 5 6 7 8 SW18 19 2wire 4wire SW20 21 4wire 2wire ...

Page 39: ...witch SW3 No 1 on CUH1200 MAIN board When the dip switch SW6 No 1 is turned ON the video frame rate can be switched by the dip switch SW3 No 2 Dip switch setting on CUH1200 MAIN Board NOTICE Set both camera and CCU to same video frame rate independently 59 94 Hz default SW3 50 Hz SW3 No 2 Disable Enable default SW3 No 1 Availability for SW3 No 2 1 2 3 4 O N 5 6 7 8 ...

Page 40: ...e installation NOTE Microsoft NET Framework 2 0 or greater must be installed on the PC beforehand b Insert the downloaded software that file name Di32DL_4 2 0 3_Web exe The PC does not have to be connected to the CU HD1500 at this time c Double click to install and follow the instructions on the screen to install the program on the PC The latest version is on website as below http ltxfaq custhelp ...

Page 41: ...ress the PC has to be set Use the following IP address then input the IP address Subnet mask and Default gateway 2 Connect the CU HD1500 to the PC as shown in the above figure Execute the Lantronix DeviceInstaller application by START ALL PROGRAMS LANTRONIX DeviceInstaller 4 2 DeviceInstaller 3 Click on Search to display the current IP Address of the connected CU HD1500 The right pane will show th...

Page 42: ...ed on the Network Settings pane When it is necessary to change the port number of the CCU click on the Serial Settings under Channel 1 on the Network Settings pane 4 Click on OK on the right pane then on Apply Settings on the left pane to change the IP address 5 Confirm that the IP Address has been changed by re starting the DeviceInstaller program again by clicking on Search The IP Address on the...

Page 43: ...U HD1500 is changed to arbitrary IP Address Subnet Mask and Default Gateway and the address is retrieved it is necessary to match IP Address of PC Subnet Mask and Default Gateway Enough operational administrative to IP Address etc ...

Page 44: ...30 External View CU HD1500 External View Unit mm ...

Page 45: ...ls Camera Control Unit CU HD1500 INPUT GEN LOCK IN B BST 0 45Vp p 75Ω loop through or HDTV tri level sync 0 60Vp p 75Ω loop through BNC x1 DIGITAL RET IN A 1 2 3 4 B 1 2 HD SDI or SD SDI 1080i SMPTE292M 720p SMPTE292M SD SDI SMPTE259M C BNC x4 x2 A x4 for VF B x2 for floor monitor PROMPT IN VS or VBS 1 0Vp p 75Ω loop through BNC x1 INTERCOM HEAD SET 60dBm XLR 5pin Female COMMUNICATION D sub 15pin ...

Page 46: ...I or SD SDI selectable WFM Embedded 2 Chnl audio available 1080i SMPTE292M 720p SMPTE292M SD SDI SMPTE259M C BNC x1 DIGITAL OUT HD SD3 PIX HD SDI or SD SDI selectable PIX Embedded 2 Chnl audio available 1080i SMPTE292M 720p SMPTE292M SD SDI SMPTE259M C BNC x1 MIC OUT 1 0dBm 600Ω XLR 3pin MIC OUT 2 0dBm 600Ω XLR 3pin INTERCOM HEAD SET 0dBu MAX 15dB XLR 5pin Female Remote 1 1 5Vp p 4pin Remote 2 1 5...

Page 47: ...9A 2 5M 8488057 1 Code Set E VM0306B VM0303B 2 5M BBZ0399 1 Operation Manual CU HD1500 O M 1 Connector HDBB 25S 05 8AAE000522 1 Plug Case HDB CTH 4 40 10 JYHS003 1 Connector HDEB 9S 05 2PBB018260 1 Plug Case HDE CTH 4 40 10 JYH0051 1 Connector HDEB 9P 05 8AAE000718 1 Plug Case HDE CTH 4 40 10 JYH0051 1 Written guarantee U Written guarantee MGA0915 1 ...

Reviews: