


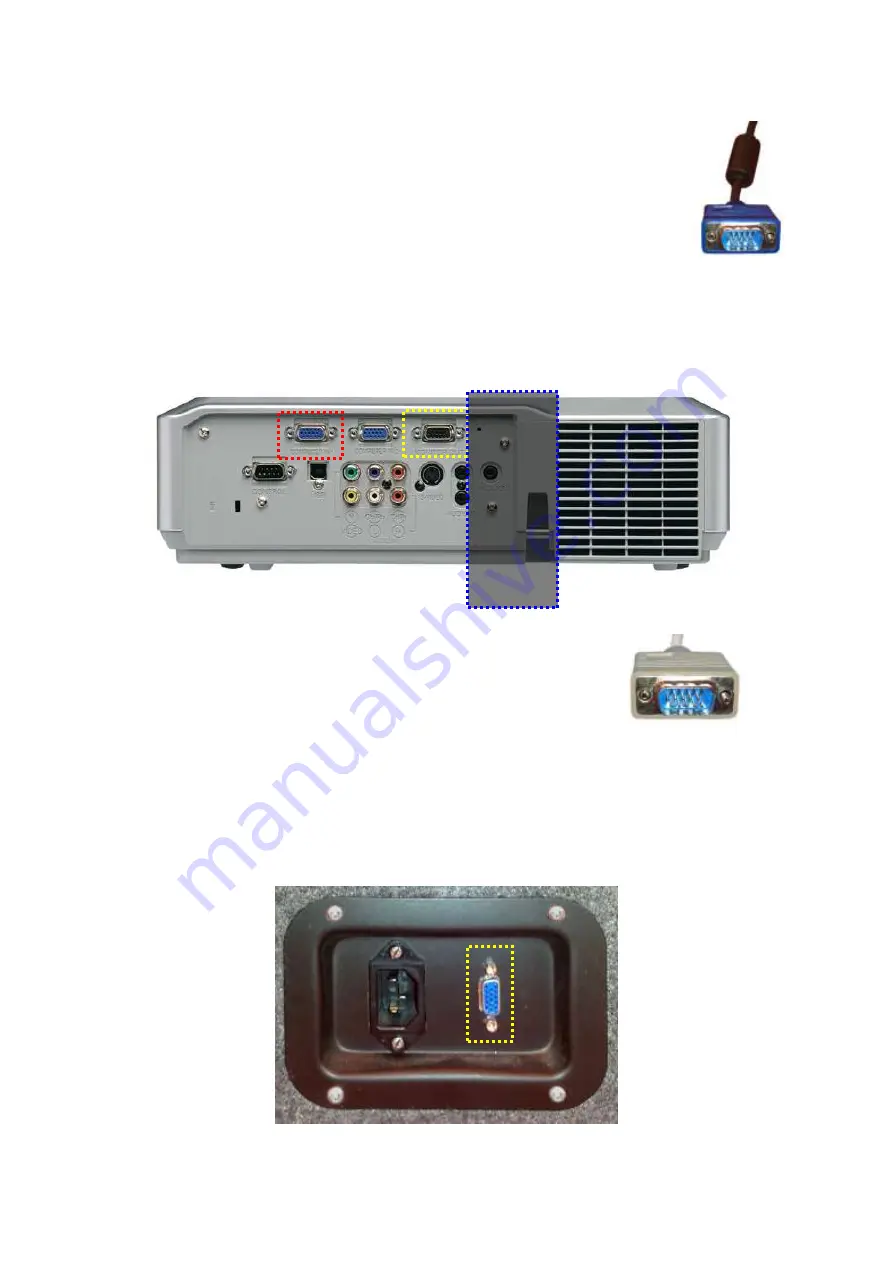
2
There is a corresponding cable, which is black with blue plugs at each
end shaped like in the picture to the right. One end of this cable should
be plugged into the socket you found on the computer‟s left hand side. It
can only go one way up. The two thumb screws projecting from the back
of the blue plug can be gently screwed into socket after connection to
stop the plug dropping out. The other end of the same cable should be
plugged into the back of the projector into the socket marked
„COMPUTER IN 1‟ (outlined with a red dashed line in the picture
below). The little thumb screws can be tightened here as well. This cable carries the
video signal from the computer to the projector. If the computer is being used at the
back of the church then the blue plug will need to be plugged into the wall socket (see
special situations below).
Another cable, grey in colour with a grey plug (exactly the same shape as the blue
plugs above) at each end is used to carry the video signal
from the projector to the wedge monitor. Normally, this is
left lying under the front row of chairs along with the long
black power cable for the wedge monitor. One end should be
plugged into the socket marked „MONITOR OUT‟ on the
back of the projector (outlined with a yellow dashed line in
the picture above). The black safety strap will need to be placed around the projector
and top platform of the stand to prevent it being knocked off. The best place for the
strap is shown on the picture above (outlined in blue dashed line), although it is not
important as long as the strap does not cover the grille for the fan or the lens at the
front. The other end of the grey cable should be plugged into the socket on the back of
the wedge monitor (outlined with a yellow dashed line in the picture below).


