15–34
Upgrading a Hitachi Unified Storage 130 system
Hitachi Unified Storage Hardware Service Guide
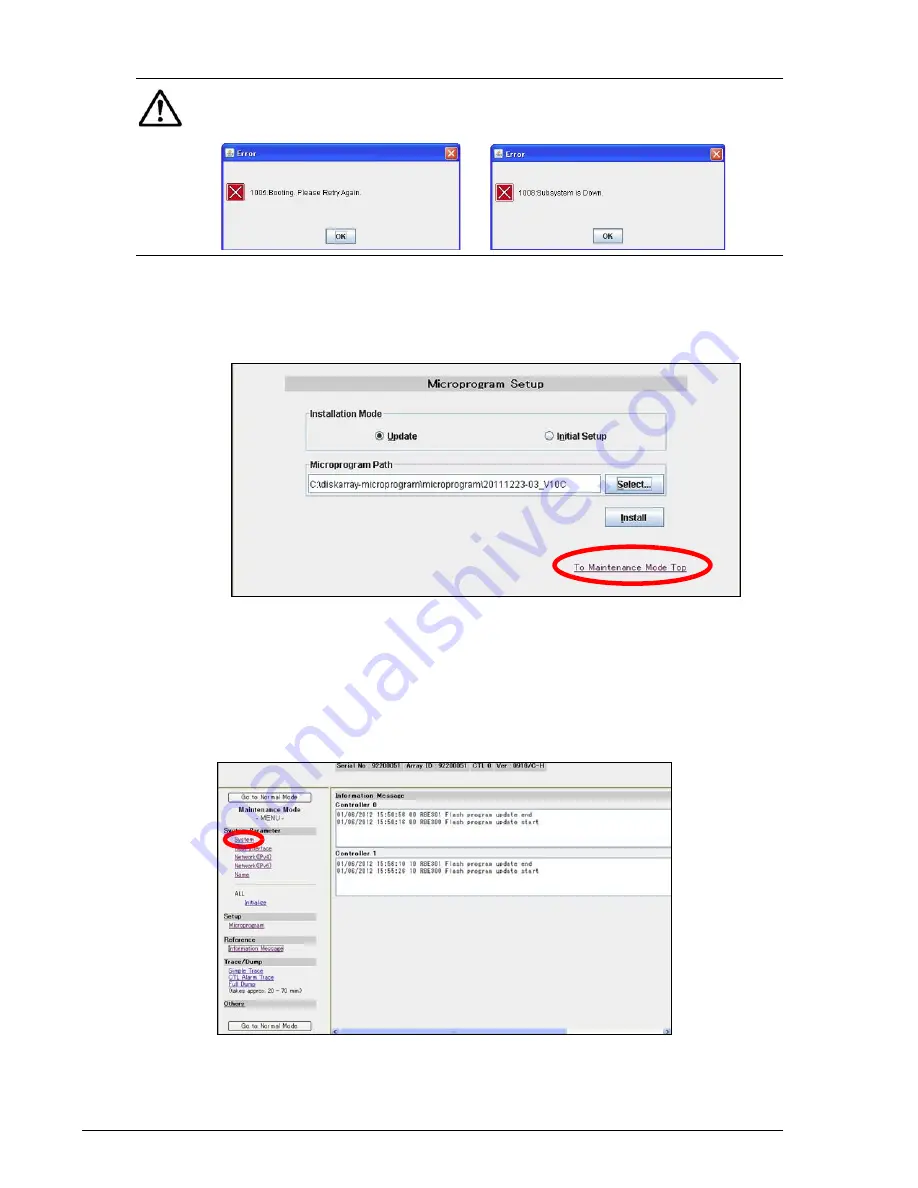
11.When a message states that the firmware installation has completed,
click OK to close the message.
12.At the Microprogram Setup page, click To Maintenance Mode Top and
proceed to
Changing the number of Drive I/O Modules
Changing the number of Drive I/O Modules
Continue with the previous procedure to change the number of Drive I/O
Modules.
1. At the Maintenance Mode page, in the left pane, under System
Parameter, click System.
2. At the next screen click Change.
NOTE: If either of the following messages appears, click OK to close the
message, and then repeat this procedure to confirm the storage system is
in Maintenance Mode.
Summary of Contents for CBL
Page 20: ...xx Hitachi Unified Storage Hardware Service Guide Labels on the CBXSS ...
Page 30: ...xxx Hitachi Unified Storage Hardware Service Guide CBL CBLE CBLD DBS DBSD DBL DBLD DBF ...
Page 39: ...xxxix Hitachi Unified Storage Hardware Service Guide Out ...
Page 40: ...xl Hitachi Unified Storage Hardware Service Guide ...
Page 152: ...5 8 Replacing a cache backup battery Hitachi Unified Storage Hardware Service Guide ...
Page 156: ...6 4 Replacing a Fan Module Hitachi Unified Storage Hardware Service Guide ...
Page 180: ...8 16 Adding and replacing controllers Hitachi Unified Storage Hardware Service Guide ...
Page 188: ...9 8 Replacing cache memory Hitachi Unified Storage Hardware Service Guide ...
Page 200: ...11 6 Replacing the Host connector Hitachi Unified Storage Hardware Service Guide ...
Page 204: ...12 4 Replacing the Drive I O Module Hitachi Unified Storage Hardware Service Guide ...
Page 212: ...14 4 Replacing the SAS ENC cable Hitachi Unified Storage Hardware Service Guide ...
Page 274: ...17 14 Troubleshooting Hitachi Unified Storage Hardware Service Guide ...
Page 291: ...1 Hitachi Unified Storage Hardware Service Guide ...


