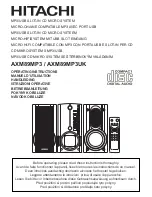
Hitachi AXM89MP3 Operating Instructions Manual Download Page 15

OPERATION/TIMER

Before setting the timer, make sure the clock is correctly set.

TIMER ON SETTING 

Select TUNER or CD mode and select the desired sound source.

For TUNER

1.

If you select BAND, press REW/DN 

B

or FF/UP

F

to select a preset station.

2.

The display will show the selected preset station and frequency.

3.

Press TIMER to confirm your selection.

4.

H

” Icon and “ON” will appear on the display.

5.

The digit of hour segment will flash more than 2 seconds.

6.

Press REW/DN 

B

or FF/UP

F

to set the hour.

7.

Press TIMER again, the digit of minutes segment will flash on the display.

8.

Press REW/DN 

B

or FF/UP

F

to set the minutes.

9.

Press TIMER again to store the start time.

10. Repeat steps 6~8 to set the timer off.
11. The display will show TUNER segment.
12. Press TIMER to store the sound source.
13. The volume level will appear on the display.
14. Press REW/DN 

B

or FF/UP

F

to set the desired sound level.

15. Press TIMER again to store the timer setting. 

For CD

1.

Insert a disc into the CD tray.

2.

Press TIMER.

3.

Repeat steps 4-11 under For tuner for Timer setting.

4.

Press REW/DN 

B

or FF/UP

F

to set the sound source to CD.

5.

The volume level will appear on the display.

6.

Press REW/DN 

B

or FF/UP

F

to set the desired sound level.

7.

Press TIMER again to store the timer setting.

8.

CD will be played.

TIMER OFF SETTING

1.

Press the TIMER.

2.

The “ 

H

” icon will disappear.

If you want to change the auto play time, redo the steps above.

OPERATION/SLEEP

(FOR REMOTE ONLUY)

1.

Press SLEEP, “SLEEP” appear on the display.

2.

Keep pressing SLEEP to adjust the sleep time in the order of 90>80>70...10 minutes.

3.

To cancel the sleep mode, press SLEEP again.

OPERATION/PRESET EQUALIZER

Press EQ key to select the digital sound performance in the order of PASS,
CLASSIC, ROCK, POP & JAZZ. 

14

Summary of Contents for AXM89MP3

Page 1: ...ggere attentamente le istruzioni prima di usare l apparecchio Lesen Sie bitte vor Inbetriebsnahme diese Gebrauchsanweisung aufmerksam durch Pred použitím si prosím peclive prostudujte tyto pokyny Pred použitím si dôkladone precitajte tieto pokyny MP3 USB SLOT IN CD MICRO SYSTEM MP3 USB SLOT IN CD MICRO SYSTEM MICRO CHAINE COMPATIBLE MP3 AVEC PORT USB MP3 USB SLOT IN CD MICRO SYSTEEM MICRO HIFISYST...

Page 2: ... with liquids such as vases to be placed on the equipment DON T place hot objects or naked flame sources such as lighted candles or night lights on or close to equipment High temperatures can melt plastic and lead to fires DON T use makeshift stands and NEVER fix legs with wood screws to ensure complete safety always fit the manufacturer s approved stand or legs with the fix ings provided accordin...

Page 3: ...by a competent person preferably a qualified electrician If there is no alternative to cutting off the mains plug ensure that you dispose of it immediately having first removed the fuse to avoid a possible shock hazard by inadvertent connection to the mains supply IMPORTANT The wires in this mains lead are coloured in accordance with the followin code Blue NEUTRAL Brown LIVE As these colours may n...

Page 4: ... intend ed use The ventilation should not be impeded by covering the ventilation openings with items such as newspapers table cloths curtains etc No naked flame sources such as lighted candles should be placed on the apparatus It shall not be exposed to dripping of splashing and that no objects filled with liquids such as vases shall be placed on the apparatus Mains plug is used as the disconnect ...

Page 5: ... sources such as radia tors heat registers stoves or other appliances including amplifiers that produce heat 8 POWER SOURCES The appliance should be connected to a power supply only of the type described in the operating instructions or as marked on the appliance 9 GROUNDING AND POLARIZATION Precautions should be taken to insure that the grounding or polarization means of an appliance is not defea...

Page 6: ...is connected to the receiver be sure that the antenna system is grounded so as to provide some protection against voltage surges and built up static charges Section 810 of the National Electrical Code ANS NFPA No 70 1984 provides information with respect to prop er grounding of the mast and supporting struc ture grounding of the lead in wire to an antenna discharge unit size of grounding conductor...

Page 7: ...the disc 1 Avoid serious scratches that could cause the laser pickup to skip 2 Do not attempt to widen the center hole in the disc It will result in damage to the disc 3 Do not write anything with a ballpoint pen or pencil on the disc level surface 1 Never use chemicals such as record sprays antistatic sprays or fluid benzine or thinner to clean compact discs Such chemicals would irreparably damag...

Page 8: ...7 ...

Page 9: ...MMC select a next track or search for a passage during play 11 REW DN key In the Radio mode for receiving frequency steps down In the CD MP3 mode USB or SD MMC to return to the start of a track select a previews track or search for a passage during play 12 PLAY PAUSE RP Key In the CD MP3 mode USB or SD MMC to start or interrupt play 13 STOP Key To stop the compact disc or clear program To select U...

Page 10: ...n 8 TIMER Key Press and hold to set the TIMER mode on 9 REPEAT key 10 RANDOM key 11 MEMORY Key 12 ALBUM PRESET Key 13 FIND ST Key 14 FF UP F key 15 VOLUME DU Key 16 STOP C key 17 BAND key 18 FUNCTION key 19 ON OFF Key CONNECTIONS A Terminals for 2 loudspeakers minimum speaker impedance 8 ohm Attach loud speaker cables to the unit Left speaker connect the wire to terminal L Right speaker connect th...

Page 11: ...select the tuner mode 3 Select the tuning range with the BAND button 4 Press REW DN B or FF UP F for few seconds then release the button The tuner will automatically search for the first transmitter of sufficient strength Repeat this procedure if you wish to select another station 5 To tune to weak stations briefly depress REW DN B or FF UP F continu ously until you read the correct frequency or t...

Page 12: ...ress STOPC 3 To interrupt play press PLAY PAUSERP 4 To resume play press PLAY PAUSERP again SELECTING A DIFFERENT TRACK DURING PLAY FOR REMOTE ONLY 1 Press REW DN B or FF UP F until the required track number appears in the display 2 MP3 CD mode only Press ALBUM PRESET or ALBUM PRESET once or more to find your desired album STARTING AGAIN WITH THE TRACK THAT IS CURRENTLY PLAYING by pressing REW DN ...

Page 13: ... Load a CD as described previously 2 Press MEMORY key to start programming 3 Press REW DN B or FF UP F to locate a particular track Press MEMORY key to store it in the memory 4 Continue this process until you have selected all the tracks you require 5 To stop programming at any time press STOP C For MP3 CD 1 Load a MP3 CD as described previously 2 Press MEMORY key to start programming 3 Press REW ...

Page 14: ...hat the apparatus can not play WMA format file SELECT USB OR SD MS MMC 1 Press FUNCTION repeatedly to select CARD USB if there s a USB and a SD MMC the SD MMC indication lights the total number of tracks albums and MP3 appear on the display 2 Press and hold STOP C button for 2 seconds the USB indication lights the total number of tracks albums and MP3 appear on the display 3 You can change the mod...

Page 15: ...he sound source 13 The volume level will appear on the display 14 Press REW DN B or FF UP F to set the desired sound level 15 Press TIMER again to store the timer setting For CD 1 Insert a disc into the CD tray 2 Press TIMER 3 Repeat steps 4 11 under For tuner for Timer setting 4 Press REW DN B or FF UP F to set the sound source to CD 5 The volume level will appear on the display 6 Press REW DN B ...

Page 16: ...cy Range MW 522 1620 KHz FM 87 5 108 MHz Compact Disc Section Frequency Response 6dB 60 15 000 Hz Signal to noise Ratio 40 dB Harmonic Distortion 1 Channel Separation 35 dB Continuous improvements are being made to our equipment both in quality and performance thus we reserve the right to alter specifications without notice ESD Remark This symbol on the product or on its packaging means that your ...

Reviews: