background image

IMPORTANT

2

Follow all warnings and instructions marked on this projection television.

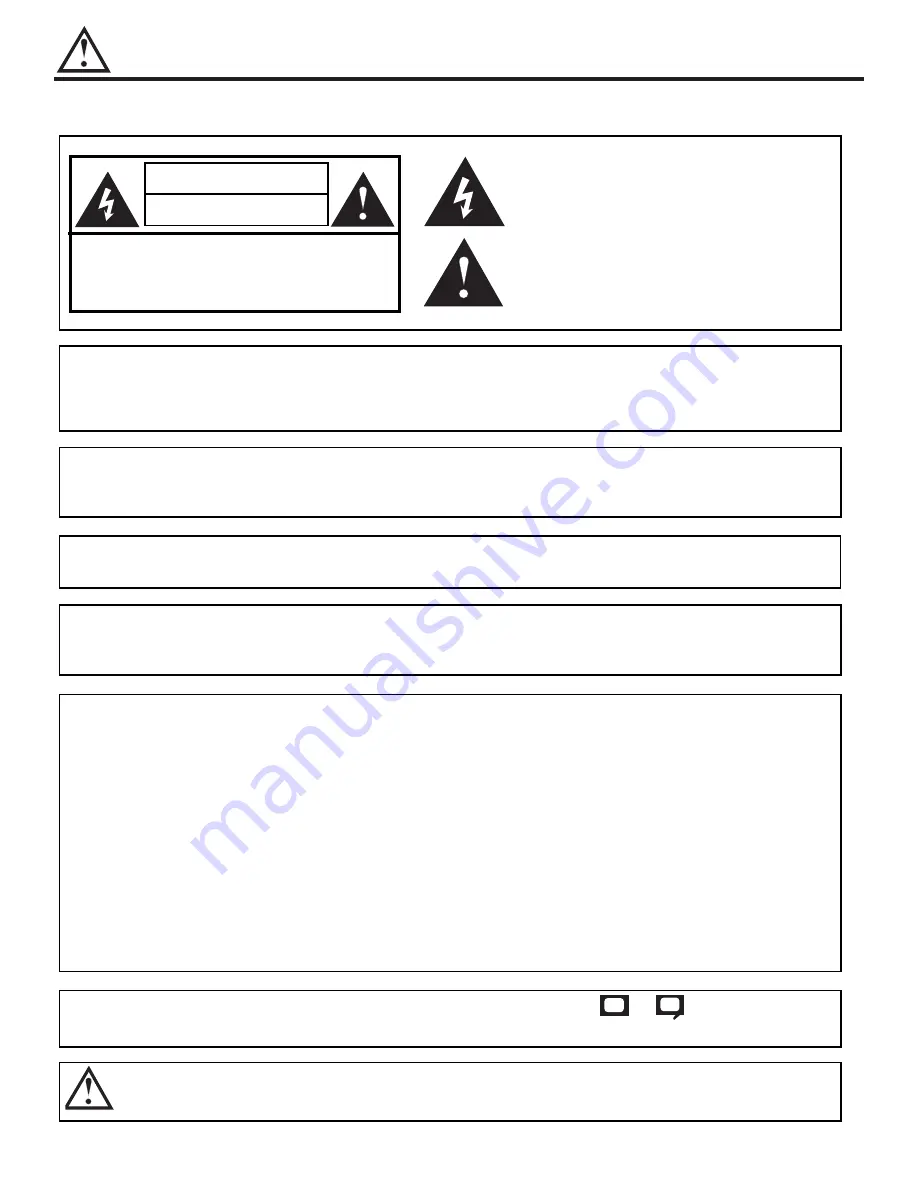
WARNING

RISK OF ELECTRIC SHOCK

DO NOT OPEN

CAUTION:  TO REDUCE THE RISK OF ELECTRIC SHOCK,

DO NOT REMOVE COVER (OR BACK).

NO USER SERVICEABLE PARTS INSIDE.

REFER SERVICING TO QUALIFIED SERVICE PERSONNEL.

The lightning flash with arrowhead symbol, within an equilateral tri-
angle, is intended to alert the user to the presence of uninsulated

dangerous voltage  within the product s  enclosure that may be of a

sufficient magnitude to constitute a risk of electric shock to persons.

The exclamation point within an equilateral triangle, is intended to
alert the user to the presence of important operating and mainte-
nance (servicing) instructions in the literature accompanying the
appliance.

WARNING:
TO PREVENT FIRE OR SHOCK HAZARD, DO NOT EXPOSE 
THIS PROJECTION TELEVISION TO RAIN OR MOISTURE.

NOTE:

¥ There are no user serviceable parts inside the television.  
¥ Model and serial numbers are indicated on back side of the television.
¥ This television is not intended for use in a computer room.

POWER SOURCE

This projection television is designed to operate on 120 volts 60Hz, AC current.
Insert power cord into a 120 volt 60Hz outlet.

TO  PREVENT ELECTRIC SHOCK, DO NOT USE THE TELEVISION S (POLARIZED)
PLUG WITH AN EXTENSION CORD, RECEPTACLE, OR OTHER OUTLET UNLESS THE
BLADES AND GROUND TERMINAL CAN BE FULLY INSERTED TO PREVENT BLADE
EXPOSURE.

NEVER CONNECT THE TELEVISION TO 50HZ, DIRECT CURRENT, OR ANYTHING
OTHER THAN THE SPECIFIED VOLTAGE.

CAUTION:

Never remove the back cover of the television as this can expose you to very high voltages and other haz-
ards. If the television does not operate properly, unplug the television and call your authorized dealer or ser-
vice shop.

NOTE:

This television receiver will display television closed captioning, (

or 

), in accordance with

paragraph 15.119 of the FCC rules.

CC

CAUTION:

Adjust only those controls that are covered in the instructions, as improper changes or modifications  not express-
ly approved by HITACHI could void the user s warranty.

MODIFICATIONS:

The FCC requires the user to be notified that any changes or modifications made to this device that
are not expressly approved by Hitachi America, Ltd. Home Electronics Division may void the user s
warranty.

Summary of Contents for 50EX01B

Page 1: ... 50EX01B 60EX01B OPERATING GUIDE IMPORTANT SAFEGUARDS 2 4 FIRST TIME USE 5 17 THE GENIUS REMOTE CONTROL ULTRATEC BIT MAP ON SCREEN DISPLAY USEFUL INFORMATION INDEX 54 58 28 53 18 27 SET UP CUSTOM VIDEO AUDIO THEATER INFO ...

Page 2: ...d for use in a computer room POWER SOURCE This projection television is designed to operate on 120 volts 60Hz AC current Insert power cord into a 120 volt 60Hz outlet TO PREVENT ELECTRIC SHOCK DO NOT USE THE TELEVISION S POLARIZED PLUG WITH AN EXTENSION CORD RECEPTACLE OR OTHER OUTLET UNLESS THE BLADES AND GROUND TERMINAL CAN BE FULLY INSERTED TO PREVENT BLADE EXPOSURE NEVER CONNECT THE TELEVISION...

Page 3: ...units To help you operate these products properly this section illustrates safety tips which will be of benefit to you Please read it carefully and apply the knowledge you obtain from it to the proper operation of your HITACHI television Please fill out your warranty card and mail it to HITACHI This will enable HITACHI to notify you promptly in the improbable event that a safety problem should be ...

Page 4: ...protection for the television during a lightning storm or when it is unused for long periods of time unplug it from the wall outlet and disconnect antenna This will prevent damage due to lightning and power line surges EXAMPLE OF ANTENNA GROUNDING AS PER NATIONAL ELECTRICAL CODE INSTRUCTIONS 19 This television should be operat ed only from the type of power source indicated on the marking label If...

Page 5: ... HL00728 2 Two AA size 1 5V batteries For Remote Control Unit REMOTE CONTROL BATTERY INSTALLATION AND REPLACEMENT 1 Open the battery cover of the remote control by pushing the notched part of the cover with your fingers and pulling the cover off 2 Insert two new AA size batteries for the remote control When replacing old batteries push them towards the springs and lift them out 3 Match the batteri...

Page 6: ...ample in direct sunlight or near a heating appliance etc VIEWING The major benefit of the HITACHI Projection Television is its large viewing screen To see this large screen at its best test various locations in the room to find the optimum spot for viewing The best picture is seen by sitting directly in front of the TV and about 10 to 18 feet from the screen Picture brightness decreases as the vie...

Page 7: ...tenna or cable TV to the antenna terminal on the television S VIDEO Super Video Connector This connector is used on camcorders VCRs and laserdisc players with an S VIDEO feature in place of the standard video cable to produce a high quality picture ANTENNA CONNECTIONS TO REAR JACK PANEL VHF 75 Ohm antenna CATV Cable TV When using a 75 Ohm coaxial cable system connect the outdoor antenna or CATV co...

Page 8: ... possible to set TV features to your preference without using the remote INPUT EXIT button Press this button to select the current antenna source VIDEO 1 or 2 Your selection is shown in the top right corner of the screen This button also serves as the EXIT button when in MENU mode VOLUME level Press these buttons for your desired sound level The volume level will be displayed on the TV screen Thes...

Page 9: ...I Artificial Intelligence sensor The Artificial Intelligence sensor will make automatic picture adjustments depending on the amount of light in the room to give the best picture see page 48 REMOTE CONTROL sensor Point your remote at this area when selecting channels adjusting volume etc ...

Page 10: ...the TV s CB input and the components R Y output to the TV s CR input It may be necessary to adjust TINT or turn AUTO COLOR ON to obtain optimum picture quality when using the Y CBCR inputs see pages 47 and 48 To ensure no copyright infringement the MONITOR OUT output will be abnormal when using the Y CBCR jacks When using the Y CBCR jacks INPUT 2 will be viewed as a blank PIP sub picture see page ...

Page 11: ...nal see tips on page 12 VCR 1 VCR 2 Stereo System Amplifier Outside antenna or cable TV coaxial cable 2 Way signal splitter V L R OUTPUT S VIDEO Laserdisc player VCR camcorder etc B R Optional see tips on page 12 MONITOR OUT AUDIO TO HI FI INPUT 2 INPUT 1 AUDIO MONO L R AUDIO MONO L R AUDIO L R S VIDEO VIDEO VIDEO VIDEO VHF UHF L R COMPONENT VIDEO Y C C S VIDEO B R STOP CONNECT ONLY 8 OHM SPEAKERS...

Page 12: ...levision Refer to the operating guide of your other electronic equipment for additional information on connecting your hook up cables A single VCR can be used for VCR 1 and VCR 2 but note that a VCR cannot record its own video or line output INPUT 1 in the example on page 11 Refer to your VCR operating guide for more information on line input output connections You may use VIDEO or COMPONENT VIDEO...

Page 13: ...peaker and distorted sound set the volume control of the audio amplifier lower and adjust the sound using the remote control of the TV set Do not connect speakers simultaneously to the REAR SPEAKER terminal of the projection TV and an external amplifier TO AUDIO INPUT TERMINAL OF EXTERNAL AMPLIFIER AUDIO AMPLIFIER EXTERNAL SPEAKERS EXTERNAL SPEAKERS REAR OF TV SET AUDIO TO HI FI TERMINAL AUDIO TO ...

Page 14: ...hen press the INPUT button as necessary to view the input source see page 21 NOTE When the TV is set to VIDEO and a video signal is not received from the VIDEO INPUT jack on the jack panel of the TV i e VCR laserdisc player etc is not connected or the video device is OFF the set will appear to be OFF CONNECTING A MONAURAL AUDIO VCR OR LASERDISC PLAYER 1 Connect the cable from the VIDEO OUT of the ...

Page 15: ...G A STEREO VCR OR STEREO LASERDISC PLAYER 1 Connect the cable from the VIDEO OUT of the VCR or the laserdisc player to the INPUT VIDEO jack on the TV set below 2 Connect the cable from the AUDIO OUT R of the VCR or the laserdisc player to the INPUT AUDIO R jack 3 Connect the cable from the AUDIO OUT L of the VCR or the laserdisc player to the INPUT AUDIO L jack 4 Press the INPUT button to view the...

Page 16: ...player to the INPUT 2 AUDIO R jack 5 Connect the cable from the AUDIO OUT L of the Laserdisc or DVD player to the INPUT 2 AUDIO L jack 6 Press the INPUT button until VIDEO 2 appears to view the program from the Laserdisc or DVD player The VIDEO 2 icon disap pears automatically after approximately eight seconds 7 Press the INPUT button to return to the previous channel NOTE Completely insert the co...

Page 17: ...O HI FI output on the TV These speakers are connected to the Rear Speaker 8 Ohm output on the TV L L L R OUT L R IN STEREO SYSTEM AMPLIFIER S S SURROUND SURROUND REQUIRED OPTIONAL EFFECT FEATURE SWITCH CONNECTION CONNECTION OFF SP MATRIX Receive Mono and Stereo sound SURROUND MATRIX SP MATRIX Receive Movie Theater like sound SURROUND EXTERNAL EXT This feature turns off the TV s SPEAKERS internal s...

Page 18: ...ons on how to program the remote to control your VCR To operate your cable satellite box point the remote at the remote sensor of the cable satellite box and press the CABLE button The remote will now control your cable satellite box See page 26 for instructions on how to program the remote to your cable satellite box These buttons allow the remote to control your TV VCR or cable satellite box dep...

Page 19: ... set on or off when the remote is in TV mode If a SPECIAL EVENT REMINDER is set it will be dis played when the TV is first turned on See page 52 CLU 436UI POWER TV CABLE VCR HELP PIPCH TV VCR PIP SWAP MOVE FRZ REC STOP PAUSE LST CH EXIT RECALL MUTE CH VOL 1 2 3 4 5 6 7 8 9 0 MENU SLEEP INPUT LIGHT ...

Page 20: ...the VOLUME up or down button until you obtain the desired sound level To reduce the sound to one half of normal volume SOFT MUTE to answer the telephone etc press the MUTE button Press the MUTE button again to turn the sound off completely MUTE To restore the sound press the MUTE button one more time or press the VOLUME Up button CHANNEL selector buttons CHANNEL selector buttons are used to set FA...

Page 21: ...ours Once set use RECALL to view time remaining If the SLEEP button is pressed while the timer is set it will reset to the original condition INPUT button The INPUT button will select between antenna signal and the two sets of video input jacks each time the button is pressed If the Picture in Picture is on the INPUT button will select between the two sets of video input jacks and antenna source w...

Page 22: ...to watch more than one program at the same time You can watch a TV program while viewing other programs from the ANTENNA source or any of the video inputs PIP button Press the PIP button and a sub picture appears in one corner of the screen Press the button again to reduce the size of the sub picture Press the PIP button a third time to remove the sub picture from the screen Use the PIP CH button ...

Page 23: ... another corner press the MOVE button The sub picture moves one step counterclockwise every time the MOVE button is pressed Example below illustrates the MOVE operation for initial shipping conditions If you have customized a PIP position the MOVE operation may differ slightly from this example ANT 10 VIDEO 1 VIDEO 1 ANT 10 ANT 10 VIDEO 1 ANT 10 VIDEO 1 ANT 10 VIDEO 1 ANT 10 VIDEO 1 SWAP MOVE MOVE...

Page 24: ...normal viewing CAUTION A pattern burn may develop if the sub picture is left in the same corner permanently If the PIP feature is used frequently occasionally MOVE the sub picture to a different corner You may also vary its position using the CURSOR or buttons NOTE 1 Only sound from the main picture can be heard 2 The FREEZE function will display blank sub pictures when the COMPONENT VIDEO Y CBCR ...

Page 25: ...e procedures your VCR s code has not been precoded into the remote 2 In the unlikely event that your VCR cannot be operated after performing the above procedures please consult your VCR operating guide 3 The remote control will remember the codes you have programmed until the batteries are removed from the remote control After replacing the batteries repeat the entire programming procedure as stat...

Page 26: ...des but note that this button may not be used for more than one component NOTES 1 If your cable box cannot be operated after performing the above procedures your cable box code has not been precoded into the remote 2 In the unlikely event that your cable box cannot be operated after performing the above procedures please consult your cable box operating guide 3 The remote control will remember the...

Page 27: ...48 49 Sears 02 07 09 15 17 22 29 31 38 61 62 Sharp 18 27 Shintom 33 Shogun 20 51 Singer 33 Sony 04 05 06 07 65 STS 61 Sunpak 65 sylvania 00 07 14 36 Symphonic 00 55 Tatung 13 Teac 00 13 Technics 07 41 Teknika 00 07 09 TMK 08 45 51 Torvision 09 51 Toshiba 14 15 29 47 49 57 Unitech 51 Vector 15 Vector Research 10 12 Video Concepts 12 15 26 Videosonic 51 Wards 00 07 17 18 24 27 33 49 51 61 64 XR 1000...

Page 28: ...light a different feature 3 Press EXIT on the remote control to quickly exit from a menu This part of the screen shows what selections are available This part of the screen shows which remote control buttons to use TO QUIT EXIT CUSTOM VIDEO AUDIO THEATER INFO SET UP MENU LANGUAGE PLUG PLAY SIGNAL SOURCE AUTO CHANNEL SET CHANNEL MEMORY CHANNEL LIST CLOCK SET CONVERGENCE ADJ HELP EXIT MENU ...

Page 29: ...TAL CONTROL Block channel picture and sound 4 EVENT PROGRAM Turn TV on and off once daily or weekly AUTO LINK Automatically turn TV on with any VIDEO input CLOSED CAPTION Feature to display dialogue text MENU BACKGROUND Select from three types of backgrounds FIRST TIME TOUR Introduces you to basic TV functions CONTRAST Adjust contrast BRIGHTNESS Adjust brightness COLOR Adjust color TINT Adjust tin...

Page 30: ...r choice Press EXIT to quit menu or CURSOR to return to previous menu MENU LANGUAGE CURSOR CURSOR EXIT EXIT EXIT CUSTOM VIDEO AUDIO THEATER INFO SET UP CUSTOM VIDEO AUDIO THEATER INFO SET UP MENU LANGUAGE ENGLISH PLUG PLAY FRANCAIS SIGNAL SOURCE ESPAÑOL AUTO CHANNEL SET CHANNEL MEMORY CHANNEL LIST CLOCK SET CONVERGENCE ADJ MENU TO MENU BAR TO QUIT MENU TO MENU BAR TO QUIT MENU TO MENU BAR TO QUIT ...

Page 31: ...CK SET CONVERGENCE ADJ QUESTION 1 MY TV SIGNAL COMES FROM A ANTENNA OR CABLE WITHOUT CABLE BOX B CABLE BOX C SATELLITE RECEIVER D SATELLITE RECEIVER WITH CABLE BOX PRESS TO SELECT PRESS TO ENTER QUESTION 2 I WANT TO CONNECT A VCR TO MY SYSTEM A YES B NO PRESS TO SELECT PRESS TO ENTER MENU TO MENU BAR TO QUIT EXIT MENU TO MENU BAR TO QUIT EXIT MENU TO MENU BAR TO QUIT EXIT MENU TO MENU BAR TO QUIT ...

Page 32: ...U BAR TO QUIT EXIT CURSOR CUSTOM VIDEO AUDIO THEATER INFO SET UP CUSTOM VIDEO AUDIO THEATER INFO SET UP CUSTOM VIDEO AUDIO THEATER INFO SET UP MENU LANGUAGE PLUG PLAY SIGNAL SOURCE ANTENNA AUTO CHANNEL SET CATV 1 CHANNEL MEMORY CATV 2 CHANNEL LIST CLOCK SET CONVERGENCE ADJ MENU LANGUAGE PLUG PLAY SIGNAL SOURCE ANTENNA AUTO CHANNEL SET CATV 1 CHANNEL MEMORY CATV 2 CHANNEL LIST CLOCK SET CONVERGENCE...

Page 33: ...ORY to add or to erase additional channels AUTO CHANNEL SET CURSOR MENU TO MENU BAR TO QUIT EXIT MENU TO MENU BAR TO QUIT EXIT MENU TO MENU BAR TO QUIT EXIT CURSOR AUTO CHANNEL SET MENU LANGUAGE PLUG PLAY SIGNAL SOURCE AUTO CHANNEL SET BEGIN CHANNEL MEMORY CHANNEL LIST CLOCK SET CONVERGENCE ADJ CUSTOM VIDEO AUDIO THEATER INFO SET UP CUSTOM VIDEO AUDIO THEATER INFO SET UP CUSTOM VIDEO AUDIO THEATER...

Page 34: ...BAR TO QUIT EXIT MENU TO MENU BAR TO QUIT EXIT CURSOR CUSTOM VIDEO AUDIO THEATER INFO SET UP CUSTOM VIDEO AUDIO THEATER INFO SET UP CUSTOM VIDEO AUDIO THEATER INFO SET UP MENU LANGUAGE PLUG PLAY SIGNAL SOURCE CHANNEL 3 AUTO CHANNEL SET ADD CHANNEL MEMORY ERASE CHANNEL LIST CLOCK SET CONVERGENCE ADJ MENU LANGUAGE PLUG PLAY SIGNAL SOURCE CHANNEL 3 AUTO CHANNEL SET ADD CHANNEL MEMORY DELETE CHANNEL L...

Page 35: ... CURSOR CURSOR CHANNEL LIST CH ID SCAN LOCK 1 ON ON 2 3 4 5 6 7 8 CHANNEL LIST CH ID SCAN LOCK 9 ON ON 10 11 12 13 14 15 16 MENU TO MENU BAR TO QUIT EXIT MENU TO MENU BAR TO QUIT EXIT MENU TO MENU BAR TO QUIT EXIT MENU LANGUAGE PLUG PLAY SIGNAL SOURCE AUTO CHANNEL SET CHANNEL MEMORY CHANNEL LIST CLOCK SET CONVERGENCE ADJ CUSTOM VIDEO AUDIO THEATER INFO SET UP CUSTOM VIDEO AUDIO THEATER INFO SET UP...

Page 36: ... CURSOR to return to previous menu when the CURSOR is in the first position CLOCK SET MENU TO MENU BAR TO QUIT EXIT CURSOR CURSOR CLOCK SET AM JAN 01 1999 CLOCK SET 12 00 PM MAR 12 2000 MENU TO MENU BAR TO QUIT EXIT MENU TO MENU BAR TO QUIT EXIT TO SET TIME TO SET TIME MENU LANGUAGE PLUG PLAY SIGNAL SOURCE AUTO CHANNEL SET CHANNEL MEMORY CHANNEL LIST CLOCK SET CONVERGENCE ADJ CUSTOM VIDEO AUDIO TH...

Page 37: ...d The process of aligning these picture beams is called convergence Over a period of time the picture tubes can drift out of alignment due to normal bumps and vibrations or moving the TV If you move your TV or if after a time you notice color rings or halos around objects in the picture you may want to converge align the colors To simplify convergence the following feature allows you to display a ...

Page 38: ...in the first position Select RESET to erase a CHANNEL ID NOTE CHANNEL ID will be displayed only when channel is displayed as main picture CHANNEL ID CURSOR MENU TO MENU BAR TO QUIT EXIT MENU TO MENU BAR TO QUIT EXIT MENU TO MENU BAR TO QUIT EXIT MENU TO MENU BAR TO QUIT EXIT MENU TO MENU BAR TO QUIT EXIT MENU TO MENU BAR TO QUIT EXIT MENU TO MENU BAR TO QUIT EXIT CURSOR VIDEO AUDIO THEATER INFO ME...

Page 39: ...nly when VIDEO input is displayed as main picture VIDEO ID MENU TO MENU BAR TO QUIT EXIT MENU TO MENU BAR TO QUIT EXIT MENU TO MENU BAR TO QUIT EXIT MENU TO MENU BAR TO QUIT EXIT CURSOR MENU TO MENU BAR TO QUIT EXIT MENU TO MENU BAR TO QUIT EXIT MENU TO MENU BAR TO QUIT EXIT MENU TO MENU BAR TO QUIT EXIT MENU TO MENU BAR TO QUIT EXIT MENU TO MENU BAR TO QUIT EXIT VIDEO ID VID 1 VID2 VIDEO LIST CUS...

Page 40: ...e channels The channel to be added is displayed in the top right corner of the screen Enter channel 00 to erase a favorite channel To reset categories and channels back to original factory preset press RECALL while you are renaming a category FAMILY FAVORITES MENU MENU TO MENU BAR TO QUIT EXIT MENU TO MENU BAR TO QUIT EXIT MENU TO MENU BAR TO QUIT EXIT MENU TO MENU BAR TO QUIT EXIT MENU TO MENU BA...

Page 41: ...sired favorite channel Select a category using CURSOR or buttons Use CURSOR or buttons to highlight a favorite channel and the TV will automatically tune to that channel Press EXIT to remove FAMILY FAVORITES OSD from the screen FAMILY FAVORITES OPERATION CURSOR MENU TO SURF TO QUIT EXIT FAMILY FAVORITES CH 12 MOVIES 3 6 8 10 ...

Page 42: ...EEKLY TV will time out one time a week or OFF to disable this function and then press cursor to select your choice MOVIE TV RATINGS are explained in detail in the Parental Control Movie TV Ratings Reference Guide To change the secret code number select CHANGE SECRET CODE Enter a new four digit key number you prefer If you forget your secret code use the factory code 7777 to erase your key number T...

Page 43: ...he ON Timer and no channel selection was made after this time If you change the channel after the ON Timer has been activated the OFF Timer will deactivate 2 If no remote control button is pressed after ON Timer is activated the TV will automatically turn off after three hours CAUTION Do not use your TV as a deterrent when away from home by using the ON and OFF TIMERS For safety the TV should be t...

Page 44: ... this function Press EXIT to quit menu or CURSOR to return to previous menu AUTO LINK NOTE 1 Once the TV has been turned on using the AUTO LINK feature it must be reset before AUTO LINK is used again To do this turn your VCR laserdisc or DVD player OFF This feature is now reset and will turn on your TV as described above 2 When using REMOTE mode any remote control button will substitute for your v...

Page 45: ...T EXIT CURSOR MENU TO MENU BAR TO QUIT EXIT VIDEO AUDIO THEATER INFO CUSTOM SET UP VIDEO AUDIO THEATER INFO CUSTOM SET UP CHANNEL ID VIDEO ID FAMILY FAVORITES PARENTAL CONTROL 4 EVENT PROGRAM AUTO LINK CLOSED CAPTION MENU BACKGROUND FIRST TIME TOUR CLOSED CAPTION DISPLAY OFF ON MODE C C TEXT CHANNEL 1 2 This function allows you to choose from three menu backgrounds Use CURSOR or to change MENU BAC...

Page 46: ...URN ON OFF POWER ON INTRODUCES YOU TO THE FIRST TIME SETUP FEATURE SHOWING YOU THE OPTIMUM SETUP GUIDE FOR YOUR PERSONALIZED SYSTEM ALWAYS SHOW FIRST TIME TOUR AT POWER ON AFTER 10 SECONDS EXIT EXIT CUSTOM VIDEO AUDIO THEATER INFO SET UP MENU LANGUAGE PLUG PLAY SIGNAL SOURCE AUTO CHANNEL SET CHANNEL MEMORY CHANNEL LIST CLOCK SET CONVERGENCE ADJ MENU TO MENU BAR TO QUIT MENU TO MENU BAR TO QUIT POW...

Page 47: ...djustments will not affect the sub picture Use this function to adjust the level of color in the picture Use this function to adjust flesh tones so they appear natural It may be necessary to adjust TINT to obtain optimum picture quality when using the COMPONENT VIDEO Y CBCR INPUT 2 jacks Use this function to adjust overall picture brightness Use this function to adjust the amount of fine detail in...

Page 48: ...ural flesh tones while preserving fidelity of background colors This function will automatically set to on and cannot be turned off when the ULTRA AI function is ON NOISE REDUCTION The NOISE REDUCTION function automatically reduces conspicuous noise in the picture without degrading picture quality This function will automatically set to on and cannot be turned off when the ULTRA AI function is ON ...

Page 49: ...cted and adjusted in the same manner This function controls the high frequency audio to all speakers This function will control the left to right balance of the TV internal speakers and the AUDIO TO HI FI output When RESET is selected press CURSOR to return audio adjustments to factory preset conditions AUDIO BASS BALANCE RESET TREBLE MENU TO MENU BAR TO QUIT EXIT CURSOR CURSOR MENU TO MENU BAR TO...

Page 50: ...R INFO CUSTOM AUDIO VIDEO SET UP THEATER INFO CUSTOM AUDIO VIDEO SET UP THEATER INFO CUSTOM AUDIO VIDEO SET UP BASS TREBLE BALANCE RESET ADVANCED SETTINGS ADVANCED SETTINGS STEREO MONO SECOND AUDIO PROGRAM INTERNAL SPEAKERS AUTO NOISE CANCEL LOUDNESS PERFECT VOLUME ADVANCED SETTINGS STEREO MONO SECOND AUDIO PROGRAM INTERNAL SPEAKERS AUTO NOISE CANCEL LOUDNESS PERFECT VOLUME INTERNAL SPEAKERS This ...

Page 51: ...pending upon the video program being viewed However if RESET is selected all modes will reset to the initial conditions as explained above When RESET is selected it will take approximately two seconds to return to factory conditions SPORTS mode Press EXIT to quit menu or CURSOR to return to previous menu Use this function to choose picture and audio settings for a true home THEATER experience Use ...

Page 52: ...ppear at the selected time 2 Each special event message can be a maximum of 20 characters 3 When the RECALL button is pressed a special icon appears on the right bottom side of the screen and indicates a SPECIAL EVENT REMINDER message Press the RECALL button again to display the SPECIAL EVENT REMINDER message SPECIAL EVENT REMINDER MENU TO MENU BAR TO QUIT EXIT CURSOR CURSOR MENU TO MENU BAR TO QU...

Page 53: ...ations as chosen in SPECIAL EVENT REMINDER see page 52 2 A special icon appears next to CALENDAR when a SPECIAL EVENT REMINDER is set CALENDAR MENU TO MENU BAR TO QUIT EXIT CURSOR MENU TO MENU BAR TO QUIT EXIT SPECIAL EVENT REMINDER CALENDAR M A R 2 0 0 0 S M T W T F S 1 2 3 4 5 6 7 8 9 10 11 12 13 14 15 16 17 18 19 20 21 22 23 24 25 26 27 28 29 30 31 VIDEO AUDIO THEATER INFO CUSTOM VIDEO AUDIO TH...

Page 54: ...r a chemically treated cloth Do not place rubber or vinyl products or cellophane tape on your television Do not touch the screen too often Do not subject the remote control to shocks such as dropping it on the floor etc Physical damage to the precision parts may result Avoid placing the remote control in a high humidity place or getting it wet Do not leave it on or near a heater Excessive heat or ...

Page 55: ...efects in the antenna system such as unshielded leads or connecting several sets to the same antenna without using multiple antenna couplers SNOW If your receiver is located in the fringe area of a television station where the signal is weak your picture may be marred by the appearance of small dots When the signal is extremely weak it may be necessary to install a special antenna to improve the p...

Page 56: ... H E C K T H E S E I T E M S A N D T R Y T H E S E A D J U S T M E N T S No Picture no sound Sound OK picture poor Picture OK sound poor Picture blurred Lines or streaks in picture Poor reception on some channels Picture rolls vertically No color Poor color B e s u r e e x t e r n a l c o n n e c t i o n i s c o r r e c t B e s u r e p o w e r c o r d i s p l u g g e d i n B e s u r e T V i s s w ...

Page 57: ...60Hz Power Consumption operating 50EX01B 146W 60EX01B 146W Power Consumption maximum 50EX01B 175W 60EX01B 175W Antenna input impedance 75 Ohm Channel coverage 181ch VHF Band 2 13 UHF Band 14 69 CATV Mid Band A 5 A 1 A I Super Band J W Hyper Band W 1 W 28 Ultra Band W 29 W 84 Video 1 0Vp p 75 Ohm S Video Luminance Y 1 0Vp p 75 Ohm Chrominance C 0 286Vp p 75 Ohm Audio input level 47k Ohm Average inp...

Page 58: ... the Hitachi Authorized Service Facility nearest you Just present proof of purchase and or delivery receipts to the Hitachi Authorized Service Facility and service will be rendered in accordance with the terms of the limited warranty as stated on your warranty card or operating guide Should you have any questions regarding warranty service operation or technical assistance please contact In Canada...

Page 59: ...NOTES 59 ...

Page 60: ...QR43664 ...

Reviews: