background image

English

   - 11 -

record the next event on the EPG. In this case, an 

OSD will be displayed, indicating the programmed 

events for recording. Press 

Stop

 button to cancel 

instant recording. 
You can not switch broadcasts or view the media 

browser during the recording mode. While recording 

a programme or during the timeshifting, a warning 

message appears on the screen if your USB device 

speed is not sufficient.

Media Browser Menu

You  can  play  photo,  music  and  movie  files  stored 

on a USB disk by connecting it to your TV. Connect 

a USB disk to one of the USB inputs located on the 

side of the TV. Pressing the 

Menu

 button while in 

the 

Media Browser

 mode will access the 

Picture

Sound

 and 

Settings

 menu options. Pressing the 

Menu

 button again will exit from this screen.


You 

can set your 

Media


Browser

 preferences by using 

the 

Settings

 Menu.

Loop/Shuffle Mode Operation

Start playback with the 

Play 

button and activate 

All files in the list will be 

continuously played in original 

order

Start playback with the 

OK 

button and activate 

The same file will be played 

continuously (repeat)

Start playback with the 

Play


button and activate 

All files in the list will be 

played once in random order

Start playback with the 

Play


button and activate 

All files in the list will be 

continuously played in the 

same random order.

Recording a Programme

IMPORTANT: 

When using a new USB hard disk drive, 

it is recommended that you first format the disk using 

your TV’s “

Format Disk

” option.

To record a programme, you should first connect a 

USB disk to your TV while the TV is switched off. You 

should then switch on the TV to enable the recording 

feature.
To use recording your USB drive should have 2 GB 

free space and be USB 2.0 compatible. If the USB 

drive is not compatible an error message will be 

displayed.
To record long duration programmes such as movies, 

it is recommended to use USB Hard disk drives 

(HDD’s).
Recorded programmes are saved into the connected 

USB disk. If desired, you can store/copy recordings 

onto  a  computer;  however,  these  files  will  not  be 

available to be played on a computer. You can play 

the recordings only via your TV.
Lip Sync delay may occur during the timeshifting. 

Radio record is supported. The TV can record 

programmes up to ten hours.
Recorded programmes are split into 4GB partitions. 

If the writing speed of the connected USB disk is not 

sufficient, the recording may fail and the timeshifting 

feature may not be available.
It is recommended to use USB hard disk drives for 

recording HD programmes.
Do not plug out the USB/HDD during a recording. This 

may harm the connected USB/HDD.
If the AC cord is unplugged while there is an active 

USB-recording timer setting, it will be cancelled.
Multipartition support is available. A maximum of two 

different partitions are supported. The first partition of 

the USB disk is used for PVR ready features. It also 

must be formatted as the primary partition to be used 

for the PVR ready features.
Some stream packets may not be recorded because 

of signal problems, as a result sometimes videos may  

freeze during playback.
Record, Play, Pause, Display (for PlayListDialog) keys 

can not be used when teletext is on. If a recording starts 

from timer when teletext is on, teletext is automatically 

turned off. Also teletext usage is disabled when there 

is an ongoing recording or playback.

Watching Recorded Programmes 

Select 

Recordings 

from the 

Media Browse

r menu. 

Select a recorded item from the list (if previously 

recorded). Press the 

OK

 button to view the 

Play 

Options

. Select an option then press 

OK

 button.

Note: Viewing main menu and menu items will not be 

available during the playback.

Press the 

Stop

 button to stop a playback and return 

to the 

Recordings

.

Slow Forward

If you press 

Pause

 button while watching recorded 

programmes, the slow forward feature will be 

available. You can use 

Rapid advance

 button to 

slow forward. Pressing 

Rapid advance

 button 

consecutively will change slow forwarding speed.

Recording Configuration

Select the 

Recording  Configuration 

item in the 

Media Browser>Settings 

menu  to  configure  the 

recording settings. 

Format Disk: 

You can use the 

Format Disk 

feature 

for formatting the connected USB disk. Your pin is 

required to use the 

Format Disk 

feature.

Note: 

Default PIN can be set to 

0000 

or 

1234. If you have 

defined  the  PIN(is  requested  depending  on  the  country 

selection) during the 

First Time Installation 

use the PIN 

that you have defined.

IMPORTANT: 

Formatting your USB drive will erase 

ALL the data on it and it’s file system will be converted 

to FAT32. In most cases operation errors will be fixed 

after a format but you will lose ALL your data.
If “USB disk writing speed too slow to record” message 

is displayed on the screen while starting a recording, 

Summary of Contents for 43HBT62

Page 1: ...CUTIUNI РЪКОВОДСТВО ЗА ЕКСПЛОАТАЦИЯ UPUTE ZA UPORABU UPUTSTVO ZA UPOTREBU PRIRUČNIK FLAT DIGITAL TV DIGITALER FLACHBILDFERNSEHER TELEVIZOR DIGITAL CU ECRAN PLAT LCD LED ТЕЛЕВИЗОР FLAT DIGITALNI TV PRIJAMNIK FLAT DIGITALNI TV ZARAVAN DIGITALNI TELEVISOR ...

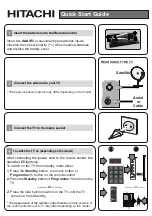
Page 2: ...differ depending on the model After connecting the power cord to the mains socket the standby LED lights up To switch on the TV from standby mode either 1 Press the Standby button a numeric button or Programme button on the remote control 2 Press the Standby button or Programme button on the TV or 2 Press the side function switch on the TV until the TV comes on from Standby and the position of The...

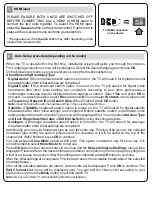
Page 3: ...ite If Satellite broadcast search option is turned on the TV will search for digital satellite broadcasts after other initial settings are completed Before satellite search is performed some settings should be made Antenna Type menu will be displayed first You can select Antenna Type as Direct Single Satellite Cable or DiSEqC switch by using directional buttons Analogue If Analogue broadcast searc...

Page 4: ... connection type Wired connection will be established automatically If wireless connection is selected TV will search for the available wireless networks and list them when finished Select one and press the OK button to connect If the wireless network is password protected you should enter the correct code to access the network Once you have established a wireless connection this will be saved and...

Page 5: ... Programmes 11 Recording Configuration 11 FollowMe TV depending on the model 12 CEC and CEC RC Passthrough depending on the model 12 E Manual depending on the model 12 General TV Operation 12 Using the Channel List 12 Configuring Parental Settings 12 Electronic Programme Guide EPG 13 Software Upgrade 13 Troubleshooting Tips 14 Connectivity Functions depending on the model 14 Supported Video File F...

Page 6: ...wer cord plug can cause fire or give you an electric shock Handle the power cord by the plug do not unplug the TV by pulling the power cord Never touch the power cord plug with wet hands as this could cause a short circuit or electric shock Never make a knot in the power cord or tie it with other cords When damaged it must be replaced this should only be done by qualified personnel Do not use this...

Page 7: ...battery is swallowed it can cause severe internal burns in just 2 hours and can lead to death Keep new and used batteries away from children If the battery compartment does not close securely stop using the product and keep it away from children If you think batteries might have been swal lowed or placed inside any part of the body seek immediate medical attention i CLASS 1 LASER PRODUCT WARNING N...

Page 8: ...2 11n WIFI Support via USB dongle Audio Video Sharing Functions and features may vary in accordance with the model Notification TRADEMARK ACKNOWLEDGMENT Manufactured under license from Dolby Laboratories Dolby and the double D symbol are trademarks of Dolby Laboratories The terms HDMI and High Definition Multimedia Interface and the HDMI Logo are trademarks or registered trademarks of HDMI Licensi...

Page 9: ...teries including those which are heavy metal free should not be disposed of with household waste Please dispose of used batteries in an environmentally friendly manner Find out about the legal regulations which apply in your area Don t try to recharge batteries Danger of explosion Replace batteries only with the same or equivalent type The above mark is in compliance with the Waste Electrical and ...

Page 10: ...e digital TV where available 12 Rapid reverse Moves frames backwards in media such as movies 13 Pause Pauses the media being played starts timeshift recording 14 Record Records programmes 15 Play Starts to play selected media 16 Stop Stops the media being played 17 Rapid advance Moves frames forward in media such as movies 18 Subtitles Turns subtitles on and off where available 19 Screen Changes t...

Page 11: ...ts devices up to 500mA Connecting devices that have current value above 500mA may damage your TV By connecting an HDMI cable to your TV you have to use only a shielded HDMI cable to guarantee a sufficient immunity against parasitic frequency radiation If you want to connect a device to the TV make sure that both the TV and the device are turned off before making any connection After the connection...

Page 12: ...socket located on the back of the TV Satellite and Cable connection are dependent on the model USB Connection You can connect USB devices to your TV by using the USB inputs of the TV This feature allows you to display play JPG MP3 and video files stored in a USB stick It is possible that certain types of USB devices e g MP3 Players may not be compatible with this TV You should back up your files b...

Page 13: ...by mode standby LED can blink to indicate that features such as Standby Search Over Air Download or Timer is active The LED can also blink when you switch on the TV from standby mode First Time Installation depending on the model When turned on for the first time the language selection screen is displayed Select the desired language and press OK On the next screen set your preferences using the di...

Page 14: ...vices and related satellites transponders in TV to a USB device Additionally you can download one of the SatcoDx files stored in USB device to the TV When you select one of these files all services and related satellites and transponders in the selected file will be stored in the TV If there are any installed terrestrial cable and or analog services they will be kept and only satellite services wi...

Page 15: ...are split into 4GB partitions If the writing speed of the connected USB disk is not sufficient the recording may fail and the timeshifting feature may not be available It is recommended to use USB hard disk drives for recording HD programmes Do not plug out the USB HDD during a recording This may harm the connected USB HDD If the AC cord is unplugged while there is an active USB recording timer se...

Page 16: ...ce System Audio Control Allows an Audio Amplifier Receiver to be used with the TV The volume can be controlled using the remote control of the TV To activate this feature set the Speakers option in the System Options More menu as Amplifier The TV speakers will be muted and the sound of the watched source will be provided from the connected sound system Note The audio device should support System A...

Page 17: ...t or source is not available during a recording Now Next Schedule Options OK button Displays event options Event Details Info button Displays detailed information about selected events Filter Blue button Views filtering options Rec Stop Record button The TV will start to record the selected events You can press again to stop the recording IMPORTANT Connect a USB disk to your TV while the TV is swi...

Page 18: ...ssible that no device is connected If not Check the AV cables and connections if you have tried to connect a device Recording unavailable To record a programme you should first connect a USB disk to your TV while the TV is switched off You should then switch on the TV to enable recording feature If you cannot record try switching off the TV and then re inserting the USB device USB is too slow If a...

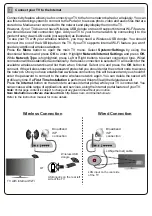
Page 19: ...ss the content in your device For this your mobile device must have an appropriate sharing software Connect your mobile device to the router modem and then activate the sharing software on your mobile device Then select files that you want to share with your TV If the connection is established correctly you will be able to access the shared files from your mobile device via the Media Browser of yo...

Page 20: ...V Plug the wireless USB dongle to TV first if the TV doesn t have internal WiFi feature Then press the Source button on the remote and switch to Wireless Display source A screen appears stating that the TV is ready for connection Open the sharing application on your mobile device These applications are named differently for each brand please refer to the instruction manual of your mobile device fo...

Page 21: ...ion depends on the connection speed provided by your internet service provider Press Internet button on the remote to open internet portal page You will see icons of the available applications and services on the portal screen Use the navigaiton buttons on your remote to select the desired one You may view the desired content by pressing OK after selecting Press BACK RETURN button to return back t...

Page 22: ...Typical Display Modes The following table is an illustration of some of the typical video display modes Your TV may not support all resolutions Index Resolution Frequency 1 640x350 85Hz 2 640x400 70Hz 3 640x480 60Hz 4 640x480 66Hz 5 640x480 72Hz 6 640x480 75Hz 7 640x480 85Hz 8 800x600 56Hz 9 800x600 60Hz 10 800x600 70Hz 11 800x600 72Hz 12 800x600 75Hz 13 800x600 85Hz 14 832x624 75Hz 15 1024x768 60...

Page 23: ...0fps 62 5 Mbps 1080P 60fps 62 5 Mbps Motion JPEG 640x480 30fps 10 Mbps Other 1080P 30fps 40 Mbps avi MPEG1 2 MPEG4 Sorenson H 263 H 263 H 264 WMV3 Motion JPEG mkv MPEG1 2 MPEG4 H 263 H 264 WMV3 Motion JPEG asf Sorenson H 263 H 264 WMV3 Motion JPEG flv WMV3 1080P 30fps 40 Mbps swf RV30 RV40 1080P 30fps 40 Mbps wmv Supported Picture File Formats for USB Mode Image Photo Resolution width x height Rem...

Page 24: ...2 8Kbps 384Kbps MPEG1 2 Layer3 8Kbps 320Kbps WMA 128bps 320Kbps 8KHz 48KHz WMA 10 Pro M0 192kbps 48KHz WMA 10 Pro M1 384kbps 48KHz WMA 10 Pro M2 768kbps 96KHz mkv mka MPEG1 2 Layer1 32Kbps 448Kbps 16KHz 48KHz MPEG1 2 Layer2 8Kbps 384Kbps MPEG1 2 Layer3 8Kbps 320Kbps AC3 32Kbps 640Kbps 32KHz 44 1KHz 48KHz AAC HEAAC 8KHz 48KHz WMA 128bps 320Kbps 8KHz 48KHz WMA 10 Pro M0 192kbps 48KHz WMA 10 Pro M1 3...

Page 25: ...32Kbps 640Kbps 32KHz 44 1KHz 48KHz AAC HEAAC 8KHz 48KHz swf MPEG1 2 Layer3 8Kbps 320Kbps 16KHz 48KHz ec3 EAC3 32Kbps 6Mbps 32KHz 44 1KHz 48KHz rm rmvb ra AAC HEAAC 8KHz 48KHz LBR cook 6Kbps 128Kbps 8KHz 11 025KHz 22 05KHz 44 1KHz wma wmv WMA 128bps 320Kbps 8KHz 48KHz WMA 10 Pro M0 192kbps 48KHz WMA 10 Pro M1 384kbps 48KHz WMA 10 Pro M2 768kbps 96KHz webm VORBIS Up to 48KHz Supported Subtitle File ...

Page 26: ...cable not supplied you can refer to the following resolution information 56Hz 60Hz 66Hz 70Hz 72Hz 75Hz 640x400 þ 640x480 þ þ þ þ 800x600 þ þ þ þ þ 832x624 þ 1024x768 þ þ þ þ þ 1152x864 þ þ þ 1152x870 þ 1280x768 þ þ 1360x768 þ 1280x960 þ þ 1280x1024 þ þ 1400x1050 þ þ 1440x900 þ þ 1600x1200 þ 1680x1050 þ 1920x1080 þ 1920x1200 þ ...

Page 27: ...content provider directly Hitachi is not responsible for providing customer service in relation to content or services and accepts no liability in this regard DVB functionality information This DVB receiver is only suitable for use in the country which it was designed to be used in Although this DVB receiver conforms to the latest DVB specifications at the time of manufacture we cannot guarantee c...

Reviews: