background image

 English

- 14 -

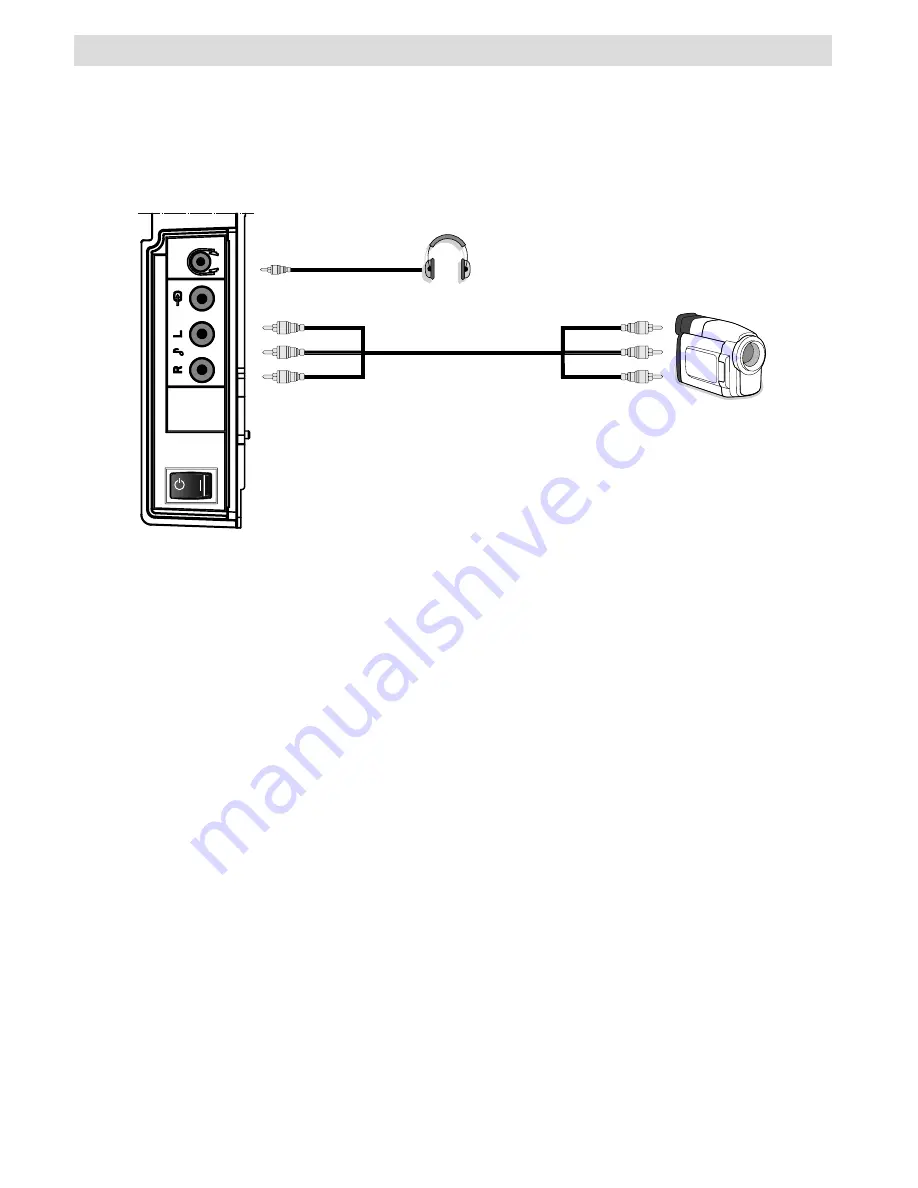
Using Side AV Connectors 

You can connect a range of optional equipment to your LCD TV. Possible connections are shown 
below. Note that cables shown in the illustration are not supplied. 

• For connecting a camcorder, connect to the VIDEO IN socket and the AUDIO SOCKETS. For 

selecting the related source, see the section “Input selection” in the following parts. 

• To listen the TV sound from headphones, connect to the HEADPHONE jack of theTV. 

Camcorder

Headphone

SIDE VIEW 

Summary of Contents for 32LD30U

Page 1: ...32LD30U GB Instructions for use 32 LCD Colour Television ...

Page 2: ... Programme Guide EPG 20 Displaying the Subtitles 20 Digital Teletext for UK only 21 Widescreen 21 IDTV Menu System 21 Channel List 21 Navigating the Entire Channel List 22 Moving the channels in the channel list 22 Deleting the Channels in the Channel List 22 Renaming Channels 22 Adding Locks to Channels 23 Setting Favourites 23 How to Add a Channel to a Favourites List 23 Removing a Channel from ...

Page 3: ...zontal Position 35 V Vertical Position 35 Phase 36 Dot Clock 36 PC Picture Menu 36 Sound Menu 36 Feature Menu 36 Source Menu 36 Mute Function 36 PIP Picture in Picture and PAP Picture and Picture Modes 36 Freezing Picture 37 Zoom Modes 37 Auto 37 16 9 37 4 3 37 Panoramic 37 14 9 37 Cinema 37 Subtitle 37 Tips 38 Screen Care 38 Image Persistence 38 No Power 38 Poor Picture 38 No Picture 38 Sound 39 ...

Page 4: ...tomatic programming system Forward or backward automatic tuning Sleep timer Child lock A u t o m a t i c s o u n d m u t e w h e n n o transmission NTSC playback PIP PAP PAT functions AVL Automatic Volume Limiting When no valid signal is detected after 5 minutes the TV switches itself automatically to standby mode PLL Frequency Search PC input Plug Play for Windows 98 ME 2000 XP Vista Audio line o...

Page 5: ...shock When it is damaged and needs to be replaced it should be done by qualified personnel Moisture and Water Do not use this device in a humid and damp place avoid the bathroom the sink in the kitchen and near the washing machine Do not expose this device to rain or water as this may be dangerous and do not place objects filled with liquids such as vases on top Avoid dripping or splashing If any s...

Page 6: ... 002 9 6 EC WEEE The mark indicates the requirement NOT to dispose the equipment including any spent or discarded batteries as unsorted municipal waste but use the return and collection systems available If the batteries or accumulators included with this equipment display the chemical symbol Hg Cd or Pb then it means that the battery has a heavy metal content of more than 0 0005 Mercury or more t...

Page 7: ...own 7 TV Digital TV 8 Mono Stereo Dual I II 9 Programme up down 10 Numeric buttons 11 Exit in DTV mode 12 Hold in TXT mode PIP position 13 Update in TXT mode PAP mode 14 Index page Guide in DTV mode 15 Reveal in TXT mode Switch from TV to 16 PC Green Picture menu Page down in 17 DTV mode Red Sound menu Page up in DTV 18 mode Menu on off 19 Ok Confirm 20 Cursor Left 21 AV Source 22 Info 23 Volume up...

Page 8: ...English 7 LCD TV and Operating Buttons FRONT VIEW REAR VIEW SIDE VIEW P CH TV AV MENU P CH TV AV MENU Standby button 1 TV AV button 2 MENU button 3 Programme Up 4 Down buttons Volume Up Down 5 buttons ...

Page 9: ...with a stereo phono to phono cable 4 SCART 2 inputs or outputs for external devices 5 SCART 1 inputs or outputs for external devices Connect the SCART cable between SCART sockets on TV and SCART socket on your external device such as a decoder a VCR or a DVD player Note If an external device is connected via the SCART sockets the TV will automatically switch to AV mode If both sockets are employed...

Page 10: ...cts to an aerial Note that if you use a decoder or a media recorder you should connect the aerial cable through the device to the television with an appropriate aerial cable as shown in the illustration on the following pages 10 PC Input is for connecting a personal computer to the TV set Connect the PC cable between the PC INPUT on the TV and the PC output on your PC 11 HDMI 2 HDMI Input HDMI Inp...

Page 11: ...Video Input is used for connecting video signals 3 from external devices Connect the video cable between the VIDEO IN socket on the TV and the VIDEO OUT jack on your device Audio Inputs are used for connecting audio signals 4 from external devices Connect the audio cable between AUDIO IN on the TV and the AUDIO OUTPUT jacks on your device Note If you connect a device to the TV via the VIDEO INPUT ...

Page 12: ...C 50 Hz After unpacking allow the TV set to reach the ambient room temperature before you connect the set to the mains Plug the power cable to the mains socket outlet Aerial Connection Connect the aerial or cable TV plug to the AERIAL INPUT socket located at the rear of the TV REAR VIEW ...

Page 13: ...g any connections Use 15 pin D sub display cable to connect a PC to the LCD TV When the connection is made switch to PC source See Input selection section Set the resolution that suits your viewing requirements Resolution information can be found in the appendix section REAR VIEW PC audio cable not supplied to AUDIO INPUTS on the TV PC RGB cable not supplied to PC input Audio Inputs PC Input ...

Page 14: ...DVD player as illustrated below switch to HDMI source See Input Selection section Most DVD players are connected through SCART sockets Use a scart cable to connect as shown below You may also connected through COMPONENT sockets Use a component video cable to connect video input For enabling audio use a component audio cable as illustrated below When done switch to YPbPr source See Input selection ...

Page 15: ...Note that cables shown in the illustration are not supplied For connecting a camcorder connect to the VIDEO IN socket and the AUDIO SOCKETS For selecting the related source see the section Input selection in the following parts To listen the TV sound from headphones connect to the HEADPHONE jack of theTV Camcorder Headphone SIDE VIEW ...

Page 16: ...ly standardized as red and white While inserting jacks audio cable s jacks colours and the colours of the audio connectors on the TV should match After connecting the cable between your TV and external speakers turn your TV on You can refer to your speaker set s instruction manual for further information For connecting a to a device that has SPDIF support use an appropriate SPDIF cable to enable s...

Page 17: ...er a VCR or a decoder to your LCD TV by using the SCART sockets Note that cables shown in the illustration are not supplied Power off both the TV and the devices before making any connections For more information refer to your device s own instruction book REAR VIEW Scart sockets Decoder DVD Recorder Video Recorder ...

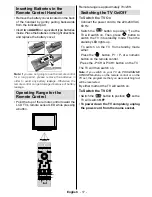
Page 18: ...KL MNO PQR STU VWX YZ M P P TV DTV i I II INFO V P PP 0 1 2 3 4 5 6 7 8 9 PC OK RC 1205 Remote range is approximately 7m 23ft Switching the TV On Off To Switch the TV On Connect the power cord to the 220 240V AC 50 Hz Switch the button to position so the TV will switch on Then press button to switch the TV into standby mode Then the standby LED lights up To switch on the TV from standby mode eithe...

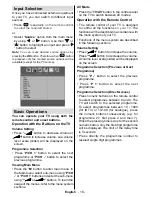
Page 19: ...learn the usage of the menus refer to the menu system sections AV Mode Press the TV AV button in the control panel on the TV to switch between AV modes Operation with the Remote Control The remote control of your TV is designed to control all the functions on your TV The functions will be described in accordance with the menu system of your TV Functions of the menu system are described in the foll...

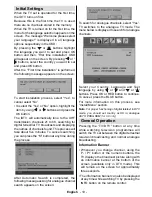
Page 20: ...es To cancel searching you can press the M button at any time during the process After Automatic Search is completed the following message asking for analogue channel search appears on the screen To search for analogue channels select Yes TV switches to the analogue TV mode The menu below is displayed to search for analogue channels Select your Country Language and Text language by using or and or...

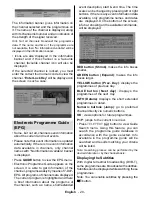
Page 21: ...splayed The current program is highlighted and there is brief information about the programs of the channel such as name short extended event description start end time The time scale can be changed by pressing left or right buttons If there is any event information data available only programme names and dates are displayed On the bottom of the screen info bar showing all the available commands w...

Page 22: ...on to digital teletext broadcasting together with the normal broadcasting there are also channels with just digital teletext broadcasting The aspect ratio picture shape when watching a channel with just digital teletext broadcasting is the same as the aspect ratio of the picture viewed previously When you press the TELETEXT button again the digital teletext screen will be displayed Widescreen Depe...

Page 23: ...ndicate that a channel number should be entered using the numeric buttons Note If you enter the programme number of the channel that you want to move channel services will be replaced Do you want to continue OSD will be displayed Press OK to confirm or select No to cancel Deleting the Channels in the Channel List Press or button to select the channel that will be deleted Press or button to select t...

Page 24: ...urites item at the bottom of the Channel List menu Then press OK button Favourite Lists menu appears on the screen You can list your favourite channels using List 1 List 2 List 3 List 4 or List 5 Using 5 lists enables listing channels for different categories sport music etc And by activating the favourites list number that you want in Favourite Mode submenu of Configuration menu you enable only t...

Page 25: ...that you connect to your TV s Ext Out When the timer is due output will be provided via the TV Out and the recording can be performed by the connected recorder that you have set Common Interface Press the M button to display the main menu and use the or button to highlight the Common Interface line and press the OK button Some Digital Terrestrial channels operate on a Pay Per View basis These requ...

Page 26: ... this setting on Hard of Hearing for EU countries only Use or button to select Hard of Hearing and then press or button to set this setting as On or Off If the broadcaster enables any special signal concerning the audio you can set this setting as On to receive such signals Favourite Mode This function enables or disables the 5 favourite channel list mode by pressing or buttons and OK If a favouri...

Page 27: ...r the menu A dialog box asking for the lock key will be displayed The key is set to 0000 initially Enter lock key If it is incorrect Wrong Pin OSD will be displayed If it is correct the Parental Control menu will be displayed Maturity Lock Whenset thisoptiongetsthematurityinformation from the broadcast and if this maturity level is disabled does not show video audio Menu Lock In menu lock you can ...

Page 28: ...tles Installation The Installation menu is mainly intended to help you for creating a Channel Table in the most efficient way Select Installation from the Configuration menu by pressing or buttons This menu includes the following items Automatic channel scan Manual Channel Scan First Time Installation Automatic Channel Scan Automatic channel scan is started by pressing OK button while Automatic chan...

Page 29: ...will be asked whether or not to delete the settings Selecting Yes by pressing OK button while the Yes is highlighted will delete the existing channel table Then you will be asked to confirm for deleting all channels and settings By selecting Yes and pressing the OK button the existing channel table will be deleted After factory settings are loaded First Time Installation menu will be displayed The ...

Page 30: ... button to select the desired option Press or button to set the level Note Hue option is only be visible when the TV receives an NTSC signal Colour Temp Press or button to select Colour Temp Press or to choose from one of these options Cool Normal and Warm Note Setting Cool option gives white colours a slight blue stress Setting Warm option gives white colours a slight red stress For normal colour...

Page 31: ...change the preset In equalizer menu the preset can be changed to Music Movie Speech Flat Classic and User Select the desired frequency by pressing or button and increase or decrease the frequency gain by pressing or button Press the M button to return to the previous menu Note Equalizer menu settings can be changed only when the Equalizer Mode is in User Balance This setting is used for emphasizin...

Page 32: ...rent sound system is stereo switching this effect on will give a more spatial effect Press or button to select Effect Press or button to set as On or Off Store Press or button to select Store Press or OK button to store the settings Stored will be displayed on the screen Feature Menu Pip Pap In the Feature menu highlight PIP item by pressing or buttons Press button to enter PIP submenu Using or bu...

Page 33: ...when the menu screen is not visible Language Press or button to select Language Use or button to select the Language Default Zoom While zoom mode is set as AUTO the TV will set the zoom mode in accordance with the signal of the broadcast If there is no WSS or aspect ratio information the TV will then use this setting to adopt Press or button to select Default Zoom You can set Default Zoom to Panor...

Page 34: ...r button to set Band Channel Channel can be changed by or button or numeric buttons Colour System Press or button to select Colour System Use or button to change the colour system to PAL PAL 60 SECAM or AUTO Sound System Press or button to select Sound System Press or button to change the sound system to BG DK I L or L Fine Tune Press or button to select Fine Tune Press or button to adjust the tun...

Page 35: ...ect the programme and press the RED button The first letter of the selected name will be highlighted Press or button to change that letter and or button to select the other letters By pressing the RED button you can store the name NB You can also use the alpha numeric buttons on the remote control to change the name Insert Select the programme which you want to insert by navigation buttons Press th...

Page 36: ...ecting a PC to the TV set For switching to PC source press button on your remote control and select PC input You can also use Source menu to switch to PC mode Note that PC mode menu settings are available only while the TV is in PC source PC Position Menu Press Menu button Select the first icon by pressing or button PC Position menu appears on the screen Autoposition If you shift the picture horiz...

Page 37: ...rce Menu section in Menu System Displaying TV Information Programme Number Programme Name Sound Indicator and Zoom Mode information is displayed on the screen when a new programme is entered or INFO button is pressed Mute Function Press button to disable sound Mute indicator will be displayed in the upper side of the screen To cancel mute there are two alternatives the first one is pressing the but...

Page 38: ...signal or the signal from an external device the TV automatically changes the ZOOM mode according to the WSS signal When the AUTO mode does not function correctly due to poor WSS signal quality or when you want to change the ZOOM mode change to another ZOOM mode manually 16 9 This uniformly stretches the left and right sides of a normal picture 4 3 aspect ratio to fill the wide TV screen For 16 9 a...

Page 39: ...coded and can be selected by pressing the coloured buttons Press a coloured button that corresponds to with your needs The coloured writings will appear showing you which coloured buttons to use when TOP text transmission is present Pressing P or P commands will request the next or previous page respectively Tips Screen Care Clean the screen with a slightly damp soft cloth Do not use abrasive solv...

Page 40: ...ound You can not hear any sound Did you perhaps interrupt the sound pressing the button Sound is coming from only one of the speakers Is the balance set to one extreme See Sound Menu Remote Control Your TV no longer responds to the remote control Perhaps the batteries are exhausted If so you can still use the local buttons at the side of the TV Input Sources If you cannot select an input source it...

Page 41: ...0 60 37 9 VESA 16 9 4 3 13 800 600 70 43 8 16 9 4 3 14 800 600 72 48 1 VESA 16 9 4 3 15 800 600 75 46 9 VESA 16 9 4 3 16 800 600 85 53 7 VESA 16 9 4 3 17 832 624 75 49 7 MAC 16 9 4 3 18 1024 768 43 35 5 VESA interlace 16 9 4 3 19 1024 768 60 48 4 VESA 16 9 4 3 20 1024 768 70 56 5 VESA 16 9 4 3 21 1024 768 72 57 7 16 9 4 3 22 1024 768 75 60 0 16 9 4 3 23 1024 768 85 68 3 16 9 4 3 24 1152 864 60 53 ...

Page 42: ...0P 60Hz O 1080I 50Hz O 1080I 60Hz O 1080P 24Hz O 1080P 50Hz O 1080P 60Hz O HDMI1 HDMI2 480I 60Hz O 480P 60Hz O 576I 50Hz O 576P 50Hz O 720P 50Hz O 720P 60Hz O 1080I 50Hz O 1080I 60Hz O 1080P 50Hz O 1080P 60Hz O 1080P 24 HZ O X Not Available O Available Note In some cases a signal on the LCD TV may not be displayed properly The problem may be an inconsistency with standards from the source equipmen...

Page 43: ...Not used 21 GND SHIELD CHASSIS 11 RGB G IN HDMI connector pin specifications Pin Input signal Pin Input signal 1 TMDS Data2 11 TMDS Clock Shield 2 TMDS Data2 Shield 12 TMDS Clock 3 TMDS Data 2 13 CEC 4 TMDS Data 1 14 Reserved N C on device 5 TMDS Data1 Shield 15 SCL 6 TMDS Data1 16 SDA 7 TMDS Data0 17 DDC CED Ground 8 TMDS Data0 Shield 18 5V Power 9 TMDS Data0 19 Hot Plug Detect 10 TMDS Clock Signa...

Page 44: ... 9 8 8 9 9 YPbPr 9 9 9 9 9 9 9 9 8 9 PC VGA 9 9 9 9 9 9 9 9 9 8 RGB This indicates that selection is possible only if Scart 1 has a RGB signal Restrictions Scart 1 source must have RGB signal to perform PIP PAP with sources TV Scart 2 Scart 2 S FAV If these sources are set to main window and Scart 1 does not have a RGB signal Pip Pap source can not be switched to the Scart 1 source If scart 1 sour...

Page 45: ...EU models Transmission standard DVB T MPEG 2 Demodulation COFDM with 2K 8K FFT mode FEC all DVB modes Video MP ML PAL 4 3 16 9 Audio MPEG Layer I II 32 44 148kHz NUMBER OF PRESET CHANNELS 200 CHANNEL INDICATOR On Screen Display RF AERIAL INPUT 75 Ohm unbalanced OPERATING VOLTAGE 220 240V AC 50 Hz AUDIO German Nicam Stereo AUDIO OUTPUT POWER WRMS 10 THD 2 x 8 POWER CONSUMPTION W 180 W max 1 W Stand...

Page 46: ...your TV or connect the aerial through a VCR Aerial RF Socket wall socket wall socket Aerial RF Lead Aerial RF Lead It is recommended that a scart lead should be fitted between your TV and VCR to enhance your picture and sound quality Scart leads are essential if you have a stereo TV and VCR and wish to obtain stereo sound from your equipment These leads can be purchased from your Hitachi dealer or...

Page 47: ...MI and YPBPR products DVD RW DVD RECORDER COMPONENT Y PR PB ANT IN ANTENNA HDMI OUT RF connector lead Device to TV wall socket Aerial RF Lead Aerial RF Socket High Definition Your LCD Television is capable of displaying High Definition pictures from devices such as a High Definition Satellite Receiver or DVD Device These devices must be connected via the HDMI socket or Component Socket TFT LCD TV ...

Page 48: ...nt of the set will illuminate red Press Operate Standby or up down P P or numeric buttons 1 2 3 to operate insert plug European plug and switch on insert plug UK plug Programme Up Volume Up Volume Down Programme Down To select a programme number To enter the main menu For navigation of the menus EXIT GUIDE WIDE ABC DEF GHI JKL MNO PQR STU VWX YZ M P P TV DTV i I II INFO V P PP 0 1 2 3 4 5 6 7 8 9 ...

Page 49: ...ase refer to the Install Menu u section of the instruction book When the TV is turned on for the first time the menu for the language selection appears on the screen The message Welcome please select your language is written in all language options sequentially in the menu on the screen By pressing or buttons highlight the language you want to set and press OK K After then First time Installation ...

Page 50: ...cios Trade Torre Este GERMANY 08028 Barcelona Tel 211 5283 808 SPAIN Fax 211 5283 809 Tel 0034 934 092 5 50 Hotline 0180 551 25 51 12ct min Email garantias ltr hitachi es Email Service germany hitachi eu com HITACHI EUROPE S r l HITACHI EUROPE AB Via T Gulli 39 Frösundaviks Alle 15 20147 MILANO 169 29 Solna ITALY SWEDEN Tel 39 02 2570094 Sweden Tel 46 856 27 1100 Fax 39 02 25712029 Finland Tel 358...

Reviews: