Hisense LCD3201EU User Manual Download Page 14

Innovation  is  life

CHANGE PASSWORD

Using the TV features

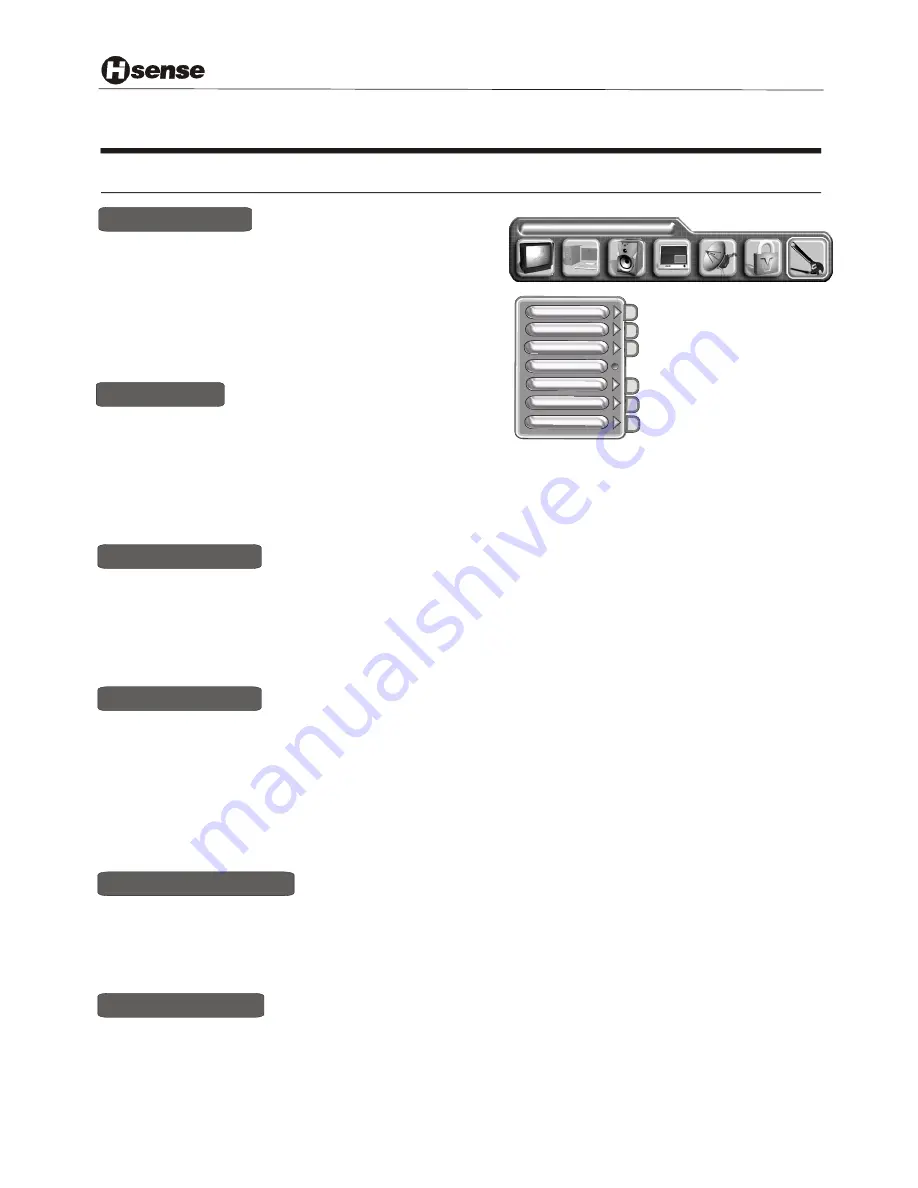
Using the GENERAL  SETTINGS  menu

LANGUAGE              ENGLISH

GENERAL  SETTINGS

OSD POSITION

COLOUR SYSTEM

OSD LANGUAGE

BLANK

TRANSPARENCY

SLEEP TIMER

DEINTERLACER

1) Press the MENU button to enter the main menu.
2) Press the [VOL+ or VOL-] button to select the item GENERAL SETTINGS.
3) Press the [CH+ or CH-] button to select BLANK
4) Press the  [ VOL+]  button to enable the BLANK 
NOTE: When you enable the blank,the screen will turn into blue screen saver mode in case of valid input 
           signal, The screen will turn into auto screen saver mode several seconds later,and into stand-by mode 15
           minutes later.

BLANK 

You can set colour syetem.
1) Press the [MENU] button to enter the main menu.
2) Press the 

button to select the item GENERAL SETTINGS

3) Press the 

button to select colour system .and press

    the [VOL+] button to enter colour system
4) Press the 

 button to switch among AUTO, PAL ,SECAM.

[VOL+ or VOL-]

[VOL+ ]


[CH+ or CH-] 

Colour  system

1) Press the [MENU] button to enter the main menu.
2) Press the 

 button to select the item GENERAL

    SETTINGS
3) Press the 

 button to select OSD POSITION

4) Press the 

 button  to

    adjust the OSD POSITION

[VOL+ or VOL-]

[VOL+ or VOL- or CH+ or CH-]

[CH+ or CH-]

OSD POSITION

1) Press the MENU button to enter the main menu.
2) Press the [VOL+ or VOL-] button to select the item GENERAL SETTINGS
3) Press the [CH+ or CH-] button to select SLEEP TIMER
4) Press the  [ VOL+-]  button to adjust the SLEEP TIMER

SLEEP TIMER

1) Press the MENU button to enter the main menu.
2) Press the [VOL+ or VOL-] button to select the item GENERAL SETTINGS
3) Press the [CH+ or CH-] button to select TRANSPARENCY
4) Press the  [ VOL+ or VOL-]  button to adjust the volume of transparency

TRANSPARENCY

1) Press the MENU button to enter the main menu.
2) Press the [VOL+ or VOL-] button to select the item GENERAL SETTINGS.
3) Press the [CH+ or CH-] button to select OSD LANGUAGE,and press the [VOL+]]button 
    to enter the OSD LANGUAGE
4) Press the  [ VOL+]  button to select the language what you want use.

OSD LANGUAGE

-13 -

Summary of Contents for LCD3201EU

Page 1: ...LCD3201EU USER S MANUAL LCD COLOUR TV Part No IES040723...

Page 2: ...ntsafeguard 2 PreparationforyournewTV 3 SelectingalocationfortheTV 3 LearningaboutyourTV 3 ConnectingyourTV 4 ConnectingtoA Vequipments 4 Connectingtoacomputer 5 Connectingtoanantenna 5 Usingtheremote...

Page 3: ...g appliances Do not allow cord to become knotted or tangled Do not lengthen the cord When removing the power plug from the socket always hold onto the plug never pull by the cord WARNING Do not remove...

Page 4: ...for Using your new TV Learning about your TV You can operate yourTV by using the buttonson the front panel or theremote control Theterminals on the back panel provideall the connectionsyou will needto...

Page 5: ...YPBPR YCBCR input PC VGAinput DVI input PC audio input CATV antenna input Audio AMP output L Audio AMP output R AV Video input Headphone output AV audio input RS232C DEBUG input AC Power Socket 1 1 2...

Page 6: ...door antenna is not needed Connect the equipments as the following figure Connecting to an antenna 5 PC NB To VGA To speaker RGB line Audio line You can use yourTV as a monitor speakers for connecting...

Page 7: ...ispose of your batteries in a designated disposal area Do not throw batteries into fire 2 Do not mix battery types or combine used batteries with new ones 3 Remove dead batteries immediately to preven...

Page 8: ...t sound mode Text Enter exit Teletext mode Red Green Yellow Cyan buttons Fasttext 4 4 8 8 3 3 7 7 2 2 6 6 0 0 1 1 5 5 9 9 Text Recall P Mode S Mode Mute Mute the sound Mute Menu VOL VOL CH CH Power Di...

Page 9: ...at you unplug the power from the outlet and then turn blue Several seconds later TV picture will display on the screen remote control to make Power ON OFF Innovation is life 8 POWER BUTTON STANDBY POW...

Page 10: ...VOL or VOL To select a channel Press the channel numbers in series to select channel directly Press the button 1 and 1_ _ will display on the top right corner of the screen then press the button 2 12...

Page 11: ...nter the main menu 2 Press the button to select the item CHANNEL 3 Press the button to select SKIP 4 Press the button to skip or unskip the present channel NOTE The skipped channels cannot be accessed...

Page 12: ...4 Press the button to adjust the level 5 The adjusted data is stored automatically in the user mode VOL or VOL VOL or VOL CH or CH BASS TREBLE BALANCE AUDIO SETTING 1 Press the MENU button to enter th...

Page 13: ...to select SET PASSWORD and press the to enter SET PASSWORD 2 Input the new password So you succeed in changing the password CH or CH VOL Enter the menu lock password ______ OK CANCEL Setting password...

Page 14: ...switch among AUTO PAL SECAM VOL or VOL VOL CH or CH Colour system 1 Press the MENU button to enter the main menu 2 Press the button to select the item GENERAL SETTINGS 3 Press the button to select OSD...

Page 15: ...the VOL or VOL button to select the item GENERAL SETTINGS 3 Press the CH or CH button to select DEINTERLACER 4 Press the VOL button to enter the DEINTERLACER 5 Press the CH or CH button to select the...

Page 16: ...s 15 Using the TV features Some Teletext pages contain quiz or questions with hidden answers Press the button to see the answers Press the button again to hide the answers REVEAL CANCEL When a page is...

Page 17: ...ght 0 5V rms 10kohm 3 Audio output A left 0 5V rms 1kohm 4 Ground audio 5 Ground blue 6 Audio input A left 0 5V rms 10kohm 7 Blue input 0 7V 75ohms 8 Function select AV control High 9 5 12V AV mode Lo...

Page 18: ...TV back Cleaning and care WARNING Do not try to remove the cabinet back Refer servicing to qualified service technicians To clean the TV screen 1 Unplug the TV to avoid possible shock hazard 2 Use a...

Page 19: ...The station may have broadcast difficulties Try another channel Check the antenna connections The station may have broadcast difficulties Try another channel Adjust the picture from the menu The chan...

Page 20: ...n and specifications are subject to change without notice Contrast 500 1 Resolution 1280X768 Brightness 2 450cd m Viewing angles o o 170 H 170 V RF input Cable antenna 1 VIDEO input S VIDEO GRAPHIC in...

Page 21: ......

Reviews: