9
•
Make sure the bottom of the image always stays parallel with
the screen. If not, rotate the Laser Cinema following previous
instructions.
•
Follow the steps in the order shown below, only if they apply to
your situation.
•
Before adjusting, fold the wall-mount bracket wands so that
screen is vertically level.
•
Use the wrentch to rotate feet from an overlooking view, but
do not look directely at the lens when the Laser Cinema is on
because the laser light may damage your eyes.
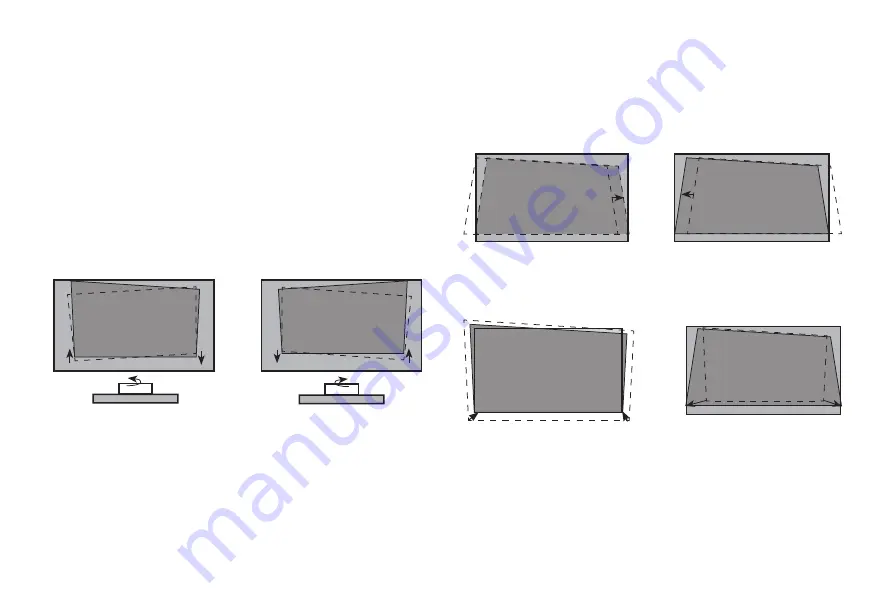
STEP 3 Adjust the Display Image and the Screen
If the bottom of the image is
lower on the left and higher
on the right, rotate the Laser
Cinema counterclockwise.
If the bottom of the image is
lower on the right and higher
on the left, rotate the Laser
Cinema clockwise.
PARALLEL THE BOTTOM OF THE IMAGE WITH THE SCREEN
FIT THE BOTTOM OF THE IMAGE TO THE SCREEN
If the image shifts to the left
side, then move the Laser
Cinema to the right.
If the image shifts to the
right side, then move the
Laser Cinema to the left.
If the bottom of the image is
wider than the screen, then
move the Laser Cinema
closer to the screen.
If the bottom of the image is
narrower than the screen,
then move the Laser
Cinema farther from the
screen.
Summary of Contents for Laser Cinema PL1H Series
Page 2: ...A...
Page 28: ...20 XX ES XXX 1 A...


