Hisense 32H5B Quick Start Manual Download Page 12

 Page 11

Select 

Network

• The Select Network : Connect your TV to access the 

network.

• When the Network Setting menu opens, Hisense Service 

Terms and Conditions will appear. Press 

◄/► button


to scroll through the pages. Please read it carefully. If 

you want to access the Internet, select Agree to set your 

network connection for the TV.

  Otherwise, select 

Disagree

 to enter the Channel search 

menu.

• You can set up the network configuration in this menu. 

For more information, please refer to the section titled 

"Network Connection" and "Network Setup" in the user 

manual online.

Channel 

Search

• Select your Tuner Mode: Antenna or Cable, press 

ENTER 

button

 to confirm.

• Set the Channel Installation: Scan or Skip Scan. If you 

select 

Scan

, your TV automatically starts Channel 

Installation available in your viewing area; If you select 

Skip Scan

, your TV does not scan for channels; 

Depending on the reception condition, it may take up to 

30 minutes or more to complete memorizing channels. 

Please allow the process to complete without interruption.

• After the TV has completed scanning for channels, select 

Go

 to exit the  wizard.

NOTE: If you are using a cable or satellite box and you have 

connected it to the TV using a coaxial cable, you should 

select the cable option. Be sure the cable or satellite box 

is turned on before starting the channel scan. If you use a 

cable or satellite box connected to AV, Component or HDMI, 

you don't need to scan for channels.

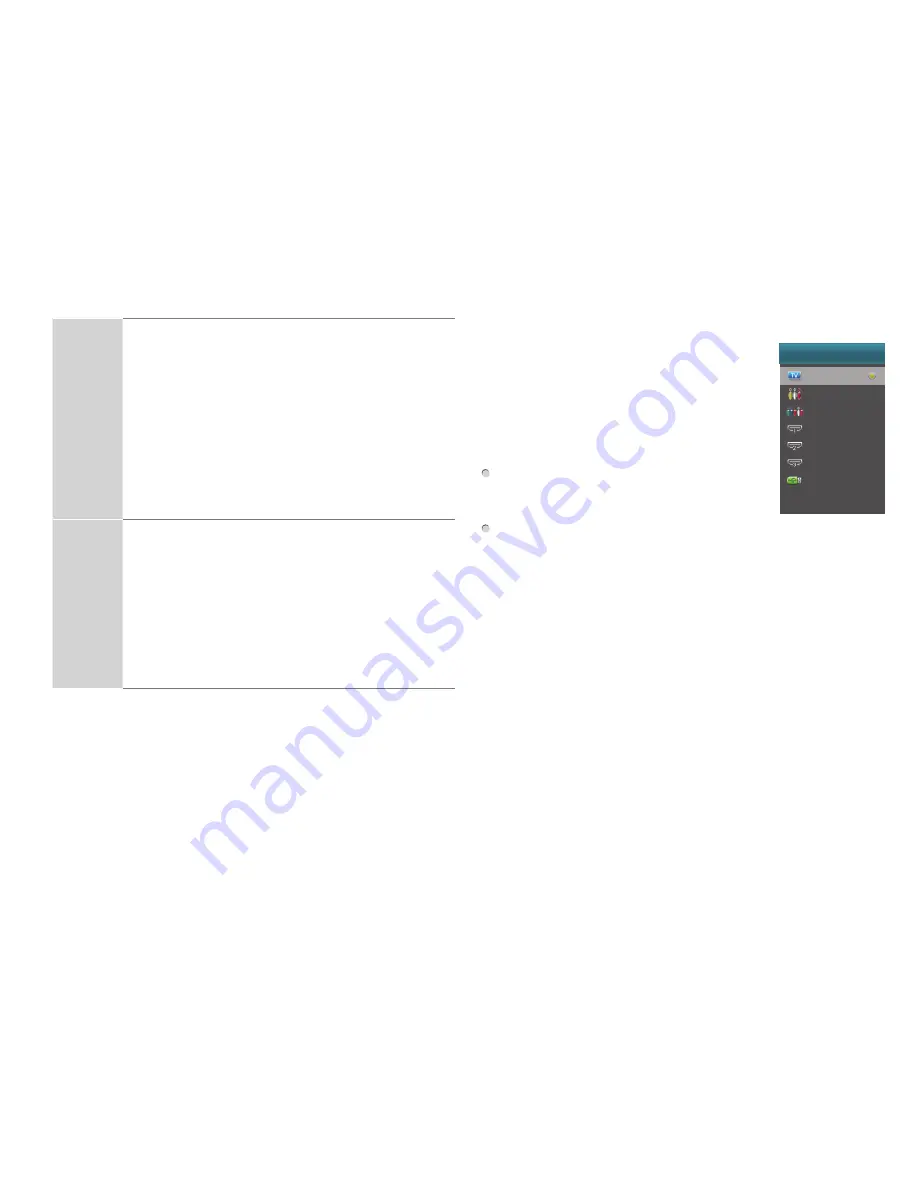
Selecting the Input Source

When you finish the first-time setup, you 

must select the TV signal source. Because 

your TV stores this information, you do not 

need to change the TV signal source unless 

it changes. An example of when to do this is 

if you change from using an outside antenna 

to cable TV.

 Turn on your TV, then press 

INPUT button


on the remote or on the TV. The INPUT 

menu opens.

 Press


/

▼ 

button

 to highlight the input source, and then press 

ENTER button

.

INPUT

TV
AV
Component
HDMI 1
HDMI 2
HDMI 3
HiMedia

Summary of Contents for 32H5B

Page 1: ...Smart TV 32H5B 40H5B 50H5GB Help Hisense improve the environment by reducing paper waste For detailed instructions and feature descriptions access the full User Manual online at www hisense usa com su...

Page 2: ...under the aforementioned laws No part of this publication may be stored reproduced transmitted or distributed in whole or in part in any manner electronic or otherwise whether or not for a charge or...

Page 3: ...upport page you can also Access Frequently Asked Questions Download the latest software for your product and Order Accessories To speak to a representative in our Consumer Electronics Care Center call...

Page 4: ...ACKAGE CONTENTS Your package in which you purchased this TV contains the following items TV Quick Start Guide this document 2 legs that form the stand Important Safety Information and Warranty Card Re...

Page 5: ...to prevent damage to the TV or scratching to the screen 2 Remove the two legs that form the stand from the accessory bag and then insert them into the bottom slots of the TV 3 Secure the legs to the...

Page 6: ...n measured from the attaching surface of the mounting hook Wall mount hole pattern VESA mm 100 100 for 32 40 200 400 for 50 Wall mount screw size mm M4 32 40 M6 50 Follow instructions provided with th...

Page 7: ...Player Recorder Set top Box Satellite Receiver Satellite antenna cable VCR Video Camera Connect a High Definition Multimedia Inter face HDMI cable from an external device COMPO NENT IN Y Green Connect...

Page 8: ...system AUDIO OUT Connect headphone for audio out of the TV Speaker Audio Amplifier Connect an audio adapter not provided from an external analog audio system USB DC 5V 0 5A MAX Connect a USB device fo...

Page 9: ...ion buttons Confirm selections Launch YouTube App Enter HiSmart Home Menu 1 Press the release button on the back of the remote control to remove the battery compartment cover 2 Insert two AAA size bat...

Page 10: ...plicable DIRECTV 0178 10178 10019 10748 11314 11660 11710 11780 12049 10171 11204 11326 11517 11564 11641 11963 12002 12183 Time Warner Cable 386 0178 10178 400 450 461 456 0748 1463 0463 10463 Comcas...

Page 11: ...the available devices and interfaces Country setting Select the country where you will operate the TV Time zone setting Select the local time zone according to your region Daylight Saving Set the Dayl...

Page 12: ...e reception condition it may take up to 30 minutes or more to complete memorizing channels Please allow the process to complete without interruption After the TV has completed scanning for channels se...

Page 13: ...MOVIES TV Browser Opera store Pandora Twitter Facebook Picasa Accuweather Viewster Youtube Power consumption 50W 70W 120W Ports 3 HDMI ports 50 2 HDMI ports 32 40 2 USB ports 50 1 USB ports 32 40 LAN...

Page 14: ...tting information The picture is normal but there is no sound Check the volume settings Check if Mute mode is set to On Sound but no picture or black and white picture If the picture is black and whit...

Page 15: ...d void the user s authority to operate the equipment The Wi Fi Module complies with FCC radiation exposure limits set forth for an uncontrolled environment This device should be installed and operated...

Page 16: ...Page 15...

Reviews: