


12.6 Synchronous Measurements with Multiple Instruments
226
Multiple instruments can be synchronized using the external control terminals.
The following two methods are available for synchronous operation.
12.6 Synchronous Measurements with Multiple
Instruments
• This is for using an external trigger to synchronize the start time for
measurements with multiple instruments, not for synchronizing sam-
pling itself. When measurements are performed for a long time, differ-
ences in data acquisition times occur because of variations in the
sampling clocks of individual instruments.
• When using an external trigger to synchronize multiple instruments,
make sure you set the following.
• Set
[Filter]
of the external trigger input to
[Off]
• Set the external trigger output to
[Level]
on the System scree
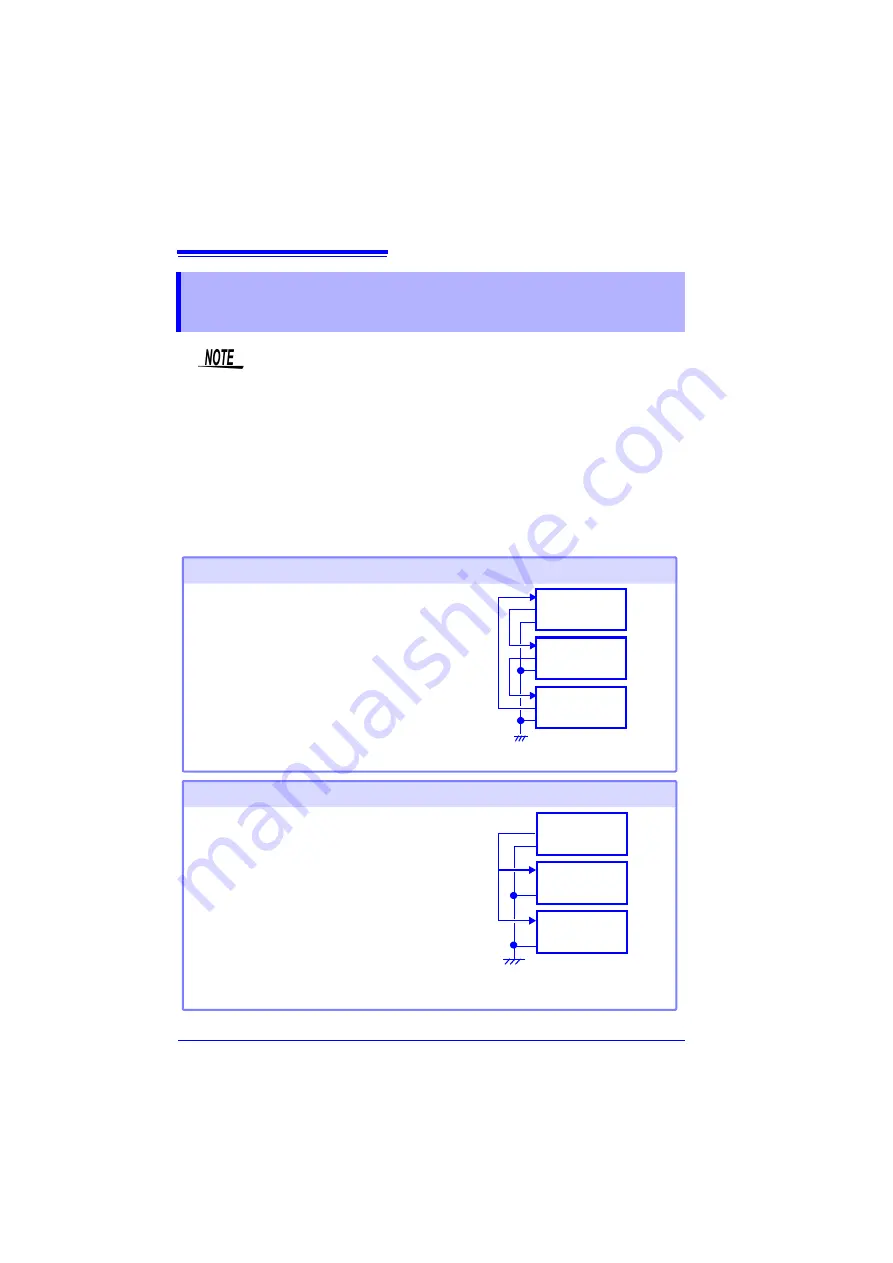
GND
EXT.TRIG
TRIG.OUT
GND
Set all instrument to master.
Setting procedure: (System screen, p. 127)
• Set external trigger to
[On]
for the all instruments.
• Set all instruments to
[External Trig In: Trigger]
.
When a trigger event occurs on any of the connect-
ed instruments, it also occurs on the others.
As more instruments are connected, the difference
between trigger timing on different instruments be-
comes larger.
Daisy chain configuration
EXT.TRIG
TRIG.OUT
GND
EXT.TRIG
TRIG.OUT
GND
Connection example
GND
EXT.TRIG
TRIG.OUT
GND
Set one instrument to master, and set the others to
slave.
Setting procedure: (System screen, p. 127)
• Set external trigger to
[On]
for the slave instru-
ments only. (p.129)
• Set all instruments to
[External Trig In: Trigger]
.
When using the master instrument as the trigger
source, the other instruments start measuring simul-
taneously when a trigger event occurs.
This gives the least difference in trigger timing be-
tween instruments.
Parallel synchronization
Connection example
EXT.TRIG
TRIG.OUT
GND
EXT.TRIG
TRIG.OUT
GND
Master
Slave
Slave
Summary of Contents for MR8880-20
Page 2: ......
Page 12: ...Procedure 2 ...
Page 40: ...1 3 Screen Configuration and Display 30 ...
Page 76: ...3 4 Measurement Using Setting Wizard PRESETS key 66 ...
Page 174: ...6 4 Data Management 164 ...
Page 186: ...7 7 Performing a Printer Check 176 ...
Page 196: ...8 4 Numerical Value Calculation Expressions 186 ...
Page 216: ...10 4 Making System Settings 206 ...
Page 222: ...11 3 Communication Using Commands 212 4Click Next to start install ing Installing Click ...
Page 226: ...11 3 Communication Using Commands 216 ...
Page 254: ...13 6 Setting Wizard Function PRESETS 244 ...
Page 292: ...Appendix 10 Installing Waveform Viewer A30 ...
Page 297: ......
Page 298: ......
Page 299: ......
Page 300: ......


