135
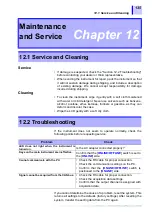
12.1 Service and Cleaning
Service
• If damage is suspected, check the "Section 12.2 Troubleshooting"
before contacting your dealer or Hioki representative.
• When sending the instrument for repair, pack the instrument so that
it will not sustain damage during shipping, and include a description
of existing damage. We cannot accept responsibility for damage
incurred during shipping.
Cleaning
• To clean the instrument, wipe it gently with a soft cloth moistened
with water or mild detergent. Never use solvents such as benzene,
alcohol, acetone, ether, ketones, thinners or gasoline, as they can
deform and discolor the case.
• Wipe the LCD gently with a soft, dry cloth.
If the instrument does not seem to operate normally, check the
following points before requesting service.
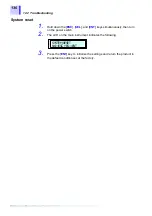
If you cannot determine the cause of a problem, reset the system. This
returns all settings to the defaults (factory settings). After resetting the
system, transfer the setting data from the PC again.
Maintenance
and Service
Chapter 12
12.1 Service and Cleaning
12.2 Troubleshooting
Problem
Check
LED does not light when the instrument is
turned on.
Is the AC adapter connected properly?
Keys on the main instrument are ineffective.
Confirm that the [
ONLINE/OFFLINE
] switch is set to
the [
ONLINE
] side.
Cannot communicate with the PC.
• Check the RS cable for proper connection.
• Check the communication settings on the PC.
• Confirm that the [
ONLINE/OFFLINE
] switch is
positioned to the [
ONLINE
] side.
Signal cannot be acquired from the CAN bus.
• Check the RS cable for proper connection.
• Check the acquisition data settings.
• Confirm that the output channel is assigned with
acquisition data.
Summary of Contents for 8910
Page 1: ...8910 Instruction Manual CAN ADAPTER EN Aug 2018 Revised edition 7 8910A981 07 18 08H ...
Page 2: ......
Page 8: ...Contents vi ...
Page 18: ...Notes on Use 10 ...
Page 44: ...3 5 Operation Map 36 ...
Page 48: ...4 2 Program Setup 40 ...
Page 56: ...5 4 Operation Flowchart 48 ...
Page 78: ...6 6 Editing in Another Window 70 ...
Page 90: ...7 4 Setting the ID Filter 82 ...
Page 99: ...91 9 2 Setting Data Printout ...
Page 130: ...10 2 Using the 8910 with the 8841 8842 MEMORY HiCORDER 122 ...
Page 147: ......
Page 148: ......
Page 149: ......
Page 150: ......

