A
B
EE
27in x 12.4in x 7.68in
9.48 lbs
PREPARATIONS
Estimated Assembly Time:10 Minutes
Tools Required for Assembly (not included):Wrench and
Screw Driver
Before beginning assembly of product, make sure all parts are
present. Compare parts with package contents list and
hardware contents above. If any part is missing or damaged,
do not attempt to assemble the product. Contact our customer
service for replacement parts at 1-888-775-1330, 7 a.m. 4 p.m.,
MST Monday to Friday.
SPECIFICATIONS
5
6
ASSEMBLY INSTRUCTIONS
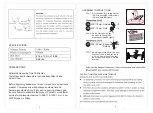
Fix the heater (B) with the bracket
(EE) with 4pcs M6X10MM screws
(AA) and Nuts(BB) tightly.
Fix the bracket(A) on the
the wall with 4pcs M6*50
expansion screws(FF) tightly.
Adjust the bracket(EE) for the ideal
direction. Typically, the direction is
in 30°-45° from horizon. Then tight
the knobs at both ends to lock the
direction.
CARE AND MAINTENANCE MAINTENANCE
1
2
A
FF
3
AA
M6
×
10mm Screws
×
4
FF
M6
×
50mm Expasion
Screws
×
4
M
BB
M6
×
10mm Nuts
×
4


