Optical Bi-spectrum Network Speed Dome
·
Quick Start Guide
3
Steps:
1.
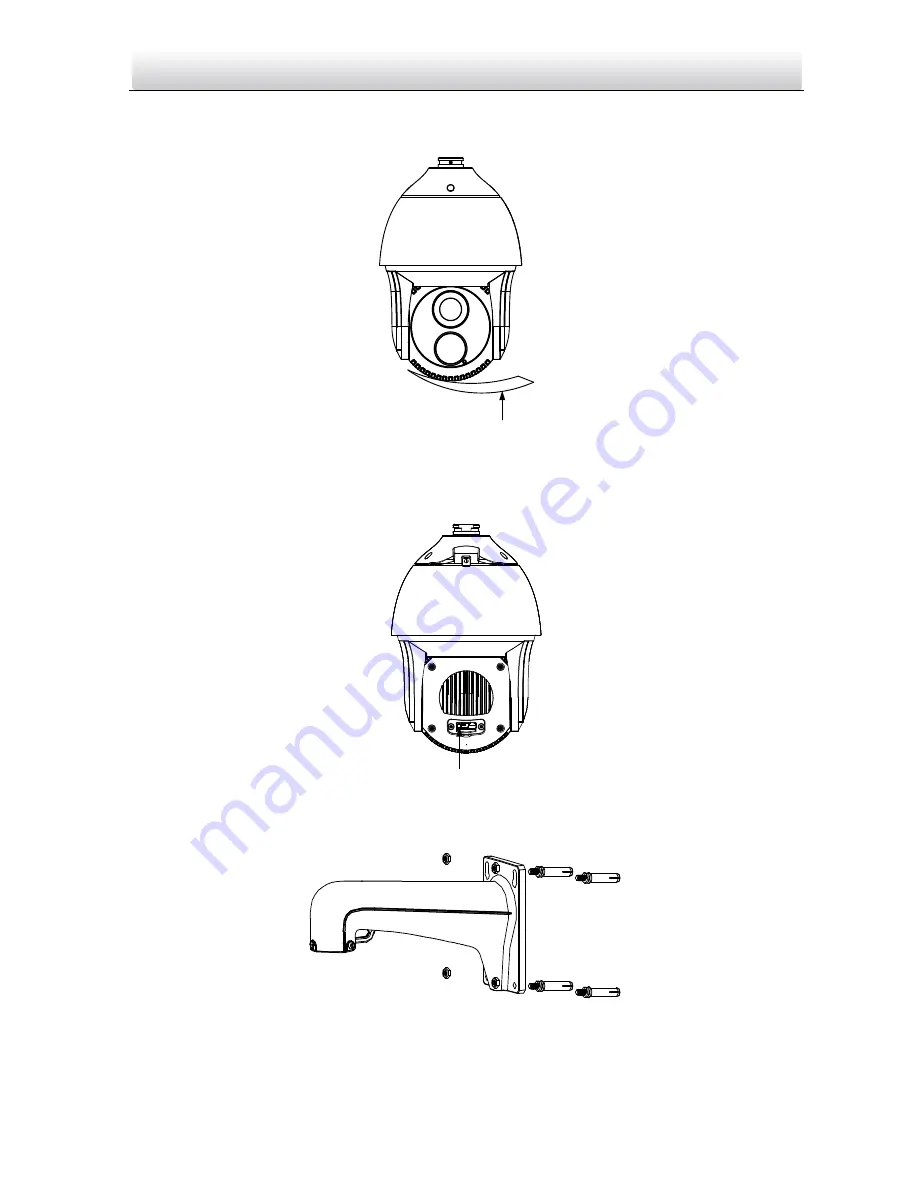
Remove the protective sticker as shown in Figure 2-2.
Protective Sticker
Figure 2-2
Remove Protective Sticker
2.
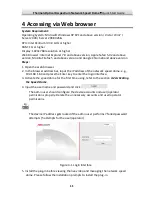
Remove the cover on the back of the speed dome. Insert the SD card to the SD card
slot and install the cover back.
SD Card Slot
Figure 2-3
SD Card Slot
3.
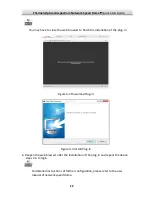
Secure the wall mounting bracket with 4 hex nuts and washers.
Figure 2-4
Secure the Bracket
4.
Apply thread tape to the thread of the head cover and rotate the head cover to the
bracket. Secure the head cover to the bracket with set screws (supplied).


