7
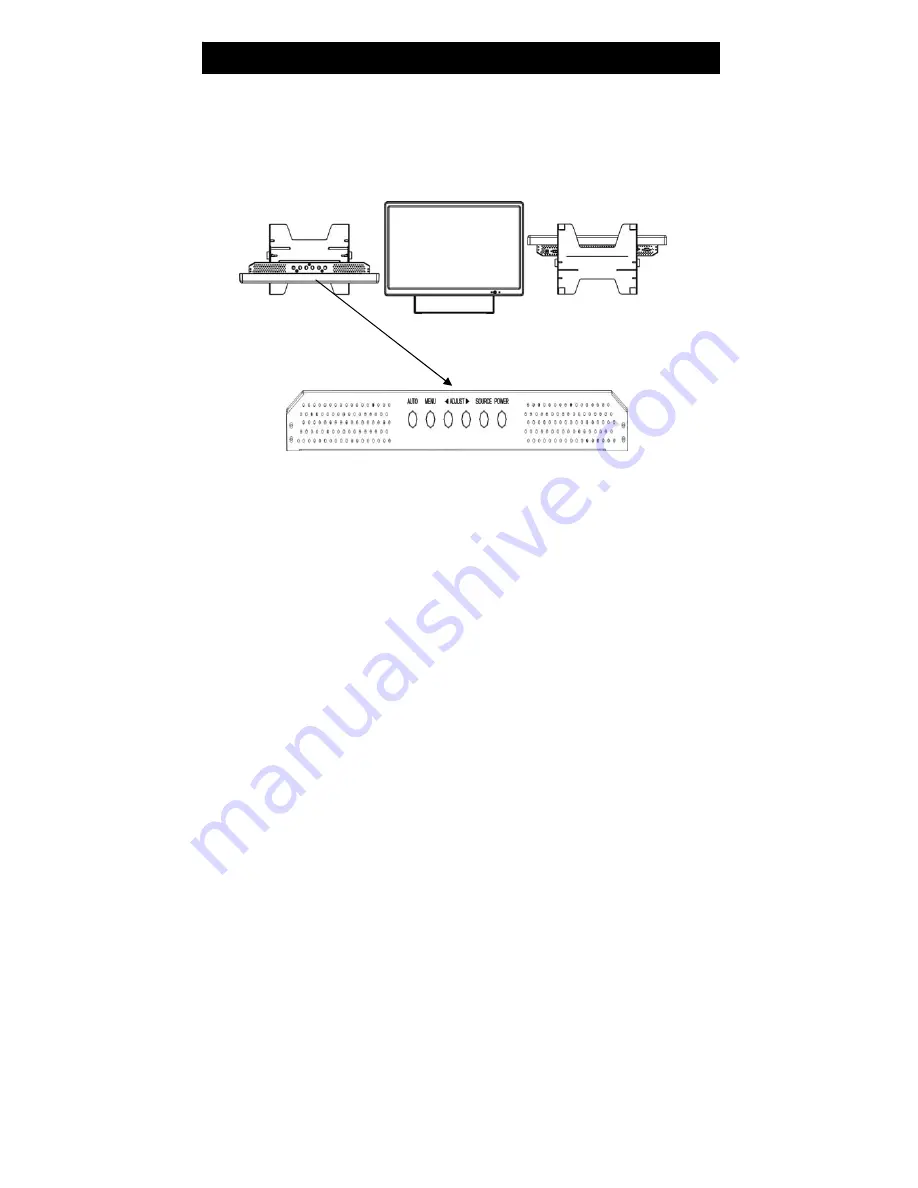
You can operate your monitor by using the buttons on the front panel. The side panels provide the inputs to connect other equipment to your monitor.
Exploring Your New Monitor
Front keypad
Rear connection
Page 1: ...Thank you for purchasing our product Please read this User s Manual before using the product Change without notice 19 22 LCD wide User s MANUAL...
Page 2: ...head symbol within an equilateral triangle is intended to alert the user to the presence of uninsulated dangerous voltage within the product s enclosure that may be of sufficient magnitude to constitu...
Page 3: ...POWER CORD PROTECTION Power supply cords should be routed so that they are not likely to be walked on or pinched by items placed upon or against them paying particular attention to cords at plugs conv...
Page 4: ...ich can be determined by turning the equipment off and on the user is encouraged to try to correct the interference by one or more of the following measures Reorient or relocate the receiving antenna...
Page 5: ...itor 9 Connecting Device 10 Setup your Monitor 11 Video Setting 12 VGA Setting 13 Audio Setting 14 PIP Setting 15 System Setup 16 Information 17 DVI Setup 18 Signboard Edit 19 Troubleshooting 20 LCD C...
Page 6: ...rate and response time avoid lagging effect Selectable 6500 K and 9300 K color temperature setting Support video system NTSC PAL Built in Key Lock feature for easy management 75ohm Auto Termination Bu...
Page 7: ...You can operate your monitor by using the buttons on the front panel The side panels provide the inputs to connect other equipment to your monitor Exploring Your New Monitor Front keypad Rear connecti...
Page 8: ...n Composite signal Input for VIDEO 1 Out Video looping output for VIDEO 1 S VIDEO Y C input Audio Channel 1 audio input 5 VIDEO2 In Composite signal Input for VIDEO 2 Out Video looping output for VIDE...
Page 9: ...you look at the rear panel of the Monitor you will see that the terminals are color coded in the same manner as the cables z S video cables provide better picture performance than standard video cable...
Page 10: ...this Monitor SXGA will be expanded or shrunk which will affect image quality To view high quality images it is recommended that the PC resolution should be set to 19 WXGA 1440x900 22 WSXGA 1680x1050...
Page 11: ...from AV1 AV2 S Video or DVI VGA POWER Monitor power ON OFF At OFF mode monitor will be at standby status Green Light ON Mode Red Flicker Power Saving Refer to note below Red Light OFF Mode Note 1 AV1...
Page 12: ...ity of the color Hue To determine the lightness and colorfulness of the picture Sharpness Sets the desired sharpening enhancement to the picture Dynamic Contrast To determine the luminosity of motions...
Page 13: ...sition Phase Is used to adjust best picture quality It adjusts the sampling phase across one pixel time When the phase is not adjusted properly the picture will be unclear Therefore this value should...
Page 14: ...lumes Bass Adjusts the tone to low frequency part of the sound Treble Adjust the high or acute of the sound Balance Adjusts the softness of loudness of notes in the sound Mute To disable the audio fun...
Page 15: ...on allows the position of PIP to be exchanged POP Zoom Only Operate under POP Side By Side mode PIP Auto Close Detect PIP mode signal PIP Switching Enable PIP source switching Switching Time Control P...
Page 16: ...itor Language English Power On Control This function is to assign a specific video signal when power ON Signboard Edit User can edit the description about environmental surveillance See page 19 Light...
Page 17: ...17 Resolution To show the resolution H Frequency To show the horizontal frequency V Frequency To show the vertical frequency Information...
Page 18: ...18 Brightness Adjusts the overall picture shade and brightness Contrast Permits adjustment of contrast between light and dark areas of the picture Default Back to factory default DVI Setting...
Page 19: ...Delete a character which is error typing Clr Delete a character row Clr ALL Delete all character rows 1440x900 16 10 1680x1050 16 10 1400x1050 4 3 280x1050 1200x900 4 3 240x900 Direction key of LCD fr...
Page 20: ...not turn on Make sure the power cord is plugged in then press POWER button No picture no sound Check cable connections No sound picture OK Check audio Cable Connections Try pressing Volume up button...
Page 21: ...Active Area mm 410 4 H x 256 5 V mm 465 H x 290 6 V mm Dot Pitch mm 0 285 x 0 285mm 0 27675 x 0 27675mm LCD Profile Ratio 16 10 Display Color 16 7M colors RGB 8 bit data Color Gamut 75 typ NTSC covera...
Page 22: ...deo Input Output BNC x 2 BNC x 2 Looping Output Auto Termination Audio Input L R Ear Phone x 3 S Video 4 pin DIN connector input x 1 Speaker 1W 1W Power Consumption 55W 4 5A Max Weight N W G W 5 9kg 7...
Page 23: ...ut your hands behind the plate in the back side when you adjust a proper angle and position for the bracket To prevent your fingers gets hurt LCD Color Monitor Dimensions V X LCD Color Monitor Bracket...