background image

î

Check the drive chain slack again.

î

Rear brake pedal free play and stop lamp 

switch  free  play  are  affected  when  

repositioning the rear wheel to adjust drive 

chain  slack.  Check  rear  brake  pedal  free 

play and adjust as necessary 

(page 39)

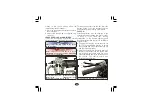
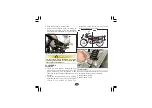
(2) Sleeve nut         (3) Drive chain lock nut

(4) Drive chain adjusting nut 

(5) Index mark        (6) Scale graduation

2

4

3

6

5

Lubrication

î

Turn the engine “OFF”, park the vehicle on 

its main stand and shift the transmission into 

neutral.

î

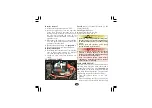
Lubricate the drive chain by applying liberal 

amount of SAE#90 oil.

CAUTION

!

!

Regular adjustment and lubrication as per the 

maintenance  schedule  would  ensure  high 

performance and longer life.

NOTE

Visit  Authorised


Hero  MotoCorp


workshop 

for  inspection,  cleaning,  lubrication  and 

adjustment of drive chain at every 2000 km

.

DRIVE CHAIN SLIDER

(Refer  to  “Maintenance  Schedule”  on 


(page 26

).

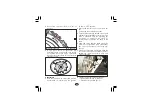
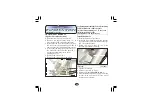
(1) Drive chain slider                    (2) Wear limit

CUTOUT

2

1

Check the drive chain slider (1) for wear, the 

chain slider must be replaced if it is worn to the 

bottom  of  the  cutout  or  wear  limit  (2)  is 

reached.

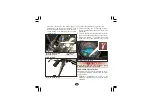
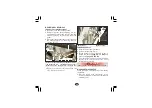
When one applies the Integrated/Rear brake 

pedal, front & rear brakes activate jointly.

For replacement, visit your Authorised 

Hero 

MotoCorp

 workshop.

Brakes (Integrated braking system)

Brakes are items of personal safety and should 

always  be  maintained  with  proper 

adjustments.

38

Summary of Contents for HF-Deluxe

Page 1: ...MotoCorp dealer will be glad to provide further information or assistance and is equipped tohandle your future service needs We at Hero MotoCorp are committed to demonstrate excellence in our environ...

Page 2: ...OTOGRAPH DIRECTIONS SPECIFICATIONS AND OTHER CONTENTS COVERED IN THIS OWNER S MANUAL ARE BASED ON THE LATEST PRODUCT INFORMATION AVAILABLE AT THE TIME OF ITS PRINTING APPROVAL AND THE ACCURACY OR CORR...

Page 3: ...ety Saftey precautions 24 Fuel valve 17 VEHICLE IDENTIFICATION 1 PRODUCT SPECIFICATION 2 Engine oil Engine oil level check 28 Engine oil top up process 28 Drive chain 36 CATALYTIC CONVERTER 50 Drive c...

Page 4: ...um Cast Wheel Black Variant M B L H A W 0 3 1 Vehicle Identification Number VIN Engine No VIN MBLHAW03 MBL HAW03 Manufacturer code Vehicle Description Model Year Plant Code Month of Manufacturing Prod...

Page 5: ...1 75 ml Weight Capacities Maximum power Maximum torque Bore and stroke Compression ratio Displacement Spark plug 6 15 kW 8 36 Ps 8000 r min 0 82 kgf m 8 05 N m 5000 r min 50 0x49 5 mm 9 9 1 97 2 cc N...

Page 6: ...SPECIFICATION SPECIFICATIONS ITEM Trail length 89 mm Tyre size Front Rear Brakes Dia 130 mm Dia 130 mm Front Drum type Rear Drum type Primary reduction Final reduction 3 722 67 18 3 143 44 14 Transmi...

Page 7: ...n on holding onto the grab rail or your waist leaning with you in turns and keeping their feet on the footrest evenwhenthevehicleisstopped Some drivers do not see because they vehicles arenotlookingfo...

Page 8: ...e is still running turn it off Inspect for fluid leaks check the tightness of critical nuts and bolts and check the handlebar brake levers brakes and wheels Ride slowly and cautiously Your vehicle may...

Page 9: ...visible wear bright reflectiveclothingthatfitswell Get your vehicle serviced regularly by the Authorised Hero MotoCorp workshop Tightly wrap loose hanging clothes avoid entanglingwithmovingparts Give...

Page 10: ...suspensiontravelorsteering travel affectyourridingpositionorinterfere withoperatinganycontrols for these attachments and their use can seriouslyimpairyourvehicle shandling PHONE NO ___________________...

Page 11: ...cle s running condition Genuine engine oil Hero 4T Plus SAE 10W 30 SL Grade JASO MA2 engine oil recommended by Hero MotoCorp and make sure you change it every 6000 km with top up every 3000 kilometres...

Page 12: ...Clutch lever 16 Throttle grip 17 Electric starter switch optional 12 High beam indicator 15 Front brake lever 18 Ignition switch with steering lock 11 Fuel gauge 14 i3s switch optional 19 Leg guard 20...

Page 13: ...women pillion step 9 Pillion foot rest 1 Fuel valve 2 Carburetor 5 Side stand switch 6 Main stand 3 Gear shift pedal 4 Rider foot rest 16 Front reflex reflector 12 Rear reflex reflector 13 Tail stop l...

Page 14: ...er 15 Exhaust muffler 11 Front visor 13 Seat 12 Fuel tank RIGHT SIDE VIEW VEHICLE VIEWS 1 Pillion foot rest 5 Starter motor Optional 3 Kick starter pedal 4 Rider foot rest 2 Battery compartment Inside...

Page 15: ...dicators Sl No Description 2 3 Function Indicates driving speed Shows accumulated distance traveled Maximum operating speed in each gear 1 7 6 4 8 5 Indicates approximate fuel quantity Light glows whe...

Page 16: ...s Horn Tail Stop lamp and Fuel gaugewillbefunctional Steering can be locked Engine cannot be started and no electrical systemwillbefunctional LOCK ON OFF Key Position Function Key cannot be removed Ke...

Page 17: ...ooperatethehorn 4 Clutch switch For electric start model Thereisaclutchswitchprovidedforthesafety of the rider The vehicle cannot be started by electric starter switch until the clutch lever is operat...

Page 18: ...er switch continuously more than 5 seconds as continuous cranking of engine will drain the battery CAUTION Starting Warmuptheengine Keep the i3s switch 1 to OFF position Turn the ignition key to ON po...

Page 19: ...econds and turn OFF Start the vehicle and allow the engine to run in neutral gear position with the r min less than 2000 r min The engine will cut off in 30 secs After the rst stop start every subsequ...

Page 20: ...blesthe side stand indicator lamp to glow on the speedometerpanel 2 Side stand switch 2 17 The three way fuel valve is on the left side of thecarburetor OFF Position FUELVALVE At OFF position 1 fuel c...

Page 21: ...ngs back to the normalpositionandcapgetslocked 18 RES Position At ON position fuel will flow from the tank tothecarburetor At RES position 3 fuel will flow from the reserve fuel supply to the carburet...

Page 22: ...eck and top up engine oil if required page 28 Check for leaks Fuel Level ensure sufficient fuel is available in your fuel tank for journey page 18 Checkforleaks Lamps and Horn check that headlamp tail...

Page 23: ...ON or OFF position WARNING Neverruntheengineinaclosedarea theexhaustcontainspoisonousgases To start the engine in any gear position using the electric starter press the clutch lever and pushthestarte...

Page 24: ...ts it may be flooded with excess fuel To clear a flooded engine turn the ignition switch OFF and turn the choke lever to OFF Close the throttle fully and crank the engineseveraltimeswiththekickstarter...

Page 25: ...vehicle reduces When riding in wet rainy or loose surface use front brake carefully after applying rear braketoavoidwheelslip PARKING After stopping the vehicle shift the transmission to neutral turn...

Page 26: ...turns or is involved in a crash be sure that you visit your Authorised Hero MotoCorp workshop for detailed inspections These instructions are based on the assumption that the vehicle will be used excl...

Page 27: ...sure there is adequate ventilation wheneveryouoperatetheengine Burnsfromhotparts Let the engine and exhaust system cool beforetouching Injuryfrommovingparts Do not run the engine unless instructed to...

Page 28: ...Athigherodometerreadings repeat thefrequencyintervalestablishedhere I INSPECT C CLEAN R REPLACE A ADJUST L LUBRICATE T TOP UP Note 7 Inspect maintainspecifiedtorque Note 12 Inspectthe hoses for deteri...

Page 29: ...Chain Drive Chain Slider I I I I I Electric Starter I I I I I I C C C C C C I T O I T O I T O I A I A I A I A I A I A I C A I C A I C A I C A I C A R R A C A A C A A I I I I I I C A Oil Circulation I...

Page 30: ...DAYS Km Note 1 500 750 1st 60 3000 Next 100 Stop Lamp Switch I A I A I A I A I A I A Headlamp Focus I A I A I A I A I A I A Nut Bolts Fasteners I I I I I I Wheels Tyres I I I I I I Steering Head Bear...

Page 31: ...ineandwaitfor2 3minutes Remove the oil level dipstick and check the oil level Remove the oil level dipstick wipe it clean andinsertwithoutscrewingitin If required add the specified oil up to the upper...

Page 32: ...e centrifugal filter cover right crankcase cover rider foot rest muffler kickstartpedalandclutchcable Remove centrifugal filter cover 7 clean thecentrifugalfilter 8 withnonflammable orhighflashpointso...

Page 33: ...orp workshoponthisifrequired Disconnect the noise suppressor cap 1 andremovethesparkplug 2 withthehelp ofsparkplugwrenchprovidedintoolbag Clean any dirt around the spark plug base Make sure that the s...

Page 34: ...s more frequent service may be necessary 5 Air cleaner cover screws 6 Air cleaner cover Remove the air cleaner element 9 fromtheelementholder 10 Aircleanercleaning The air cleaner element should be cl...

Page 35: ...ally from outside to inside as the fine dust particles may go deep insidetheelement Never wash the air cleaner element Only blow air for cleaning the dust as explained Replace aircleanerelementevery12...

Page 36: ...nce will cause noise and little or no clearance will prevent the valve from closing and cause valve damage and power loss Check valve clearance at the specifiedintervals page26 1 3 2 2 Boot 3 Lock nut...

Page 37: ...ndition Check the clearance by inserting the feeler gauge 9 between the adjusting screw 10 andvalvestem 4 Timing hole cap 5 T mark 6 Index mark 7 Cam sprocket 8 Special tool 4 6 5 7 8 Adjust by loosen...

Page 38: ...leration to lag behind engine speed Normalclutchleverfreeplay 1 is10 20mm atthelever 2 Start the engine press the clutch lever and shift into gear Make sure the engine does not stall and the vehicle d...

Page 39: ...knut 4 Clutch cable adjusting nut page 19 Under severe usage or when the vehicle is ridden in unusually dusty areas more frequent maintenance will be necessary Inspection Turn the engine OFF park the...

Page 40: ...e rear axle nut 1 and sleeve nut 2 Loosenthedrivechainlocknut 3 Ifthedrivechainslackisexcessivewhenthe rear axle is moved to the farthest limit of adjustment the drive chain is worn and mustbereplaced...

Page 41: ...djustment and lubrication as per the maintenance schedule would ensure high performanceandlongerlife NOTE Visit Authorised Hero MotoCorp workshop for inspection cleaning lubrication and adjustmentofdr...

Page 42: ...Righthandfrontbrakecable A on F side 2 3 Turnthefirstadjusternut 5 tillyoucannot turnitbyhand FREE PLAY 10 20 mm CheckthefreeplayofFrontbrakelever If the free play is more than 20 mm further turn the...

Page 43: ...the cut out on the adjusting nut 1 is seated on the brake joint pin 2 after making final free play adjustment If proper adjustment cannot be obtained by this method visit your Authorised Hero MotoCorp...

Page 44: ...in good condition with adequate tread and correctly inflated Therecommendedtyressizeis Whenthebrakeisapplied anarrow 1 fixed to the brake arm 2 moves towards a reference mark 3 on the brake panel 4 If...

Page 45: ...kgf cm 25 psi 2 2 00 kgf cm 28 psi 2 1 75 kgf cm 25 psi 2 2 80 kgf cm 41 psi Rider only Rider and Pillion Therecommended cold tyrepressureare Ifnecessary installanewcap Makesurethevalvestemcapsaresecu...

Page 46: ...nce 43 Also if you hit a pothole or hard object pull to the side of the road as soon as you safely can and carefully inspect the tyres for damage Ensure the arrow mark 2 on the tyre is in the same dir...

Page 47: ...lth Always confirmlocalregulationsforbatterydisposal WARNING Wear protective clothing and a face shield or have skilled technician do the battery maintenance A spark or flame can cause the battery to...

Page 48: ...Type Bladefuse Incircuitfuse 2 15A 10A WARNING Battery gives off explosive gases Keep sparks flames cigarettesaway Never use a fuse with a different rating from that specified It may lead to serious d...

Page 49: ...function Check the spring 1 for damage or loss of tension and the side stand assembly for free movement Check whether the side stand indicator 2 glowswhenvehicleisparkedonsidestand While the vehicle i...

Page 50: ...rks by locking the front brake and pumping the front fork up and down vigorously The suspension action shouldbesmoothandthereshouldbenooil leakage Check the rear shock absorber by pushing hard downwar...

Page 51: ...ke arm 4 and brake panel 5 by removing the integrated brake adjusting nut 9 48 1 Speedometer cable 2 Tab 3 Front brake cable 4 Brake arm 5 Brake panel 6 Front brake adjusting nut 7 Axle nut 8 Integrat...

Page 52: ...3 Brake arm 4 Brake stopper arm 5 Brake panel 6 Split pin 7 Lock nut 5 3 1 6 7 4 2 Reversetheremovalprocedure Brake stopper arm nut torque 2 2 kgf m Adjust the brake page 39 to 40 and drivechain page...

Page 53: ...etrol Even a small amount of leaded petrol can contaminate the catalyst metals making the catalytic converterineffective Keeptheenginetunedup A defective catalytic converter contributes to air polluti...

Page 54: ...51 1 Canister 1...

Page 55: ...k Plug No spark Consult Authorised Hero MotoCorp Workshop Check spark plug for fouling Improper electrode gap Replace spark plug adjust Spark plug gap 0 6 0 7 mm Loose contact Check for poorly connect...

Page 56: ...heck bulbs Fuse wrong wattage Replace fuse Weak Fused Feeble horn sound or no light Replace bulbs 4 ELECTRICAL SYSTEM Ok Check connections Loose Secure connections Consult Authorised Hero MotoCorp Wor...

Page 57: ...signs as theyhelpavoidaccidents TheirviolationcanbepenalisedundertheMotorVehicleAct Mandatory Speed Limit No Hand Craft No Pedestrians No Right Turn No U Turn Overtaking Prohibited No Parking Length L...

Page 58: ...information about road directions are maps of specific destinations On highways they provide information about the location of public telephones restaurants hospitals parking petrol pumps resting pla...

Page 59: ...e Hero MotoCorp s authorized workshop as per the recommended schedule to be eligible for warranty benefits Each paid service should be availed within 90 days from the date of previous serviceorasperth...

Page 60: ...nymaintenance repairsrequiredduetobadroadconditionsormisuseof vehicle HF Deluxe 9 Ifanydefectcropsorrepairsneededasaresultofusingadulteratedfuel 11 Ifanydefectcropsorrepairsneededasaresultof vehicleme...

Page 61: ...uthorized dealers auto electricians maintenance willfull abuse destruction by fire collusion theft orrecharging 11 Ifabatterywhichisnotrecommendedisfittedonthevehiclethensuchbatterywillnotcarryanywarr...

Page 62: ...toCorp only obligation liability shall be to repair and orreplacethosepart s whichis areconsideredtobethecauseofnon compliancewiththeemissionstandards c The emission warranty shall be applicable only...

Page 63: ...ssures long life CONSEQUENTIAL DAMAGES ON USING NON GENUINE PARTS Clutch Plate Poor performance Material used is inferior Damages other parts of clutch like clutch center and outerclutch Affects fuel...

Page 64: ...ine performance Frequent stalling of engine Affects fuel efficiency Poor braking efficiency Rider safety an issue Higher emission level Noisy Operation Affects fuel efficiency Failure of chain can cau...

Page 65: ...O 367 368 FirstFloor Sector 34A Chandigarh 160022 India Tel 91 172 2623773 2623774 2623775 E mail chandigarh heromotocorp com HeroMotoCorpLtd KapoorTowers PlotNo 284 15 B RajpurRoad Dehradun 248001 I...

Page 66: ...H 5 Vijayawada 520008 AndhraPradesh India Tel 91 866 2546859 2546860 E mail vijayawada heromotocorp com Tel 91 40 23223735 23223727 23223570 E mail hyderabad heromotocorp com HeroMotoCorpLtd 3 6 289 3...

Reviews: