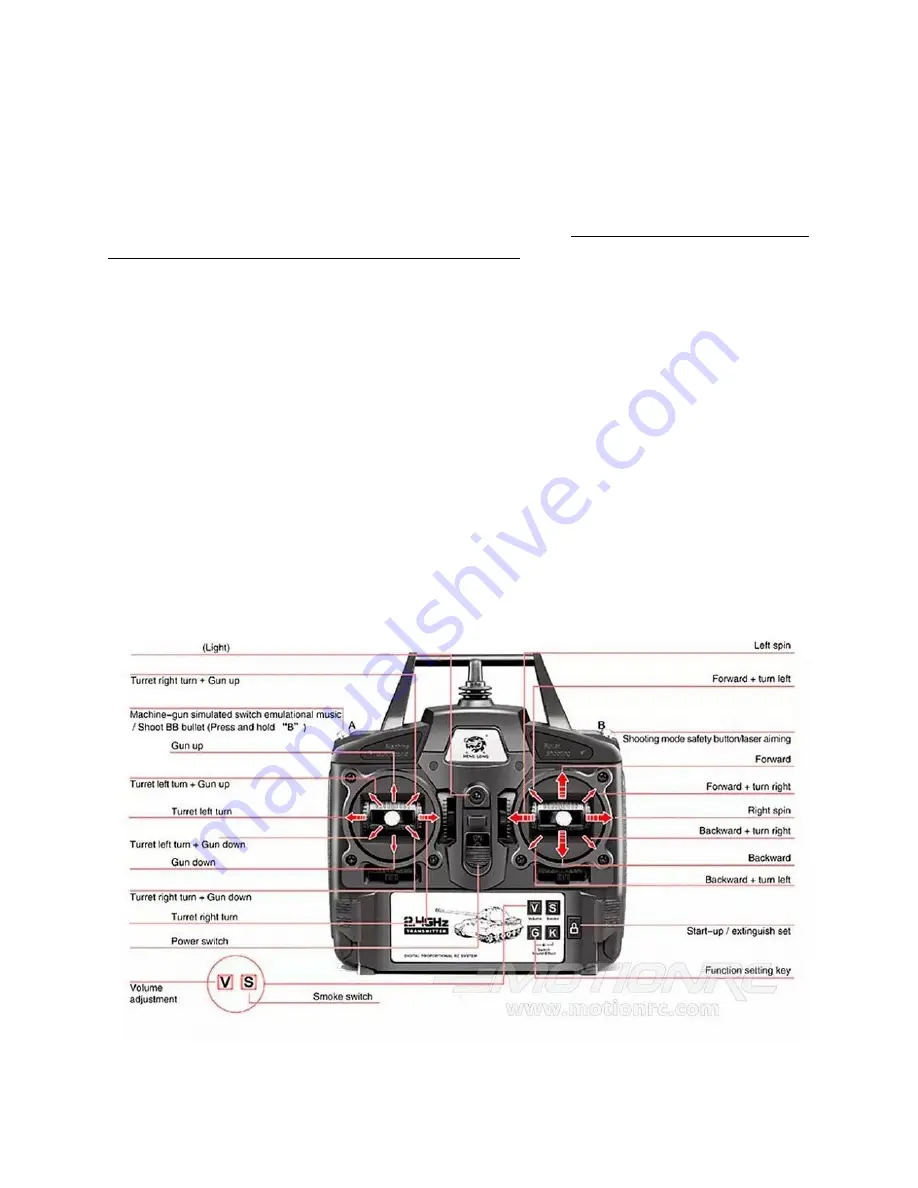
13) Press the "K" and "S" buttons at the same time as proscribed in the manual at the same time to cycle
through the four levels of track recoil.
14) Press the machine gun button and verify that the machine gun sound and LED fires.
15) Hold down the machine gun button and press the shooting button at the same time to toggle the
Airsoft firing sequence. You don't need to have an Airsoft BB loaded. Note, always point the barrel away,
just in case there is still a BB in there from the factory testing.
16) Drive the tank forward and back with the right stick forward and back, and turn right and left with
the right stick left and right. Notice that all the controls are proportional, meaning that you can do them
slowly or quickly. Precise control at different speeds and control inputs will come with practice. For now,
just move the sticks in all directions to verify the tank drives and turns in all directions. See the manual
for how to fine-tune the radio settings for acceleration curve, sensitivity, max speed setting, etc.
17) Maneuver the turret with the left stick: Left and right traverse the turret left and right, and up and
down elevate/depress the barrel up and down. Note, when you hear the "clack, clack, clack" sound, that
means the turret or barrel has reached its endpoint. Cease giving it that control input.
18) After a minute or two, power down the tank, remove the battery, and plug it in with the included
charger. DO NOT run the tank more than 2 minutes. Assuming everything works, congrats, your tank is
fully operational! Proceed to installing the cosmetic parts. By the time you've installed all of them, your
battery should be fully charged, then you can go out and play for stringently.
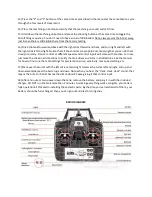
RADIO DIAGRAM


