6
LISTENING TO THE RADIO
Notes:
Ensure that the FM wire antenna is completely tangle free and extended to have
the best FM reception.
The AM band uses an internal, directional antenna. Rotate the entire radio for
best AM reception.
1. Press the
button to turn the radio ON.
2. Press the
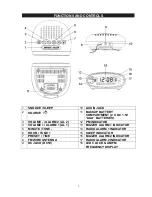
SOURCE
button again to select AM or FM band. When AM band is
selected, the AM frequency
will show on LED display.
3. Use the
TUNE +
or
TUNE –
button to select the desired radio station. If you
press and hold the
TUNE +
or
TUNE –
button for one second, then release, the
unit will automatically scan to the next broadcasting station.
4. The broadcasting radio frequency will be displayed for about 4 seconds before
reverting to the clock time.
5. Press and hold the
button for about 2 seconds to turn the radio OFF.
TO SET/RECALL RADIO PRESETS
1. Press the
button to turn the radio ON.
2. Press the
SOURCE
button again to select AM or FM band. When FM band is
selected, the FM frequency will show on the LED display.
3. Use the
TUNE +
or
TUNE –
button to select the desired radio station.
4. Press and hold the
PRESET
button to enable the program function. The preset
channel number “P01” indicator will flash on the LED display for initial setup.
Otherwise, the next available preset memory number will then flash in the LED
display. You may change to another preset memory number by tapping the
TUNE +
or
TUNE –
button.
Note:
If you select an existing preset memory, the new radio station frequency
will replace the existing one.
5. Repeat above steps #3 thru #4 to preset up to 10 stations for each of the AM
and FM bands.
6. To retrieve one of the preset stations already programmed, press
PRESET
button repeatedly until you reach the desired preset number (radio station).
AUXILIARY INPUT
This unit provides an auxiliary audio signal input jack for connecting external audio
devices like MP3 players and CD players and to listen to them through the speakers
of this unit.
1. Use an audio cable (not included) with one 3.5 mm stereo plug on each end.
2. Plug one end into the
AUX-IN Jack
on the main unit and the other end of the
cable into the Line-out Jack or Headphone Jack of your external audio device.
3. Turn on the unit AND external audio device.
4. To select the auxiliary audio input, tap the
SOURCE
button
repeatedly
to select
AUX mode. “AU” appears on the
LED DISPLAY
.
5. The volume level can now be controlled through the main unit. Operate all other
functions from the external audio device itself.
6. Press and hold the
button for about 2 seconds to turn the unit OFF.


