mounting the motor to the ceiling.
Unlike most ceiling fans, The Ceiling Fan requires you to attach the blades to the motor BEFORE
SELECTING A LOCATION:
v
Choose a location for mounting the fan where the blades will have at least 2.1 metres of
clearance from the floor.
v
Make sure that the installation site will not allow the rotating fan blades to come into contact with
any object and that there is a minimum clearance of 150mm (6”) from the blade tip to the wall or
ceiling. Please note that the bigger this clearance is the better the airflow from your fan will be.
v
DO NOT use outdoors. Installing the fan in a position where it could be exposed to water or
moisture is dangerous.
v
If the location you have chosen does not have a suitable support beam capable of supporting
45Kg, install a brace 2” x 4” between the ceiling joists as a support medium.
ASSEMBLY:
If installing more than one ceiling fan, ensure that the blades do not get mixed up between units, as
each set is dynamically balanced.
BLADE ATTACHMENT:
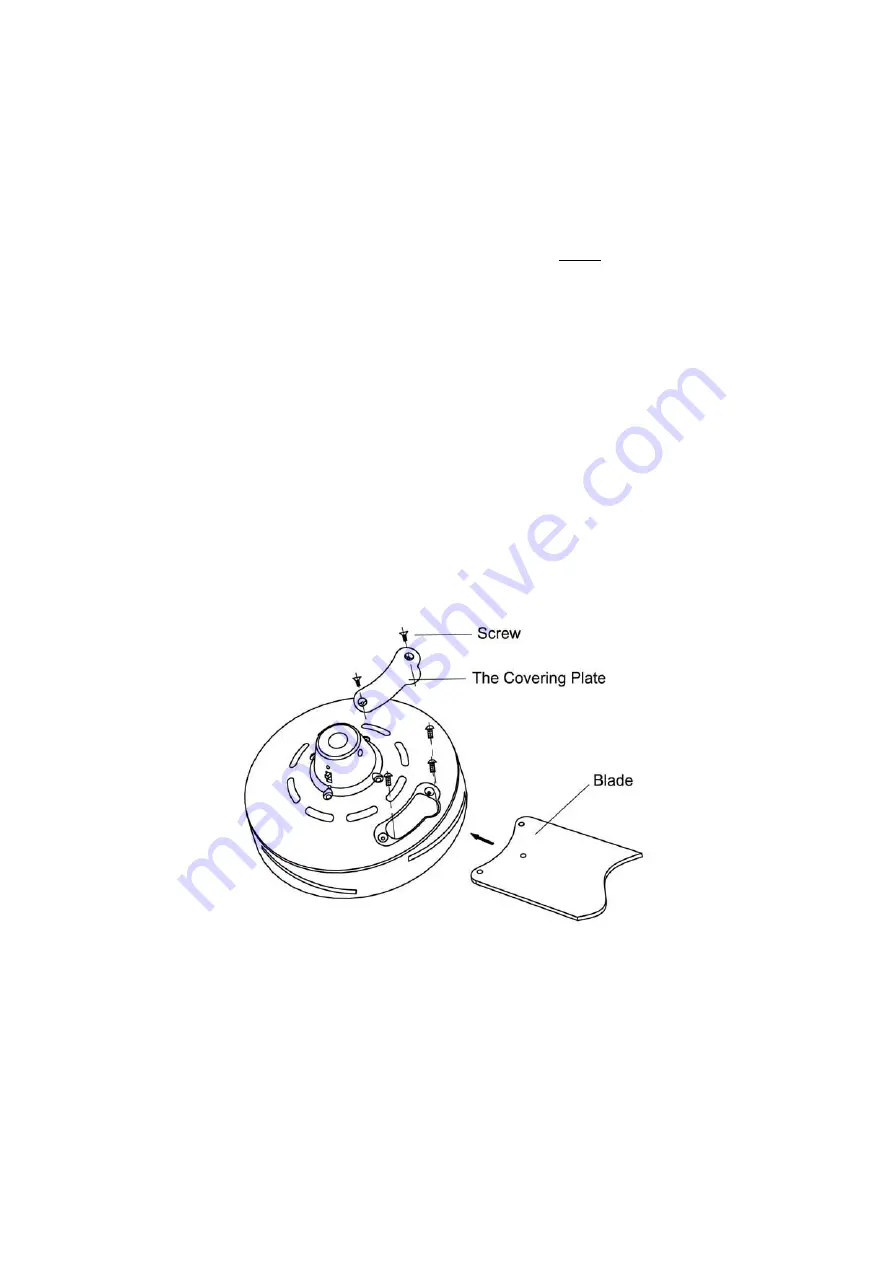
1. Remove the two screws from the covering plate on top of the motor housing (Fig. 4), and
remove the plate.
2. Insert the blade through the slots around the motor. Align the blade with the three holes, and
secure the three screws through the opening exposed when the covering plate was removed. If
the holes do not align, the blade is upside down. The blade is designed to fit snugly, the screws
should be vertical with the blade.
3. Tighten all blade screws evenly and securely to ensure quiet, wobble free operation of the fan.
4. Replace the covering plate on top of the motor housing by reversing step 1.
Summary of Contents for DAYNE
Page 2: ......


