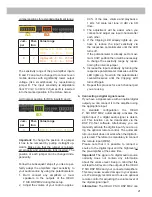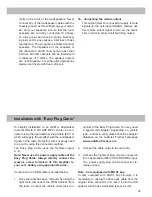
only handle uncompressed digital stereo sig-
nals in PCM format with a sample rate between
12 kHz and 96 kHz. Neither Dolby-coded sig-
nals nor compressed MP3-/WMA- or AAC-audio
formats will be accepted.
5. Connection to power supply
Make sure to disconnect the battery before
installing the HELIX P SIX DSP MK2!
Connect the +12 V / 24 V power cable to the
positive terminal of the battery. The positive wire
from the battery to the amplifier power terminals
needs to have an inline fuse at a distance of
no more than 12 inches (30 cm) from the bat-
tery. The value of the fuse is calculated from the
maximum total current input of the whole car au-
dio system (P SIX DSP MK2 = max. 60 A RMS
at 12 V RMS, max. 30 A RMS at 24 V power
supply). If your power wires are short (less than
1 m / 40”) then a wire gauge of 16 mm² / AWG
6 will be sufficient. In all other cases we strong
-
ly recommend gauges of 25 - 35 mm² / AWG
4 – 2! The ground cable (same gauge as the
+12 V / +24 V wire) should be connected to a
common ground reference point (this is locat-
ed where the negative terminal of the battery is
grounded to the metal body of the vehicle), or to
a prepared metal location on the vehicle chas-
sis, i.e. an area which has been cleaned of all
paint residues.
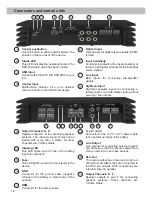
6. Connecting the remote input
The remote input (
REM
) has to be connected to
the radio remote output if the amplifiers pre-am
-
plifier inputs are used as signal inputs. We do
not recommend controlling the remote input via
the ignition switch to avoid pop noise during turn
on/off. If the
Highlevel Inputs
are used this input
does not need to be connected as long as the
car radio has BTL output stages.
7. Configuration of the remote input
The HELIX P SIX DSP MK2 will be turned on
automatically if the highlevel inputs (
High level
Input
) are used or if a signal is applied to the
remote input (
REM
). The “Automatic Remote”
switch allows to deactivate the automatic turn-
on feature. The feature should be deactivated if
there are e.g. disturbing noises while switching
on/off the amplifier.
Note:
If the automatic turn-on function is deac-
tivated it is mandatory to use the
REM
terminal
to power up the amplifier! The highlevel signal
will be ignored in this case.
Note:
The activation of the amplifier via high
-
level loudspeaker input is activated ex works.
To deactivate the automatic turn-on feature you
have to open the device and change the posi-
tion of the “Automatic Remote” switch.
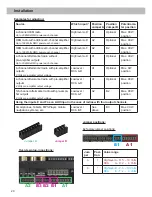
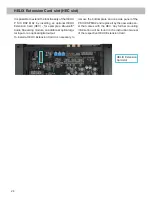
Therefore untighten the ten Phillips screws of
the bottom plate. Now you can remove it and
get access to the switch. The switch is located
near by the jumper positions A1 and B1 (see
marking in the following picture).
Jumper A1 & B1
Position 1: Activation via highlevel loudspeak-
er input is enabled (ex works).
Position 2: Activation via highlevel loudspeak-
er input is disabled.
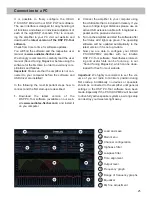
8. Configuration of the integrated DSP
The general amplifier settings should be
conducted with the DSP PC-Tool software
before using the amplifier for the first time.
Ignoring this advice may result in damaging the
connected speakers / amplifiers. Especially if
the P SIX DSP MK2 will be used to drive ful-
ly active speaker systems, a wrong setup can
destroy your tweeters right away. Information
about connecting the P SIX DSP MK2 to a com-
puter can be found on page 25.
9. Connecting the loudspeaker outputs
The loudspeaker outputs can be connected di-
22
Installation


