30
Various adjustment examples of the input sensi-
tivity can be found in the table below. For further
applications or if you are not sure regarding the
signal sources output voltage, please contact
your HELIX specialist dealer.
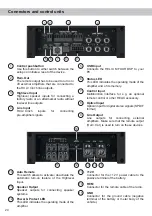
9. Connecting the loudspeaker outputs
The loudspeaker outputs can be connected
directly to the wires of the loudspeakers. Never
connect any of the loudspeaker cables with the
chassis ground as this will damage your ampli-
fier and your speakers.
Ensure that the loudspeakers are correctly con-
nected (in phase), i.e. plus to plus and minus
to minus. Exchanging plus and minus causes
a total loss of bass reproduction. The plus pole
is indicated on most speakers. The impedance
of each channel must not be less than 2 Ohms
(4 Ohms in bridged mode), otherwise the ampli-
fier protection will be activated.
10. Connecting the remote output
This output (
Rem. Out
) is used to supply remote
signals to the external amplifier/s. Always use
this remote output signal to turn on the ampli-
fiers in order to avoid on / off switching noises.
Installation
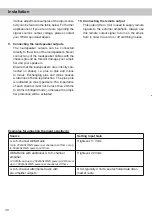
Examples for adjusting the input sensitivity:
Source
Setting Input Gain
4- to 6-channel OEM-Radio
Up to 25 Watts RMS power per channel at 4 Ohms or up
to 50 Watts RMS power at 2 Ohms
Highlevel: 11 Volts
OEM-Radio with additional 4- to 6-channel
amplifier
>25 Watts and up to 200 Watts RMS power at 4 Ohms or
up to 100 Watts RMS power per channel at 8 Ohms
Highlevel: 20 Volts
4- to 6-channel aftermarket radio with
pre- amplifier outputs
RCA: typically 4 Volts; see technical data after-
market radio

