background image

www.heinner.com   


2100W, 50/60Hz, 220-240V 


    VI.    USING INSTRUCTIONS 

ASSEMBLING 


Press  the  fasten  button

hold  the  head  and  insert  it  into  the  inlet(when  inserting 

please  pay  attention  the  head  must  be  slanted  as  per  arrow  indicated  on  the  top,  see 
fig.1), then move the head anticlockwise so that the head being fastened tightly.(fig.2)     


Place the snake into the head, long end first, and turn to feed the screw slightly until 

it is set into the motor housing (fig.3). 


Place  the  cutting  blade  onto  the  snake  shaft  with  the  blade  facing  the  front  as 

illustrated (fig.4). If it is not fitted properly, meat will not be grinded. 


Place the desired cutting plate next to the cutting blade, fitting protrusions in the slot 

(fig.5).   


Support or press the center of the cutting plate with one finger then screw the fixing 

ring tight with another hand (fig.6). Do not over tighten. 


Place the hopper plate on the head and fix it into position. 


Locate the unit on a firm place.   


The air passage at the bottom and the side of the motor housing should be kept free 

and not blocked. 

27.  This appliance can be used by children aged from 8 years and above if they have been given 
supervision or instruction concerning use of the appliance in a safe way and if they understand 
the hazards involved. Cleaning and user maintenance shall not be made by children unless they 
are aged from 8 years and above and supervised. Keep the appliance and its cord out of reach of 
children aged less than 8 years. 
28.  This appliance is intended to be used only in household.   

Summary of Contents for MG-2100RD

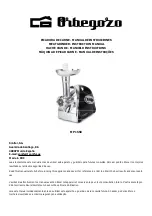
Page 1: ...MEAT GRINDER Model MG 2100RD www heinner com Meat Grinder Power 2100W Color Red...

Page 2: ...designed to provide you with all required instructions related to the installation use and maintenance of the appliance In order to operate the unit correctly and safety please read this instruction...

Page 3: ...g blade 2 ON OFF SLOW REV Reverse switch 10 Cutting plate fine 3 Fasten button 11 Cutting plate medium 4 Tube inlet 12 Cutting plate coarse 5 Food pusher 13 Fixing ring 6 Hopper plate 14 Kebbe 7 Head...

Page 4: ...and if they understand the hazards involved 8 Children shall not play with the appliance 9 Switch off the appliance and disconnect from supply before changing accessories or approaching parts that mov...

Page 5: ...he appliance for more than 5 minutes consecutively Leave the appliance to cool for 10 minutes before using again 19 Accessories shall include instructions for their safe use 20 It shall warn of potent...

Page 6: ...ing blade fitting protrusions in the slot fig 5 Support or press the center of the cutting plate with one finger then screw the fixing ring tight with another hand fig 6 Do not over tighten Place the...

Page 7: ...the projections of the mincer head Turn the screw ring in the direction of the arrow on the cutter housing until it is properly fastened 2 Attach the cutter housing to the motor unit 3 Place the tray...

Page 8: ...he mincer head 2 Attach the cutter housing to the motor unit 3 Place the tray on the upright part of the cutter housing 4 Now the appliance is ready for making sausages Put the ingredients in the tray...

Page 9: ...e slightly until it is set into the motor housing fig 4 5 Insert the shaft of the snake into the central axis of the screw fig 5 6 Put the whole sleeve along with the fixing ring through the screw the...

Page 10: ...fig 12 2 Press the release button and turn the whole cutter housing in the direction of the arrow Remove the pusher and the tray fig 13 3 Unscrew the screw ring and remove all parts of the cutter hou...

Page 11: ...roduct names are trademarks or registered trademarks of their respective holders No part of the specifications may be reproduced in any form or by any means or used to make any derivative such as tran...

Page 12: ...www heinner com 2100W 50 60Hz 220 240V 11 MA IN DE TOCAT CARNE Model MG 2100RD www heinner com Ma in de tocat carne Putere 2100W Culoare Rosu...

Page 13: ...t pentru a v oferi toate instruc iunile necesare referitoare la instalarea utilizarea i ntre inerea aparatului Pentru utilizarea corect i n siguran a aparatului v rugam s citi i cu aten ie acest manua...

Page 14: ...u it 2 Carcas 10 Sit fin 3 Buton de blocare 11 Sit medie 4 Orificiu pentru tub 12 Sit medie 5 Dispozitiv de mpingere 13 Inel de fixare 6 Tav de alimentare 14 Accesoriu pentru c rna i 7 Tub principal 1...

Page 15: ...aparatul 9 Opri i aparatul i deconecta i l de la sursa de alimentare cu energie electric nainte de a schimba accesorii sau de a v apropia de piesele care se mi c n timpul func ion rii n cazul n care t...

Page 16: ...Nm Nu l sa i aparatul s func ioneze continuu pentru mai mult de cinci minute nainte de utiliza aparatul din nou l sa i l s se r ceasc timp de 10 minute 19 Accesoriile includ instruc iuni referitoare...

Page 17: ...oeminen ele n caneluri fig 5 5 Sus ine i sau ap sa i cu un deget centrul sitei de tocare apoi n uruba i bine inelul de fixare cu cealalt m n fig 6 Nu str nge i excesiv 6 Fixa i tava de alimentare pe c...

Page 18: ...le sitei de tocare pe proeminen ele tubului n uruba i inelul de fixare n direc ia indicat de s geat p n c nd acesta se fixeaz bine 2 Fixa i tubul pe unitatea motorului 3 A eza i tava n partea de sus a...

Page 19: ...i 4 Aparatul este preg tit pentru prepararea c rna ilor Pune i ingredientele n tav Utiliza i dispozitivul de mpingere pentru a mpinge u or carnea n tubul de tocare ine i membranele pentru c rna i n ap...

Page 20: ...esta se fixeaz n lag rul motorului fig 4 5 Introduce i cap tul axului melcat n centrul axului spiralei pentru stoarcere 6 Trece i conul prin inelul de fixare i pozi iona i spirala pentru stoarcere n c...

Page 21: ...suci i tubul n direc ia indicat de s geat Deta a i dispozitivul de mpingere i tava fig 13 3 De uruba i inelul de fixare i scoate i toate componentele de pe tub Nu cur a i componentele cu ajutorul ma i...

Page 22: ...www heinner com 2100W 50 60Hz 220 240V 21 Putere 2100 W Alimentare 220 240 V 50 60 Hz Nivel de zgomot 90 dB Culoare Rosu XII FI A TEHNIC...

Page 23: ...O U G 5 2015 privind deseurile de echipamente electrice si electronice va recomandam sa aveti in vedere urmatoarele Materialele si componentele folosite la constructia acestui produs sunt materiale d...

Page 24: ...loc nici utilizat pentru ob inerea unor derivate precum traduceri transform ri sau adapt ri f r consim m ntul prealabil al companiei NETWORK ONE DISTRIBUTION Copyright 2013 Network One Distribution To...

Page 25: ...www heinner com 2100W 50 60Hz 220 240V 24 MG 2100RD www heinner com 2100W...

Page 26: ...www heinner com 2100W 50 60Hz 220 240V 25 I II...

Page 27: ...www heinner com 2100W 50 60Hz 220 240V 26 1 9 2 10 3 11 4 12 5 13 6 14 7 15 kibbe 8 16 III...

Page 28: ...www heinner com 2100W 50 60Hz 220 240V 27 IV 1 2 3 60 4 5 6 7 8 9 V 1 2 4 Nm 3 4 5...

Page 29: ...www heinner com 2100W 50 60Hz 220 240V 28 6 7 8 9 10 11 12 13 14 15 16 17 18 20 x 20 x 60 5 Nm 10 19 20 21 22 23 REV 24 25 2002 96 26...

Page 30: ...www heinner com 2100W 50 60Hz 220 240V 29 VI 1 1 2 2 3 3 4 4 5 5 6 6 7 8 27 8 8 8 28...

Page 31: ...www heinner com 2100W 50 60Hz 220 240V 30 VII 1 2 3 4 10 2...

Page 32: ...www heinner com 2100W 50 60Hz 220 240V 31 1 8 kibbe 9 2 3 4 kibbe 10 VIII KIBBE IX 1 11 2 3 4 10 kibbe Kibbe Kibbe...

Page 33: ...www heinner com 2100W 50 60Hz 220 240V 32 X 1 1 2 2 3 3 4 4 5 6 6 7 7 8 8...

Page 34: ...www heinner com 2100W 50 60Hz 220 240V 33 XI 1 2 13 3 4 5 6...

Page 35: ...60 Hz 90 dB XII HEINNER Network One Distribution SRL NETWORK ONE DISTRIBUTION Copyright 2013 Network One Distribution www heinner com http www nod ro http www heinner com http www nod ro Network One D...

Page 36: ...www heinner com 2100W 50 60Hz 220 240V 35 H SDAR L G P Model MG 2100RD www heinner com H sdar l k sz l k Teljes tm ny 2100W Sz n piros...

Page 37: ...s re bocs ssunk a k sz l k zembe helyez s re haszn lat ra s karbantart s ra vonatkoz minden sz ks ges utas t st a A k sz l k helyes s biztons gos haszn lata rdek ben az zembe helyez s s haszn lat el t...

Page 38: ...ol 9 K s 2 K sz l k h z 10 H s rl t rcsa kis lyuk 3 Blokkol gomb 11 H s rl t rcsa k zepes 4 Fejr sz csatlakoz ja 12 v g sz r 5 T m r d 13 R gz t gy r 6 Adagol t lca 14 Kieg sz t kolb szt lt shez 7 Fej...

Page 39: ...helytelen haszn lat vesz lyeivel 8 A gyermekeknek tilos j tszani a k sz l kkel 9 Miel tt cser ln a k sz l k tartoz kait vagy miel tt a forg r szekhez k zeledne kapcsolja ki a k sz l ket s ramtalan tsa...

Page 40: ...et 5 percn l hosszabb ideig folytonosan m k dni A k sz l k jb li haszn lata el tt hagyja 10 percig h lni 19 A kell kek a biztons gi haszn latukra vonatkoz utas t sokat is tartalmaznak 20 Ezek felh vj...

Page 41: ...r szeket a v lyatokba 5 bra 5 Egyik ujj val nyomja vagy tartsa meg a t rcsa k zep t majd a m sik kez vel csavarja be j l a r gz t gy r t 6 bra Ne szor tsa be t ls gosan er sen 6 Helyezze el az adagol...

Page 42: ...dtek a dar l fej domborulataival Csavarja a r gz t gy r t a ny l ltal jelzett ir nyba m g alaposan r gz l 2 Csatlakoztassa a fejr szt a motoregys ghez 3 Helyezze a t lc t a fejr sz fels r sz re 4 A k...

Page 43: ...rulataival 2 Csatlakoztassa a fejr szt a motoregys ghez 3 Helyezze a t lc t a fejr sz fels r sz re 4 A k sz l k k szen ll a kolb szk sz t shez Helyezze a hozz val kat a t lc ba A h st a t m r ddal t m...

Page 44: ...majd csavarja meg lassan m g r gz l a motor gyban 4 bra 5 A csiga v g t helyezze be a csavar spir l k zep be 6 A k p alak tartoz kot h zza kereszt l a r gz t gy r n s helyezze be a csavar spri lt a k...

Page 45: ...blokkol sfelold gombot s tekerje az eg sz fejr szt a ny l ltal jel lt ir nyba T vol tsa el a t m rudat s a t lc t 13 bra 3 Csavarja ki a r gz t gy r t s vegye ki az sszes alkatr szt a fejr szb l Ne t...

Page 46: ...rtokl k ltal bejegyzett m rkanevek A m szaki le r sok egyik r sze sem reproduk lhat semmilyen form ban s semmilyen m don s nem haszn lhat fel ford t sra tv ltoztat sra vagy alkalmaz sra a NETWORK ONE...

Reviews: