3
598-1116-10
ENGLISH
Note:
One remote control is able to independently oper-
ate two receiver units. If more than two receiver units,
operating independently, are desired, additional remote
controls will need to be purchased.
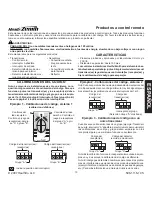
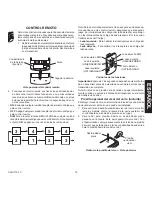
1. Remove Tab from Battery Chamber. Remove cover
from back of transmitter. Gently pull tab out of battery
chamber. Slide cover onto transmitter.
REmOTE CONTROL
Rear View of Remote Control
4
5
4
3
1
2
3
2
2. Remote Control Functions. The three buttons on the left side
of the remote will operate one or more receiver units with
matching code settings. The three buttons on the right side of
the remote will operate a second set of one or more receiver
units.
•
ON:
Turns on any receiver unit set to the same code as this
remote control.
•
OFF:
Turns off any receiver unit set to the same code as this
remote control.
•
DIm:
Activates the DIM feature for any receiver unit set to the
same code as this remote control.
Note:
Pressing the DIM button
steps through five brightness levels.
ON DIP
1 2 3 4
ON DIP
1 2 3 4
Battery Chamber
(Type A23)
Battery
Cover
Tab
Note:
To independently operate a second receiver unit using a
single remote control, make sure the second set of code switches
(Right Side) and the code switches on each receiver match (see
Code Settings
section).
•
Left Side
- Set left side code switches.
•
Right Side
- Set right side code switches.
Important:
Wait 1 to 2 seconds after you press a transmitter
button before you press it again to allow the transmission to be
completed.
Note:
If light does not turn on or intermittently turns on and off when
transmitter buttons are pushed, see
Troubleshooting Guide
.
Optional Car Visor Clip (Included)
The remote control includes an optional car visor clip for added
convenience that may be installed.
1. To attach car visor clip to remote control (if desired) push it
into slot on rear of remote unit until it snaps into place.
2. To remove car visor clip, insert a small, flat-head screwdriver
into slot on back of remote. Gently push down on portion of
visor clip inside slot with screwdriver while pulling clip out of
remote from top.
Removing Visor Clip - Rear View
Flat-Head
Screwdriver
Optional
Visor Clip
Function Controls
Left Side DIM
Left Side ON
Left Side OFF
Right Side DIM
Right Side ON
Right Side OFF


