background image

Hearthstone Quality Home Heating Products, Inc 

®                                                                                                                                                             Green Mountain 40 (Model 8640) 

I

NSTALLATION


U

NPACKING


Hearthstone  packages your Green Mountain 40 
woodstove with the greatest care so that it ships 
safely. Under certain circumstances, however, 
damage may occur during transit and handling. 
When you receive the Green Mountain 40, carefully 
unpack and inspect the stove and all accompanying 
parts.  Ensure that  all parts are included inside the 
stove. If any parts are damaged or missing, please 
contact your authorized Hearthstone dealer 
immediately.  
 

P

ACK 

L

IST


Green Mountain 40 Model 8640 Woodstove 
Owner’s Manual  
 
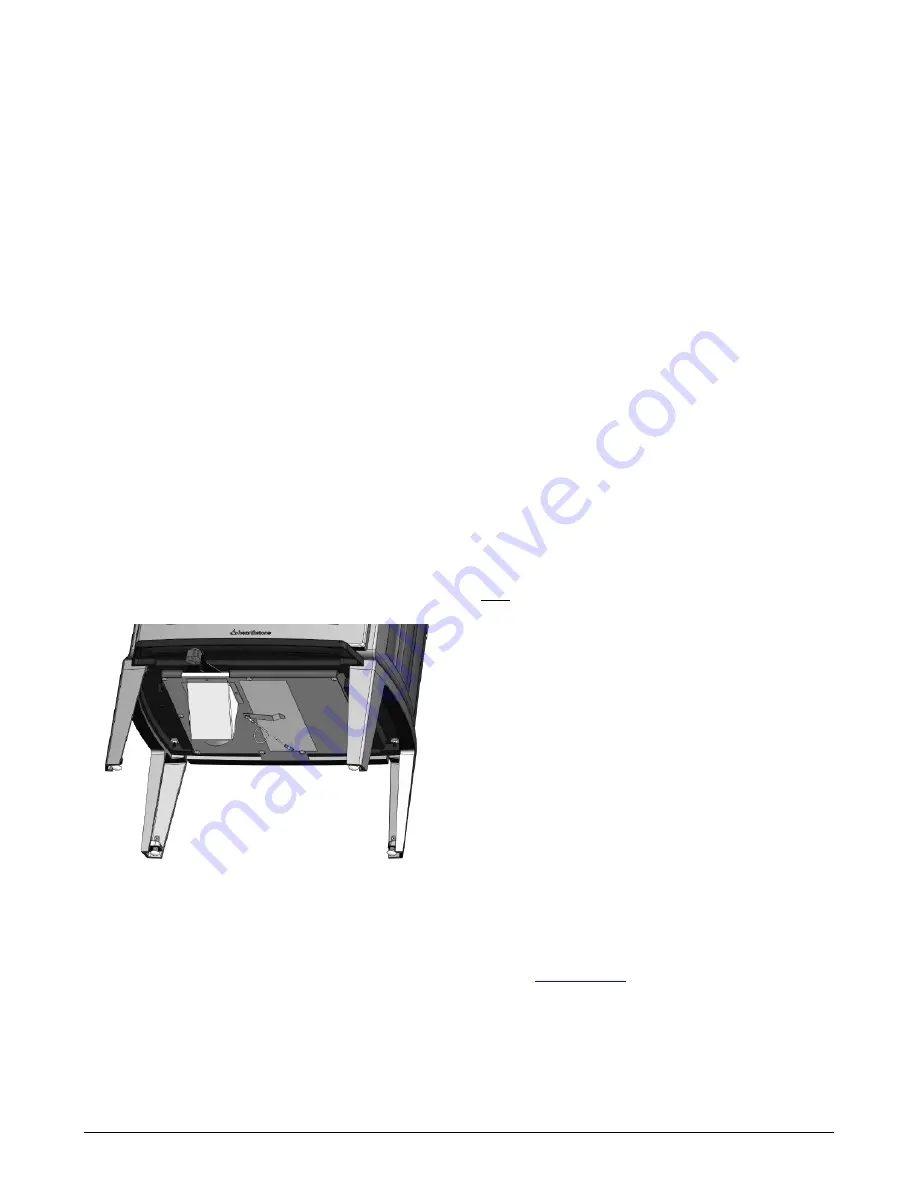
The label is attached by a cable to the bottom of the 
stove. Take care when lifting the stove not to 
damage the label or cable. After final positioning of 
the stove, the label may be stored in the holding clip 
on the bottom shield of the stove.


Figure 2 - Label Location 

I

NSTALLING 

Y

OUR 

S

TOVE


Choose a place to install your Green Mountain 40 
woodstove.  Consider the location of your stove for 
optimum heating efficiency. In general, it is better to 
place your stove in a main living area, rather than in 
a basement or other confined space.  

Inspect this location to make sure that the stove and 
stovepipes will have the required clearance from 
combustible materials that are near the stove. 
Combustibles include walls, floor, ceiling, and 
chimney chase. You must carefully consider the 
clearances to all of these combustibles before 
actually connecting your stove.   

If the floor is made of combustible material, then a 
non-combustible floor protector is required between 
the floor and the stove. An example of a non-
combustible floor protector is a hearth constructed 
with a continuous layer of tile, brick, slate, glass  or 
another non-combustible facing. There is no R-value 
requirement. 

If you use a rear  connector pipe, ensure it is listed 
with Underwriter’s Laboratories. Check the listing of 
your pipe with UL for the correct clearances.   

The diagrams in this manual represent typical 
installations, but are specific to the Simpson Dura-
Vent DVL brand.   

Clearances to NFPA  Code 211 Protected 
Surfaces 

You can reduce the clearances to combustible 
surfaces by using any National Fire Protection 
Agency (NFPA) approved wall protection system


with additional approval of the regulatory authority 
having jurisdiction in your area.  Please refer to 
NFPA Code 211 for specifications and complete 
details. You can obtain this information directly from 
the NFPA.


National Fire Protection Agency 


Batterymarch Park 


Quincy, MA  02269 


1-800-344-3555 


1-617-770-3000 

www.nfpa.org


Summary of Contents for 8031

Page 1: ... NEW GREEN MOUNTAIN 40 WOOD STOVE If this room heater is not properly installed a house fire may result To reduce the risk of fire follow the installation instructions Failure to follow these instructions can result in property damage bodily injury or even death Conforms to UL Std 1482 Certified to ULC Std S627 CONTACT LOCAL AUTHORITIES WITH JURISDICTION BUILDING DEPARTMENT or FIRE OFFICIALS ABOUT...

Page 2: ... recognizing potential impacts to efficiency Proper draft is important to the efficient operation of your heater Refer to the Normal Operation section of this manual for information regarding adequate draft Both excessive and sub minimum draft can affect the efficiency of your wood heater Excessive draft can lead to over consumption of fuel lower overall heating capacity of the stove and potential...

Page 3: ...VENTING COMPONENTS CONFIGURATION REQUIREMENTS 13 INSTALLING IN A MOBILE HOME 177 OPERATION 18 CONTROLS AND FEATURES 18 BUILDING A FIRE 20 BREAKING IN YOUR WOOD STOVE 20 NORMAL OPERATION 21 CATALYTIC COMBUSTOR OPERATION 22 MAINTENANCE 24 CATALYTIC COMBUSTOR INSPECTION AND REPLACEMENT PROCEDURES 24 INSPECTING THE CATALYSTS 24 REPLACING THE CATALYSTS 25 REPLACING THE BAFFLE 25 REPLACING THE REFRACTOR...

Page 4: ...nstructions can result in fire property damage bodily injury and even death Install the stove in a safe open area away from traffic flow doors and hallways If possible try to install the stove near an existing chimney and chimney connector It is extremely important to install this stove with the proper clearance from combustible surfaces You can purchase specific connector pipe and special wall co...

Page 5: ...nditions in the stove Keep all such materials away from the stove Never use a wood grate or other device to elevate the fire Never allow logs in the firebox to hit the glass when the door is closed Never slam the door or use the door to force wood in to the stove Never over fire your stove See page 23 Never put articles of clothing or candles on a hot stove Never connect the stove to a flue used b...

Page 6: ... out the inside of the stove thoroughly Check and clean the catalytic combustor if necessary Inspect all door gasket material and replace if worn frayed cracked or extremely hard EMERGENCY PROCEDURES If you have a stovepipe or chimney fire follow these instructions 1 If the fire is too threatening leave the area and call the fire department immediately If not perform the next three steps 2 Close t...

Page 7: ...32 cubic feet Maximum Log Length Up To 16 40 6cm Emissions 0 9 g hr Burn Time Up to 16 hrs Heat Life Up to 20 hours Note The amount and weight of wood contained per cubic foot of firebox volume can vary from 10 to 25 lbs per cubic foot depending on type of wood moisture content packing density and other factors Stove Dimensions Height 30 3 8 77 2cm Width 23 1 4 59 1cm Depth 19 3 8 49 2cm Weight 46...

Page 8: ... that the stove and stovepipes will have the required clearance from combustible materials that are near the stove Combustibles include walls floor ceiling and chimney chase You must carefully consider the clearances to all of these combustibles before actually connecting your stove If the floor is made of combustible material then a non combustible floor protector is required between the floor an...

Page 9: ...covering of noncombustible material The Green Mountain 40 does not require an insulated hearth pad The minimum floor protection must be met under the stove and extend beyond the stove as follows The minimum floor protection for US installations is 33in x 31 1 2in The minimum floor protection for installations in Canada is 43in x 40in Figure 3 Hearth Dimensions ...

Page 10: ...onnector Inc Rear Heat Shield 13 33cm 7 18cm 12 32cm 24 5 64cm 6 16cm 16 5 42cm Double Wall Connector With Blower Kit Shield 13 33cm 7 18cm 12 32cm 24 5 64cm 6 16cm 16 5 42cm Alcove W Single Wall Conn Inc Rear Heat Shield 13 33cm 9 23cm 14 36cm 24 5 63cm 6 16cm 16 5 42cm Alcove W Single Wall Conn With Blower Kit Shield 13 33cm 9 23cm 14 36cm 24 5 63cm 6 16cm 16 5 42cm Alcove W Dbl Wall Conn Inc Re...

Page 11: ...l top flue exit With Blower Kit Shield Inc Rear Heat Shield With Blower Kit Shield Inc Rear Heat Shield A 9 23cm 9 23cm 7 18 cm 7 18 cm B 14 36 cm 14 36 cm 12 32cm 12 32cm For double wall pipe clearance to ceiling refer to pipe manufacturer specifications FOR BLOWER KIT USE KIT 96 57400 See Parallel Clearance to Combustibles for clearances to the sides of the stove ...

Page 12: ...ed thimble minimum 24 gauge in thickness having two 1in air channels separated from combustibles by a minimum of 6in of glass fiber insulation Opening shall be covered and thimble supported with a sheet steel support minimum 24 gauge in thickness D Solid insulated listed factory built chimney length with an inside diameter 2in larger than the chimney connector and having 1in or more of insulation ...

Page 13: ... hearth keep in mind the need to avoid structural members of the house The outside air kit attaches to the underside of the stove Refer to the instructions provided with the kit for installation An adaptor for 4 duct is available if needed KIT 90 53308 Figure 7 Outside Air Kit Detail The International Residential Code IRC does not allow the outside air duct to terminate higher than the appliance S...

Page 14: ...To protect against the possibility of a house fire you must properly install and constantly maintain the venting system in good condition Be sure to inspect the chimney and chimney connector and keep it clean Upon inspection immediately replace rusted cracked or broken components Failure to follow these instructions and specified components or using make shift compromises can result in fire proper...

Page 15: ...r ULC S629 or 2 a code approved masonry chimney with a flue liner The chimney size should not be less than the flue collar or more than three times greater than the cross sectional area of the flue collar We recommend installing a cleanout tee where possible to simplify chimney cleaning and maintenance Connecting to a Prefabricated Metal Chimney There are two ways to install a prefabricated metal ...

Page 16: ...ckness of 5 8 16 mm installed with refractory mortar and with at least 1 25 mm air space around the liner Stainless steel UL listed 6 diameter insulated or wrapped liner or the space around the liner filled with vermiculite or suitable material these keep the liner warmer for better performance Ensure any equivalent flue liner is a listed chimney liner system meeting type HT requirements or other ...

Page 17: ...Hearthstone Quality Home Heating Products Inc Green Mountain 40 Model 8640 16 Figure 9 Typical Chimney Configurations ...

Page 18: ...INSTALL IN A SLEEPING ROOM IN A MOBILE HOME CAUTION MAINTAIN THE STRUCTURAL INTEGRITY OF THE MOBILE HOME WALLS FLOOR CEILING AND ROOF WHEN INSTALLING AND USING YOUR STOVE FAILURE TO FOLLOW THESE INSTRUCTIONS AND SPECIFIED COMPONENTS OR USING MAKE SHIFT COMPROMISES CAN RESULT IN FIRE PROPERTY DAMAGE BODILY INJURY AND EVEN DEATH Burning any fuel other than wood in this unit could generate dangerous ...

Page 19: ...dle in and down until it latches shut Gently pull on the door handle to make sure it is properly latched PRIMARY AIR CONTROL The primary air control lever is located under the ash lip The primary air control allows you to regulate the amount of air entering the firebox Generally the more air allowed into the firebox the faster the rate of burn and the higher the heat output conversely less air cre...

Page 20: ... OTHER MATERIALS AS FUEL THEY ARE NOT SAFE DO NOT BURN GARBAGE OR FLAMMABLE FLUIDS THE USE OF UNAUTHORIZED FUEL SUCH AS COAL COULD PRODUCE HIGH LEVELS OF CARBON DIOXIDE IN THE LIVING SPACE AT HIGH LEVELS CARBON DIOXIDE COULD RESULT IN PERSONAL INJURY OR DEATH The quality of your firewood directly affects heat output duration of burn and performance of your stove Softwoods generally burn hotter and...

Page 21: ... stack Plastic or tarps that cover the sides of the woodpile trap moisture and prevent the wood from drying As for stacking an old Vermonter said The spaces between the logs should be large enough for a mouse to get through but not for the cat that s chasing it CAUTION DO NOT STORE FIREWOOD WITHIN THE STOVE S SPECIFIED CLEARANCES TO COMBUSTIBLE MATERIALS BUILDING A FIRE Once you understand the con...

Page 22: ...sible steam or boiling moisture and hissing indicate the soapstone is too hot At most a few small chunks of wood should be added to the fire to reach safe break in temperatures 6 Once the stove is warm but not hot to the touch close the primary air control by pushing it fully inward toward the stove to allow the fire to die out completely 7 Let the stove return to room temperature Your first fire ...

Page 23: ... medium to high firing rate must be maintained for about 20 minutes This ensures that the stove catalysts and fuel are all stabilized and at proper operating temperatures Even though it is possible to have gas temperatures reach 500 F 260 C within 2 to 3 minutes after a fire is started if the fire is allowed to die down immediately it may go out or the combustor may stop working Once the stove and...

Page 24: ...cked refractory panels discolored or warped external parts and damaged finish ANY SIGNS OF OVER FIRING WILL VOID YOUR WARRANTY THE FRONT DOOR MUST REMAIN CLOSED WHEN IN OPERATION REMOVAL AND DISPOSAL OF ASHES You can leave a thin layer of ashes in the firebox if preferred Allow fire to die down or go out completely It is important to prevent ashes from building up around the front door opening or ...

Page 25: ...nd often reach temperatures in excess of 1 000 F If catalyst temperatures are not in excess of 500 F refer to the Catalyst Troubleshooting section of this owner s manual You can get an indication of whether the catalysts are working by comparing the amount of smoke leaving the chimney when the smoke is going through the combustor and catalysts light off has been achieved to the amount of smoke lea...

Page 26: ... equipped 3 Remove the heat shield by sliding the screw heads through the slots in the heatshield 4 Remove the 2 bolts securing the cast iron catalyst access cover and remove the cover 5 Inspect the catalysts for visible damage or fly ash If fly ash exists gently brush the catalysts off with a narrow soft bristle brush or vacuum with a crevice tool 6 If fly ash exists or if there are suspected cat...

Page 27: ...as shown to hold gasket snug at ends and in the middle This will reduce snagging and make it easier to reinstall the catalysts 12 Once the gasket is installed on the catalysts gently push the catalysts into the catalyst opening until the catalysts hit against the back wall of the cavity Take care to ensure the gasket is not damaged 13 Replace the catalyst access door 14 Heat the stove slowly durin...

Page 28: ...e screw holes and place a small amount of anti seize compound in each one 7 Install a new glass gasket in the glass gasket groove 8 Place the new glass onto the door 9 Important Center the glass and ensure that the edges of the glass are parallel with the edges of the opening 10 Check glass position again centered and parallel then screw the glass retainer clips with the glass pads back on the doo...

Page 29: ...a certified sweep We recommend that before each heating season you have the entire system professionally inspected cleaned and repaired if necessary GASKETS Replace door gasket material every two to three seasons or whenever it becomes deteriorated or loose depending on stove use If the door seal leaks a new gasket will ensure a tight seal and improve stove performance We recommend you only use He...

Page 30: ...uidelines are as follows An AIRTIGHT HOUSE The air supply infiltration to the interior of the house may be inadequate if your home is super insulated or especially well sealed This phenomenon of air starvation within the building is exacerbated if exhaust fans such as clothes dryers bathroom fans or cook stove exhaust fans are in operation within the home Outfitting your stove with the optional ou...

Page 31: ...bypass door is open before opening the door Extra Low Burn Rate Burn the stove at a higher burn rate Chimney Down draft Install a chimney cap Excessive Ash Build up Empty the ash pan more frequently Increase efficiency of burns and avoid using poor quality or green wood UNCONTROLL ED OR SHORT BURN Unsealed or Open Door Close the door tightly or replace the gaskets Air leakage around glass gasket r...

Page 32: ...large loads of small diameter wood with the combustor in the operating position without catalyst light off occurring Burn dry seasoned wood Follow instructions in the manual for a proper catalyst light off and ensure catalyst light off as occurred before closing bypass damper It may be possible to burn the soot or creosote off by building a hot fire and allowing the stove to run until the catalyst...

Page 33: ...5640 002 BOTTOM HEAT SHIELD 5640 008 HINGE PIN 5640 009 HINGE BLOCK 5640 010 SECONDARY AIR RISER ASSEMBLY 5640 012 TIE ROD 5640 016 BAFFLE GUARD 5640 018 BYPASS ROD RETAINER 5640 020 LATCH STRIKER PLATE 5640 022 DOOR LATCH 5640 024 REAR SHIELD INCLUDED 7200 520 CATALYST THERMOMETER REPLACEMENT KITS AND ACCESSORIES 96 58400 GASKET KIT 96 58405 GLASS KIT 96 71400 HANDLE KIT 96 73400 FRONT DOOR LATCH...

Page 34: ...Hearthstone Quality Home Heating Products Inc Green Mountain 40 Model 8640 33 SAFETY LABEL ...

Page 35: ...as a component in an EPA certified solid fuel appliance to replace at no charge to the consumer the FIRECAT STEEL COMBUSTOR that ceases to function with two 2 years from the date of purchase by the original consumer provided that the following conditions are met 1 A copy of the original bill of sale that includes place and date of purchase must be submitted with the warranty claim 2 The original F...

Page 36: ... year after the Purchase Date Hearthstone will pay for warranty labor performed by an authorized Dealer at Hearthstone s published labor rates in effect at the time the labor is performed only if the appliance is installed by an authorized dealer or their designated representative Otherwise or thereafter the Original Purchaser is responsible for the cost of labor Shipping cost for parts Within the...

Page 37: ...r designated representative or Hearthstone 5 Damage due to water or condensation due to installation of the appliance in a high moisture area 6 Damage due to installation of the appliance in an atmosphere contaminated by damaging chemicals including but not limited to chlorine fluorine or salts 7 Scratches on glass enameled surfaces or stones due to mechanical abrasion 8 Noise caused by expansion ...

Page 38: ... on Hearthstone s Web site www hearthstonestoves com if the original dealer is not available to find a Hearthstone dealer nearest to the Original Purchaser s location REMEDY The remedy for any breach of the foregoing warranties will consist of repair or replacement at Hearthstone s option of any covered defect in the appliance When the Original Purchaser contacts a Hearthstone Dealer the Dealer on...

Reviews: