Healthrider 831.297872 User Manual Download Page 14

14

Insert the key fully into the console.

See HOW TO TURN ON THE POWER on page 9. 

Select the Learn 1 or Learn 2  program.

To select the Learn 1 or
Learn 2 program, the
MANUAL indicator or a
program indicator must
be flashing.

If neces-

sary, hold down the
PAUSE/STOP button for two seconds until the
MANUAL indicator is flashing. 

Next, press the 

or Ð button

repeatedly until the Learn 1

or Learn 2 program indicator is flashing. Then,
press the ENTER button.

Note: When you are familiar with the console,
you may go directly to step 5. While learning to
use the console, please read all steps.

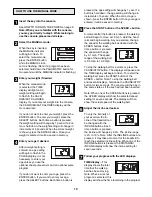
Enter your weight if desired.

When the Learn 1 or
Learn 2 program is 
selected, a weight setting
will begin to flash in the
CALORIES/FAT CALO-
RIES display. If your
weight is entered into the console, the CALORIES/
FAT CALORIES display will be more accurate. 

If you do not want to enter your weight, or if you
have already entered your weight, press the
ENTER button. If you want to enter your weight,
press the SELECT buttons. When the correct
weight is shown, press the ENTER button.

Enter your age if desired.

See step 4 on page 10.  

Press the START button.

A moment after the button is pressed, the walking
belt will begin to move. Hold the handrails and
begin walking.

During the first one-minute period of the program,
the speed and incline of the treadmill will automati-
cally adjust to the first settings that you programmed
previously. When the first one-minute period is
completed, two tones will sound and the speed
and incline of the treadmill will automatically adjust
to the second settings that you programmed. The
program will continue in this manner until no time
remains in the TIME display. The walking belt will
then slow to a stop and the program will be com-
pleted. 

Note: To stop the program for a moment, press the
PAUSE/STOP button. The displays will pause and
the TIME display will begin to flash. To restart the
program, press the START button or the SPEED +
button. To end the program at any time, hold down
the PAUSE/STOP button for two seconds. The
console will then be in the same state as if the key
had just been inserted.

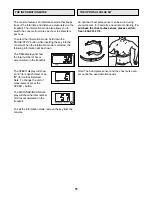
Note: While the program is running, the speed and
incline of the treadmill can be adjusted with the
SPEED and INCLINE buttons. Adjustments will not
be stored in memory. To 

reprogram

speed and in-

cline settings, press the LEARN button. The Learn
1 or Learn 2 indicator will begin to flash rapidly.

Speed and incline settings can be repro-
grammed only when the indicator is flashing
rapidly. 

Next, adjust the speed and incline of the

treadmill with the SPEED and INCLINE buttons.

When the current one-minute period of the pro-
gram is completed,

the new speed and incline set-

tings will be stored in memory. When you have re-
programmed speed and incline settings for as
many one-minute periods as desired, press the
LEARN button again. 

Follow your progress with the five displays.

Refer to step 7 on page 10.

When the program is completed, remove the
key.

Make sure that the incline of the treadmill is at 2%.

The incline must be at 2% when the treadmill is
folded to the storage position, or the treadmill
will be damaged.

Remove the key from the con-

sole and put it in a safe place. In addition, move the
on/off switch to the off position (see page 9).

7

6

5

4

3

2

1

HOW TO USE THE LEARN 1 AND LEARN 2
PROGRAMS

Summary of Contents for 831.297872

Page 1: ...UCK AND CO HOFFMAN ESTATES IL 60179 TABLE OF CONTENTS IMPORTANT PRECAUTIONS 2 BEFORE YOU BEGIN 4 SETTING UP THE TREADMILL 5 HOW TO USE THE HAND PULSE SENSOR 6 GROUNDING INSTRUCTIONS 7 CONSOLE OPERATIO...

Page 2: ...ppressor not included and plug the surge suppressor into a grounded circuit capable of carrying 15 or more amps No other appliance should be on the same circuit Do not use an extension cord 11 Use a s...

Page 3: ...e representative Servicing other than the procedures in this manual should be performed by an authorized service representative only 25 The treadmill is intended for in home use only Do not use the tr...

Page 4: ...please call our toll free HELPLINE at 1 800 736 6879 Monday through Saturday 7 a m until 7 p m Central Time excluding holidays To help us assist you please note the prod uct model number and serial n...

Page 5: ...t all parts are tightened before you use the treadmill Place a mat beneath the treadmill to protect the floor or carpet 2 ASSEMBLY Assembly requires two people Place the treadmill in a cleared area an...

Page 6: ...d your heart rate will be shown Continue to hold the contacts for about 15 seconds for the most accurate heart rate reading HAND PULSE SENSOR TROUBLE SHOOTING Stand on the foot rails and avoid moving...

Page 7: ...uctor and a grounding plug Plug the power cord into a surge suppressor and plug the surge suppressor into an appropriate outlet that is properly installed and grounded in accordance with all local cod...

Page 8: ...al chest pulse sensor adds even more features to the console The chest pulse sensor continuously monitors your heart rate during your workouts and adds two workout programs to the console one program...

Page 9: ...en the hand pulse sensor or the optional chest pulse sensor is used L MANUAL Program Indicators These indicators show when the manual mode is selected and when one of the workout programs is selected...

Page 10: ...ange in increments of 5 years When the correct age is shown press the ENTER button Once your age is entered it will be saved in memory Press the START button or the SPEED button A moment after the but...

Page 11: ...treadmill will be damaged Remove the key from the console and put it in a secure place Move the on off switch to the off position see page 9 The Incline 1 program automatically controls the incline o...

Page 12: ...can be adjusted with the IN CLINE buttons To stop the program for a moment press the PAUSE STOP button The displays will pause and the TIME display will begin to flash To restart the program press the...

Page 13: ...When the LEARN button is pressed the Learn 1 or Learn 2 indicator will begin to flash rapidly Speed and incline settings can be programmed only when the indicator is flashing rapidly Each program is...

Page 14: ...o the second settings that you programmed The program will continue in this manner until no time remains in the TIME display The walking belt will then slow to a stop and the program will be com plete...

Page 15: ...mber of hours accumulated on the treadmill The SPEED display will show an E for english miles or an M for metric kilometers Note To change the unit of measurement press the SPEED button The DISTANCE I...

Page 16: ...ct sunlight Do not leave the treadmill in the stor age position in temperatures above 85 Fahrenheit HOW TO MOVE THE TREADMILL Before moving the treadmill convert the treadmill to the storage position...

Page 17: ...sition see d above a Use only a single outlet surge suppressor that is UL 1449 listed as a transient voltage surge suppressor TVSS The surge suppressor must have a UL sup pressed voltage rating of 400...

Page 18: ...wer cord insert the key and run the treadmill for a few minutes Repeat until the walking belt is properly tightened a If error code E1 E2 or E3 appears in the SPEED display remove the key wait for ten...

Page 19: ...ing zone as you exercise WORKOUT GUIDELINES Each workout should include three parts 1 a warm up 2 training zone exercise and 3 a cool down Warming Up Begin each workout with five to ten minutes of str...

Page 20: ...r Housing short 57 4 Hand Pulse Sensor 58 1 Pulse Sensor Cap 59 1 Console Base 60 1 Console 61 1 Electronics Bracket 62 2 Latch Screw 63 2 25 Hand Pulse Wire 64 1 Key Clip 65 1 Storage Latch 66 1 Rear...

Page 21: ...76 88 79 8 79 8 77 78 30 26 102 82 81 26 102 60 59 76 42 16 32 31 8 50 44 11 51 52 11 47 45 46 53 54 61 43 8 50 8 42 64 104 104 104 104 57 57 58 56 63 63 57 70 56 63 57 63 22 49 98 76 62 65 73 20 89...

Page 22: ...luded in this manual Model No 831 297872 QUESTIONS If you find that you need help assembling or operating the HealthRider SOFTSTRIDER EX a part is missing you need to schedule repair service call our...

Reviews: