

Power Source Menu Vol+
Vol-
CH+ CH-
USB
PC
HDMI 3
Touch
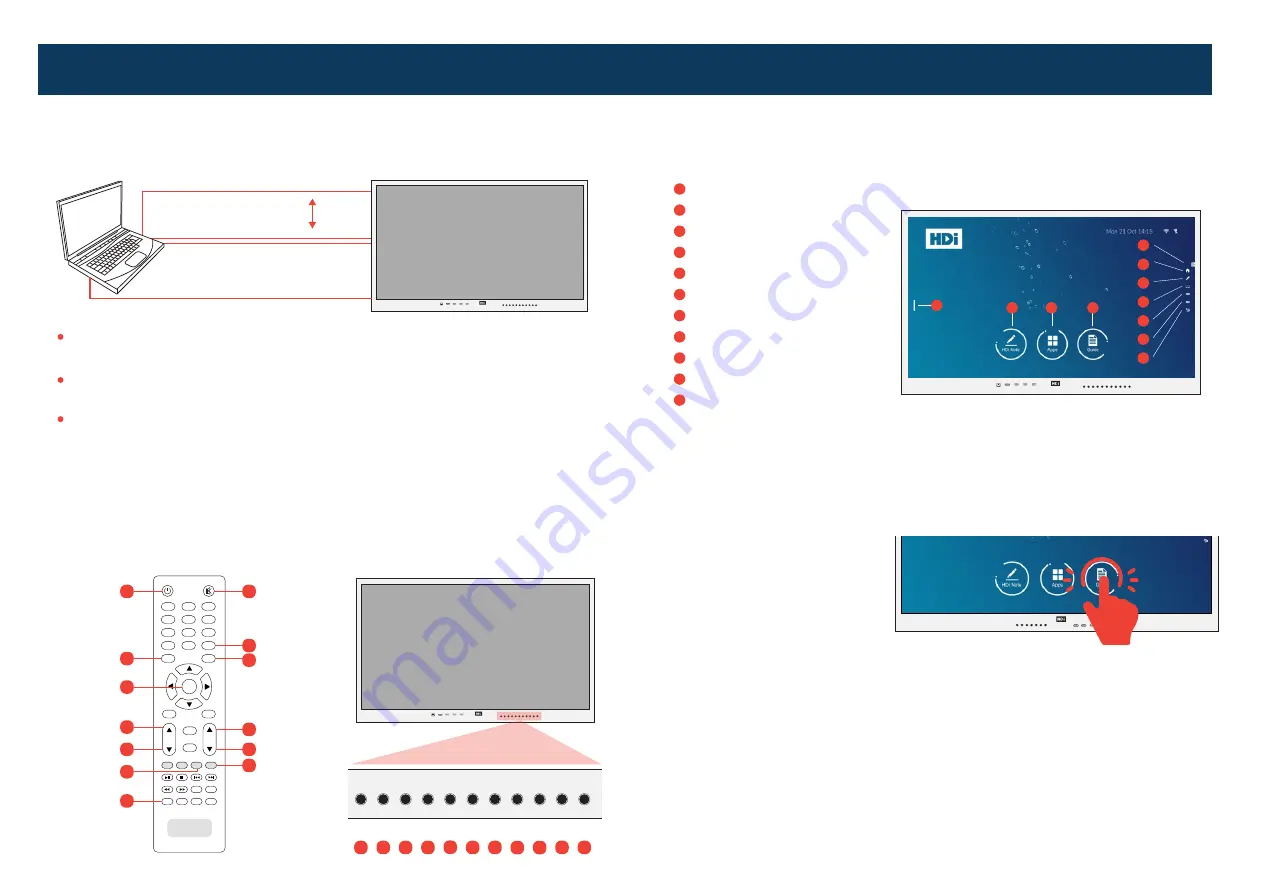
Now that you are familiar with the cables, connect the B end of the USB A to B to
the front / rear panel socket TOUCH USB. Then connect the A end to your laptop.
Tap to select
You have now connected your multi-touch screen and laptop. Turn on your laptop
and multi-touch screen. The multi-touch screen is now ready to use.
Source / Input
Menu
Energy Saver
Mode
Mute
Vol -
Freeze / Unfreeze
Home
Vol +
Enter
CH +
CH -
If you are using HDMI, connect the cable to the front / rear panel HDMI socket and
to your laptop.
If you are using VGA, connect the cable to the VGA socket on the rear panel and to
your laptop. Then connect the 3.5mm audio cable to the PC Audio socket at rear
and to your laptop.
4. Connecting your Multi-touch-Screen and laptop
6. OSD
7. Touch Functions
5. Ready to use
1
2
3
4
5
6
7
8
0
INFO
E.S
MENU
OK
INPUT
EXIT
SLEEP
S.MODE
P.MODE
PRSNR
HOME
L.S
ZOOM
TV
CHLIST
CH
VOL
9
USB A to B cable (Touch)
HDMI cable
or
VGA cable
3.5 mm audio cable
Power
Power Source Menu Vol+ Vol-
CH+
CH-
Mute
Eco Enter Home
HDi Multi-touch Screen Quick Start Guide - HDi Edge Series Android 6.0
Touch USB
HDMI 3
USB 3.0
PC
MEDIA
Power Source Menu Vol+ Vol-
CH+
CH-
Mute
Eco Enter Home
Touch USB
HDMI 3
USB 3.0
PC
MEDIA
Power Source Menu Vol+ Vol-
CH+
CH-
Mute
Eco Enter Home
Touch USB
HDMI 3
USB 3.0
PC
MEDIA
6
Click back home
6
5
Click to close the side bar
5
1
Click to open the left side bar
1
Annotation software
2
Go to all Android Apps
3
On screen user manual
4
7
Click to annotate
7
8
Quick access to OPS
8
9
Click to OSD menu
9
10
11
Click to change source
10
Click to go back
11
6
6
5
5
1
1
2
2
3
3
4
4
7
7
8
8
9
9
10
10 11
11
Power Source Menu Vol+ Vol-
CH+
CH-
Mute
Eco Enter Home
Lock / Unlock
(Front panel buttons)
2
3
4


