background image

InfinityMR-S2 – Universal 3 axis Gimbal


www.hdairstudio.com


1. DISCLAIMER & WARNING


The disclaimer shall be read carefully before using the product – InfinityMR-S2. By using this product, you hereby 

accept the disclaimer and state that you have familiarized yourself with its statements.


THE PRODUCT IS NOT SUITABLE FOR PEOPLE UNDER THE AGE OF 18.


HD Air Studio is not liable for:


1.


Damages caused by the misuse of the product.  


2.


Damages caused by users under the influence of intoxicants.  


3.


Health impairments caused by the misuse of the product.  


4.


Damages caused by using the product in severe weather conditions  


5.


Damages caused by the wrongful storage of the product.  

6.


Damages caused by gimbal modification  

7.


Damages caused by taking gimbal apart 

8.


Damages caused by changing gimbal software setup 


InfinityMR-S2 Gimbal Warranty does not include damages caused by:


1.


Not applying to the manual.  


2.


Improper usage of the device.  


3.


Improper storage of the device.  


4.


Device exploitation resulting from its improper usage.  


5.


Wear and tear.  


Summary of Contents for Infinity MR S2

Page 1: ...InfinityMR S2 Universal 3 axis Gimbal www hdairstudio com 1 Infinity MR S2 Gimbal Manual ...

Page 2: ...LEXMOS CONTROLLER 13 8 GETTING STARTED 14 9 CHANGING ALEXMOS CONTROLLER DEAFAULT SETTINGS 14 10 USING PPM SUM FUTABA S BUS OR DSM2 DSMXRECEIVER 15 11 TIPS FOR TUNING THE ALEXMOS CONTROLLER WITH ENCODERS 17 12 PROFILE SETUP 18 13 ALARMS AND BATTERY MONITORING SETTINGS 19 14 OFFSETADJUSTMENT 21 15 SOFTWARE VERSION CHECK AND UPGRADE 24 16 ADVANCED GYRO CALLIBRATION 24 17 MAINTENANCE 29 18 FREQUENTLY ...

Page 3: ... product 2 Damages caused by users under the influence of intoxicants 3 Health impairments caused by the misuse of the product 4 Damages caused by using the product in severe weather conditions 5 Damages caused by the wrongful storage of the product 6 Damages caused by gimbal modification 7 Damages caused by taking gimbal apart 8 Damages caused by changing gimbal software setup InfinityMR S2 Gimba...

Page 4: ...Motors 22 poles built in magnetic encoders Operating voltage 13 5 24V 4S lipo recomended 1 Rigid construction carbon fibre aluminium Different motors on all axes to provide the best troque and stabilization Camera IMU housing under the camera shelf 12 channel Slip Ring with three free channels Gimbal comes ready to use out of the box Easy and fast balancing with thumbscrews Box shape camera shelf ...

Page 5: ...InfinityMR S2 Universal 3 axis Gimbal www hdairstudio com 5 3 GIMBAL OUTPUTS AND CONNECTORS ...

Page 6: ...InfinityMR S2 Universal 3 axis Gimbal www hdairstudio com 6 ...

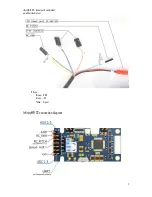
Page 7: ...InfinityMR S2 Universal 3 axis Gimbal www hdairstudio com 7 RC yaw Brown GND Green 5V Yellow Signal InfinityMR S2 connection diagram ...

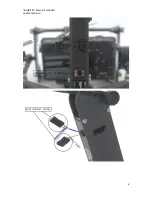
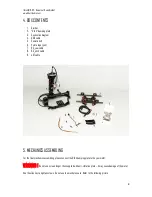
Page 8: ...e pair 7 RC_yaw cable 8 RC_pitch cable 9 JST cable 5 MECHANICS ASSEMBLING For the final mechanics assembling please connect the Orbit damping plate to the yaw motor WARNING Do not use screws longer then supplied with anti vibration plate it may cause damage of the motor Use the allen key to tighten screws Do not use too much pressure Refer to the following picture ...

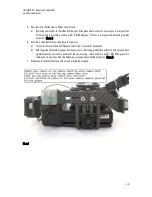
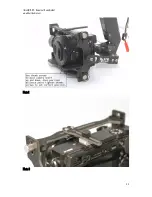
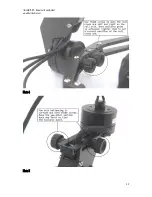
Page 9: ...urface 3 Mount your camera with lens battery SD card etc on the gimbal camera shelf Photo 1 a With your camera mounted on the shelf find a place where a camera shelf remains levelled to the ground 4 Unscrew a little thumbscrews to balance the pitch axis Photo 2 b First move bottom bar to find balance position then by moving top bar firmly secure camera find a place where a camera can stay put in e...

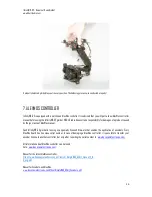
Page 10: ...ng is made properly Photo 4 6 Unscrew a little thumbscrew to balance the yaw axis a Tilt your multirotor frame by 20 degrees left right or forward backward b Hold the gimbal by thumbscrews under the yaw motor By moving gimbal back and forth find a place where a gimbal can stay put in every position of the yaw axis e g rotate a camera by 20 30 45 degrees if it remains put in every position the bala...

Page 11: ...InfinityMR S2 Universal 3 axis Gimbal www hdairstudio com 11 Photo 2 Photo 3 ...

Page 12: ...InfinityMR S2 Universal 3 axis Gimbal www hdairstudio com 12 Photo 4 Photo 5 ...

Page 13: ...s manual Each InfinityMR S2 gimbal is running on a specially licensed firmware that enables the application of encoders Every AlexMos board has its unique serial number In case of damaging a AlexMos controller it is possible to transfer your encoder license to another controller but only after reporting the serial number to www basecamelectronics com All information about AlexMos controller can be...

Page 14: ...aw pan axis In order to change that please refer to AlexMos Controller manual available at www basecamelectronics com 6 Gimbal by default can be operated via a standard PWM signal in two axes pitch tilt and yaw pan To control those two axis connect your radio control receiver by using two cables coming out the gimbal RC_PITCH and RC_YAW RC_YAW cable has 3 wires white signal red 5V black ground You...

Page 15: ... To enable the operation of all 3 axes and launch additional features available on AlexMos controller you can use PPM SUM Futaba S BUS and DSM2 DSMX signal receivers Connect your receiver using RC_PITCH cable white wire is a signal wire and should be connected to PPM SUM Futaba S BUS DSM2 DSMX signal port on your receiver To power your receiver you can use RC_YAW cable 2 Open AlexMos GUI configura...

Page 16: ...InfinityMR S2 Universal 3 axis Gimbal www hdairstudio com 16 ...

Page 17: ...th the pitch than roll at the end yaw axis 3 Any tuning of a gimbal should be conducted with a gimbal mounted to your multirotor with full equipment installed on the gimbal camera battery video RC 4 If after auto tuning you can still see some small jitters or buzzing it means you might need some manual tweaks of PID values It is good to refer to AlexMos manual Notch filters might help to get rid o...

Page 18: ...ited angles Profile 3 fixed stabilization gimbal keeps pointing in one direction How to set up profile 1 Connect InfinityMR S2 to GUI using USB cable supplied with the gimbal see chapter 8 2 Go to service tab on GUI and from menu picture below choose what action you want to assign to the button ie 3 clicks Use profile 3 3 Press save button and write current settings 4 From profile selection window...

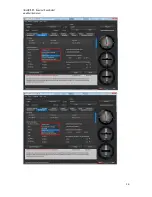
Page 19: ...N OFF button picture below 5 Choose battery type 6 Compare previously measured voltage to the one that is indicated in the GUI if it is different press Calibrate button picture below fig 1 and type in value that you measured using as a separator Press WRITE button 7 Now you can set up voltage level for each action picture below low voltage alarm and low voltage stop Motors 8 After each adjustment ...

Page 20: ...InfinityMR S2 Universal 3 axis Gimbal www hdairstudio com 20 ...

Page 21: ...rs are switched off Put camera in desired position and press 2 CALIB OFFSET button picture below Press WRITE button Your Gimbal will remember this position only for current profile CHANGING OFFSET BY SETTING ANGLE IN FOLLOW TAB You can set up different offset for each profile that you use Simply connect IfinityMR S2 to GUI Go to follow tab and in window offset type in angle degrees for each axis P...

Page 22: ...CAMERA BY MANUAL SET InfinityMR S2 is pre set to remember position of camera after one second for PITCH and YAW axis and two seconds for ROLL axis You can adjust those values by connecting to GUI and changing Manual set time sec for each axis After each adjustment press WRITE button ...

Page 23: ...InfinityMR S2 Universal 3 axis Gimbal www hdairstudio com 23 ...

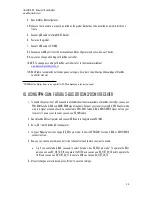
Page 24: ... be disconnected from GUI automatically For further work with GUI disconnect USB cable for few seconds and then reconnect 16 ADVANCED GYRO CALLIBRATION 1 To perform advanced Gyro calibration you need to put camera on gimbal and balance it it s easier with camera 2 Connect gimbal to GUI chapter 8 3 Go to basic tab on GUI and press IMU calibration helper button 4 Calibration of accelerometer by six ...

Page 25: ...axis Gimbal www hdairstudio com 25 7 When calibration is done ok marks will appear next to each axis 8 Repeat this operation for each axis 6 positions from Photo 1 9 Close sensor calibration helper window and press WRITE button ...

Page 26: ...InfinityMR S2 Universal 3 axis Gimbal www hdairstudio com 26 ...

Page 27: ...InfinityMR S2 Universal 3 axis Gimbal www hdairstudio com 27 Photo 1 ...

Page 28: ...ow you can set parameters of time lapse time and acceleration You can set different parameters of time lapse for each profile Choose profile than change time lapse parameters and Write settings for each profile Photo2 5 Once setting are done mount gimbal on stand or handheld in upside down position 6 Turn on gimbal and choose Profile with required parameters 7 Set up camera in position that will b...

Page 29: ...ve problem please contact us on support hdairstudio com 3 Do not use your gimbal in wet conditions If gimbal gets wet IMMIDIETLY disconnect battery dry it with compressed air and leave it for several hours in warm dry place 4 Remember to check regularly condition of the gimbal damages untighten bolts looses etc 5 It is recommended to run gyro calibration from time to time especially when you notic...

Page 30: ...balancing Please follow instruction step by step method is developed for our gimbals and it should help If there is problem with balancing PITCH axis you might need to loosen the screws of the clamp holding PITCH motor on carbon fiber pipe After that try to correct angle of the motor Once corrected tighten screw and try to balance it again 6 How Can I change PIDs on my Infinity MR S2 Before changi...

Page 31: ...in or try to calibrate gyro on this profile Chapter12 14 Gimbal suddenly starts spinning in yaw axis Connect the gimbal to GUI Chapter 9 go to basic tab and check NUM POLES it should be 22 for each motor if it is different on GUI correct it Connect gimbal to GUI Chapter 9 go to encoders tab and check if in cooling factor and heating factor you have 0 15 When turning the gimbal in the YAW axis it a...

Page 32: ... off calibration at every startup to do it you need to connect to GUI Chapter 9 go to basic tab and mark option skip gyro calibration at startup When option skip gyro calibration at startup option is activated it is important to run this calibration manually from time to time every 10th start ...

Reviews: