© 2008 Hawking Technologies, Inc. All rights reserved. All trademarks herein are the property of
their respective owners. Apple and Mac are registered trademarks of Apple Computer, Inc. No
affiliation implied or expressed.
Technical Support: 1.888.202.3344 or [email protected] www.hawkingtech.com
Cont’d
6
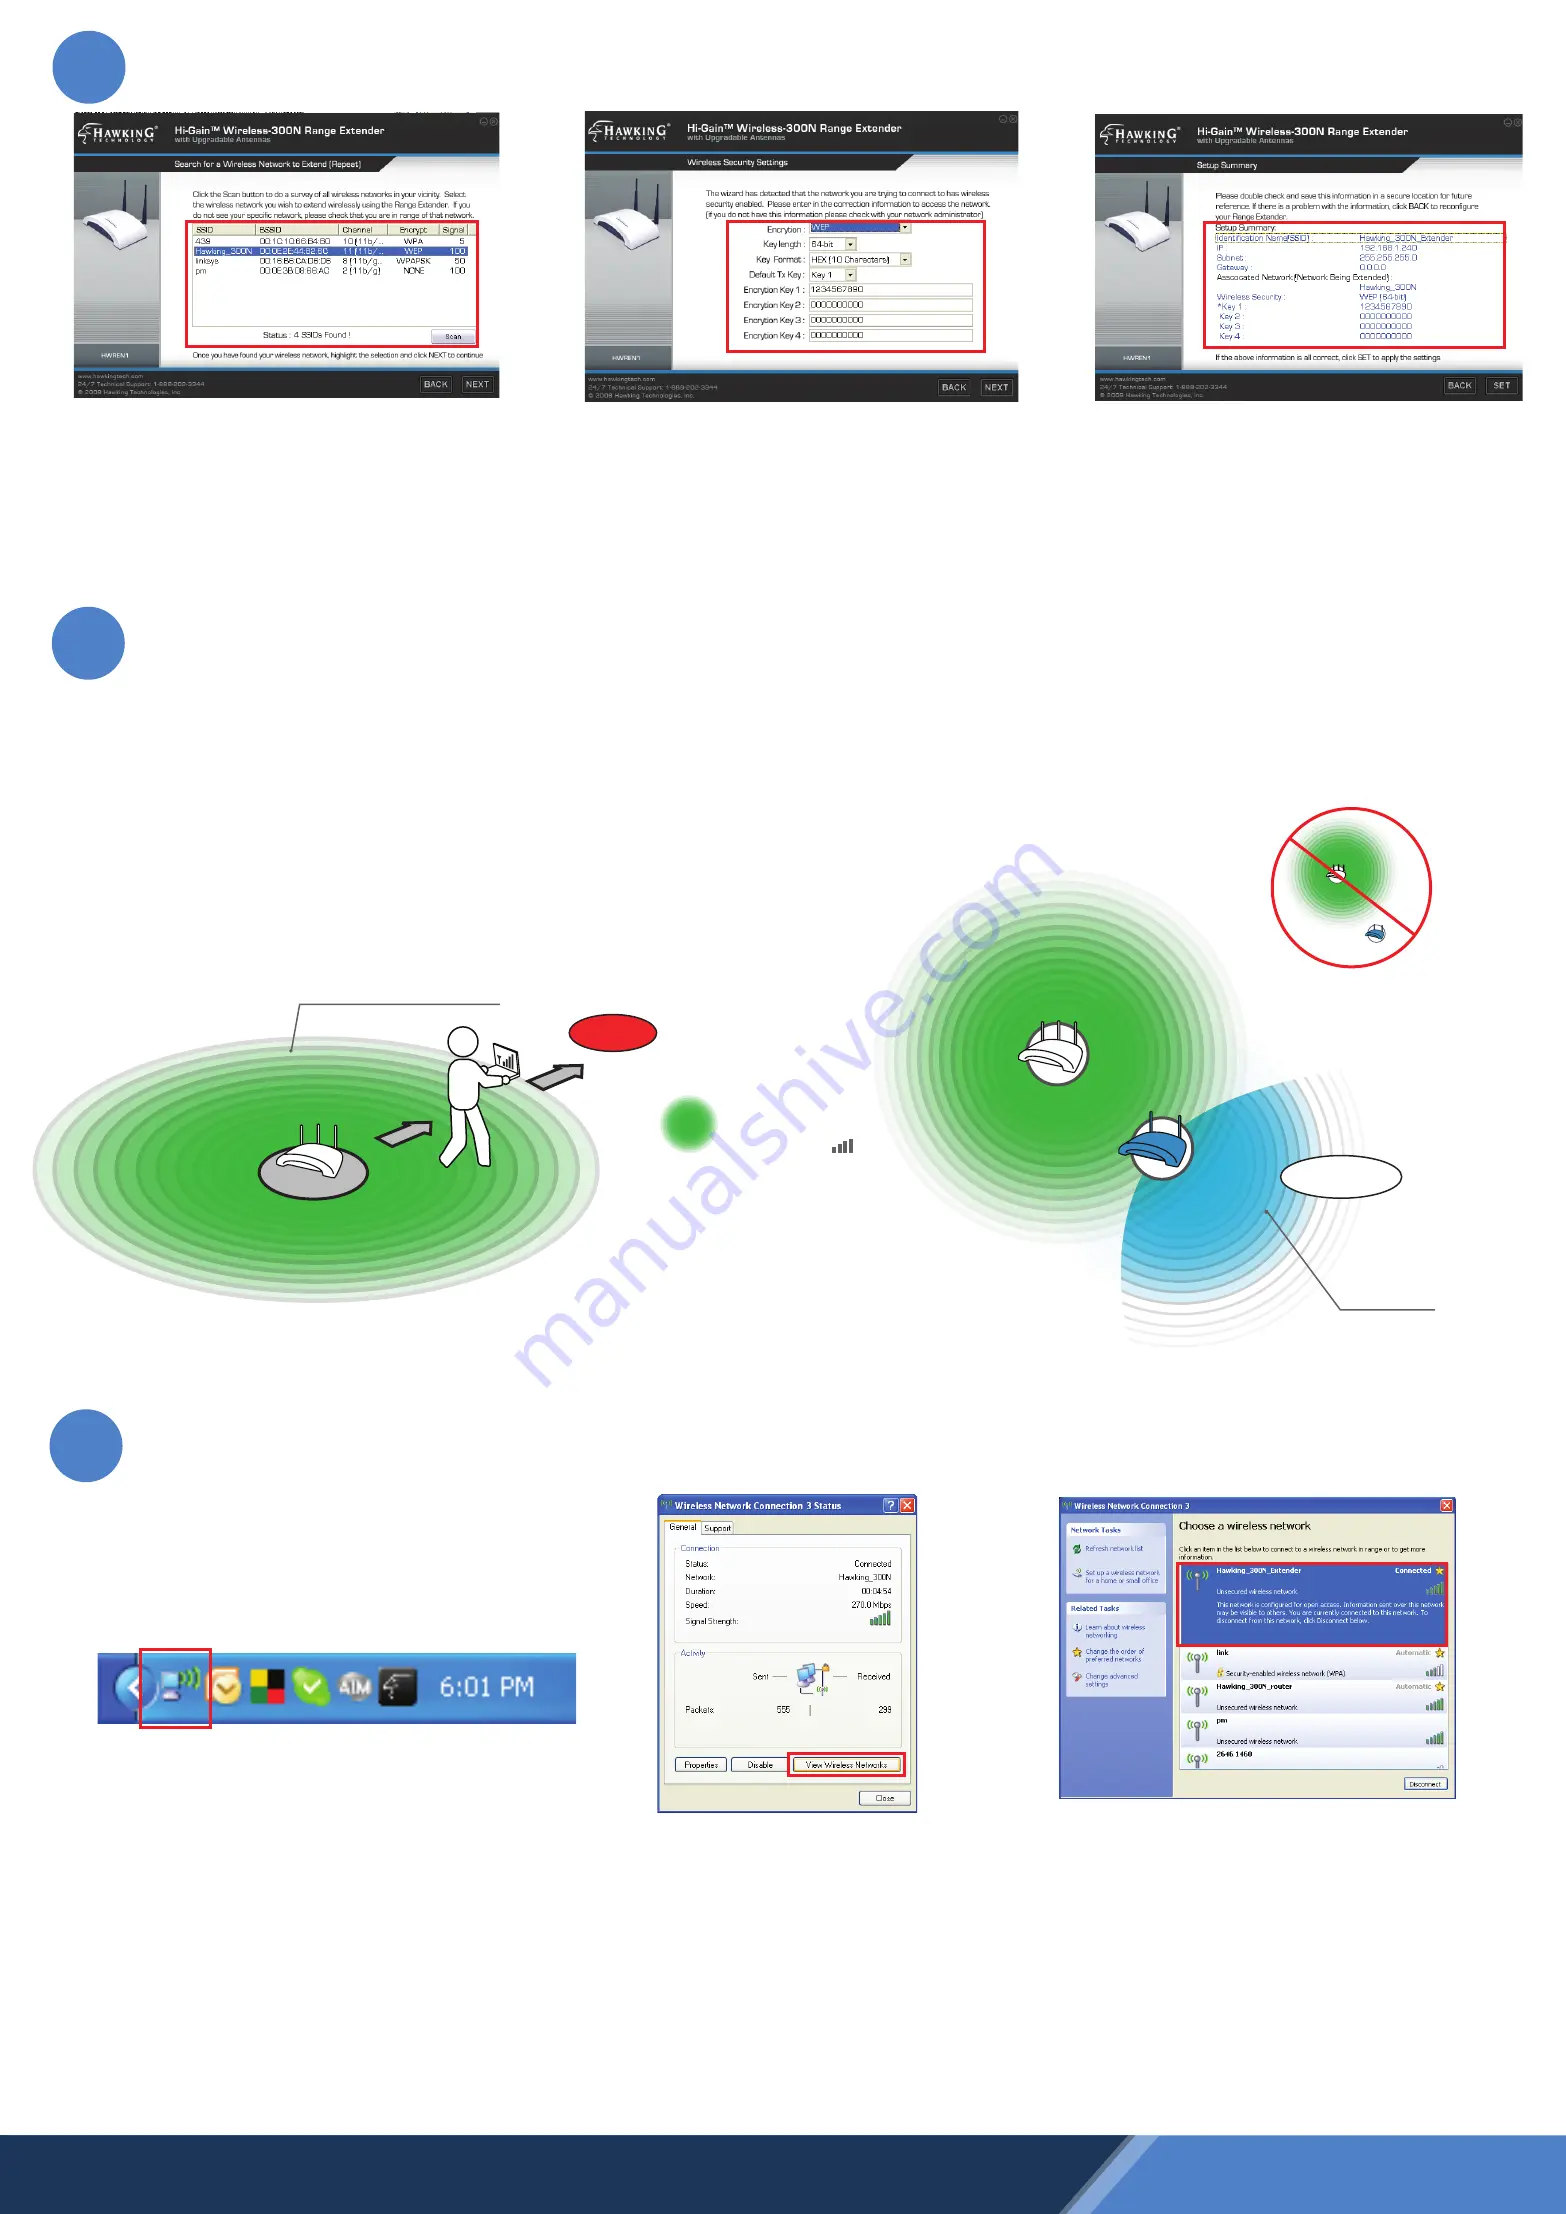
Connecting to your Range Extender
6.) In the Search box, find the Wireless Network
that you would like to extend (repeat). This
Range Extender works with wireless-N,
wireless-B, and G networks. Select your
“Source” network and then click ‘Next’.
7.) For Security Settings, the Range Extender’s
security settings must be set identical to that of
the “Source” network that is having the signal
extended (repeated). If you do not know these
settings please contact your network adminis-
trator. Leave encryption disabled if the “Source”
network has no security setting.
4
8.) The Setup Summary displays all configured
settings of the Range Extender. If the informa-
tion displayed corresponds to your desired
network settings, you can go ahead and click
‘SET’ to apply the settings. The HWREN1 will
automatically reboot. Please be patient.
1.) To connect to your newly extended wire-
less network, click the wireless network icon
in your system tray. It is located in the bottom
right-hand corner of your desktop.
2.) Click the ‘View Wireless
Networks’ button in the ‘Wire-
less Network Connection
Status’ window.
3.) Find your new network (default ID:
Hawking_300N_Extender) and click on it
twice or select and click ‘Connect’. You can
now enjoy your newly extended wireless
network!
NOTE #1
: If you have security enabled you
will be prompted to enter your password.
NOTE #2
: It may take a few minutes for the
Range Extender to associate with the network
for the first time. Please be patient.
5
Placing your Range Extender in an Optimal Location
To ensure your Range Extender’s performance, you must place it in the
best location that suits your needs.
1.) After the reboot, unplug your Range Extender from the Router/AP and
from its power source. It no longer needs to be connected with an ethernet
cord. Now, using your laptop’s wireless utility software, locate a place that
recieves a good to excellent signal from the original root AP (usually 3-4
bars of signal strength) that is in the direction of your problem area or
“dead spot”.
Problem Area
(no signal)
Router or AP
Router’s Original Wireless Coverage Area
Green area
represents 3-4 bars
of signal strength.
Key:
2.) Place your Range Extender in the location found in the previous step
and plug it into the nearest power source to power it on. The power LED
and WLAN LED should light up to show you that your Range Extender is
now broadcasting a wireless network signal.
Home Router or AP
Range Extender
Range Extension
“Source”
Router or AP
Home Router or AP
Range Extender
“Source”
Router or AP
NOTE:
DO NOT p
lace the
Range Extender outside
your router’s Coverage
Area.
Fixed Problem Area


