background image

COMPONENT LIST

ENGLISH

SPECIFICATIONS

Voltage:  120 v

Frequency:  60 hz

Amperage:  9 amps

No-load speed: 2,100 rpm

Cleaning path: 12.5" (31.75 cm)

Intake height: 6" (15.24 cm)

Max throwing distance: 20 ft (6 m)

Figure 1 names the major components of the 

EST100 electric snow shovel:

1. Lock-off button

2. On/off trigger

3. Handle Grip  

4. Handle Knob Fastener

5. Assist Handle 

6. Fastening Knob

7. Extendable shaft

8. Rotor Blade

20

EST100

!

SHAFT ASSEMBLY

1. Loosen the fastening knob (Fig. 2)

2. Hold the inner and outer pipe with both hands, and pull them apart until the 

locking holes are exposed (Fig.3)

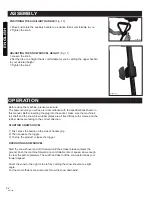
ASSEMBLY

WARNIG


:


The snow blower is to be assembled before operation .To assemble the 

snow blower, following the instructions below.

Figure 2

Figure 3

Outer Pipe

Inner Pipe

1 2

3

4

5

6

7

8

Figure 1

Summary of Contents for 68125114

Page 1: ...RVEZ CE GUIDE Vous aurez besoin de ce guide pour les règles de sécurité les procédures d utilisation et la garantie Conservez le avec la facture d origine dans un endroit sûr et sec pour référence future Our Customer service staff is available to help you For help with product assembly to report damaged or missing parts or for any other information about this product please call our toll free numb...

Page 2: ... et consultez Ie fréquemment pour une utilisation sécuritaire par toute personne qui utilise cet outil CONSERVEZ CE MANUEL Gardez ce manuel qui contient les avertissements de sécurité les précautions à prendre le mode de fonctionnement les inspections et l entretien à effectuer Gardez ce manuel et le reçu dans un endroit sec et sécuritaire pour référence ultérieure EST100 La plaque signalétique ap...

Page 3: ...les visiteurs doivent se tenir à distance lorsque vous manipulez un outil électrique Toute distraction peut vous faire perdre le contrôle de l appareil Protégez les personnes présentes sur le lieu de travail des débris comme les copeaux et les étincelles Placez des barrières ou des écrans de protection lorsque c est nécessaire SÉCURITÉ EN ÉLECTRICITÉ 4 Les outils à isolation double sont équipés d ...

Page 4: ...ives peuvent provoquer des blessures 13 Ne travaillez à bout de bras Gardez un rythme et un équilibre de travail stables à tout moment Un rythme et un équilibre de travail appropriés vous permettront de mieux contrôler l outil dans les situations imprévues 14 Utilisez un équipement de sécurité Utilisez toujours des protections pour les yeux Les masques antipoussière les casques ou les protections ...

Page 5: ...et pris connaissance des avertissements et des instructions relatives au présent mode d emploi et celles apposées sur l appareil 21 Vérifiez que les pièces mobiles ne sont ni mal alignées ni bloquées ni affectées par toute autre condition pouvant entraver leur bon fonctionnement En cas de dommage faites réparer l outil avant utilisation De nombreux accidents ont pour cause des outils mal entretenu...

Page 6: ...ixez la à la poignée supérieure avant de la brancher à la souffeuse Afn d éviter des risques d électrocutions utilisez seulement avec le type de rallonge spécifié dans le mode d emploi ÉVITEZ LA MISE EN MARCHE ACCIDENTELLE Ne déplacez pas la pelle en ayant le doigt sur l interrupteur Vérifiez que l appareil est en position OFF arrêt avant de le brancher CORDONS ÉLECTRIQUES Si le cordon ou la rallo...

Page 7: ...ncher la pelle à neige de la prise d alimentation électrique lorsque celle ci n est pas en fonction avant l entretien et la réparation PIÈCES DE RECHANGE Lorsque vous faites des réparations utilisez seulement des pièces de rechange identiques ENTREPOSER LA PELLE À NEIGE Lorsque vous n utilisez pas la pelle à neige entreposez celle ci dans un emplacement qui est à l abri des conditions climatiques ...

Page 8: ...le trou de blocage fig 5 4 Le tube est maintenant complètement inséré et prêt à être serré à l aide du fermoir de la poignée de maintien Fig 6 5 Insérer le fermoir de la poingée de maintien et tournez dans le sens horaire pour le fixer fig 7 ASSEMBLAGE AVERTISSEMENT La pelle à neige doit être assemblée avant l utilisation Pour assembler la pelle à neige suivez les instructions ci dessous EST100 Fi...

Page 9: ...ide de deux boulons et écrous POSITIONNEMENT DE LA POIGNÉE AUXILIAIRE fig 10 1 Déplacer et faire tourner la poignée auxiliaire à une position confortable 2 Serrez la poignée RÉGLAGE DE LA HAUTEUR DE LA PELLE À NEIGE fig 11 1 Desserrez la poignée 2 Réglez le tube à une hauteur qui est confortable pour vous en faisant glisser la poignée supérieure à la hauteur désirée 3 Serrez la poignée Figure 8 Fi...

Page 10: ...chaussée en pierre concassée ou gravier poussez vers le bas sur la poignée pour soulever le grattoir afin d éviter que la pelle ne projette des pierres ou autres matières sur le sol La pelle à neige peut enlever la neige jusqu à 6 pouces 15cm de profondeur en un seul passage Lorsque il faut enlever les accumulations plus importantes tenez la pelle à neige par les poignées supérieures et inférieure...

Page 11: ... acheté cet appareil HAUSSMANN Ces produits ont été conçus pour répondre à des normes de haute qualité très strictes et sont garantis pour usage domestique contre tout défaut de fabrication pour 36 mois suivant la date d achat Cette garantie n affecte pas vos droits légaux En cas de mauvais fonctionnement de votre outil bris pièces manquantes etc veuillez appeler notre ligne de service pour parler...

Page 12: ...pport à balai Rondelle à ressort Roulement 608zz Ens du stator Support du moteur Ens du rotor Roulement 6001ZZ Couvercle central Roulement du pétrole Grande roue Arbre Fin de couvercle Rondelle à ressort 33 34 35 36 37 38 39 40 41 42 43 44 45 46 47 48 49 50 51 52 53 54 55 56 57 58 59 60 61 62 63 NO DESCRIPTION Petite poulie Contre écrou Rondelle plate Vis taraudeuse Couvercle gauche Déflecteur Rou...

Page 13: ...13 SCHÉMA SCHEMATIC DRAWING FRANÇAIS ENGLISH ...

Page 14: ...rush holder Spring washer Bearing 608zz Stator assy Motor holder Rotor assy Bearing 6001ZZ Middle cover oil bearing Big gear Shaft End cover Spring washer 33 34 35 36 37 38 39 40 41 42 43 44 45 46 47 48 49 50 51 52 53 54 55 56 57 58 59 60 61 62 63 NO DESCRIPTION Small Pulley locknut Flat washer Tapping Screw Left cover Baffle Bearing 6000z Belt Roller shaft Bearing 6000z Tapping Screw Baffle Fixed...

Page 15: ... to use this product until you read the manual thoroughly and understand it completely Save this manual and review frequently for continuing safe operation and instructing others who may use this tool SAVE THIS MANUAL Keep this manual for the safety warning precautions operations inspections and maintenances Keep the manual and the receipt in a safe and dry place for future reference The rating pl...

Page 16: ...ep bystanders children and visitors away while operating a power tool Distractions can cause you to lose control Protect others in the work area from debris such as chips and sparks Provide barriers or shields as needed ELECTRICAL SAFETY 4 Double Insulated tools are equipped with a polarized plug one blade is wider than the other This power plug will fit in a polarized outlet only one way If the p...

Page 17: ...afety equipment Always wear eye protection Dust mask non skid safety shoes hard hat or hearing protection must be used for appropriate conditions TOOL USE AND CARE 15 Use clamps or other practical way to secure and support the work piece to a stable platform Holding the work by hand or against your body is unstable andmay lead to loss of control 16 Do not force tool Use the correct tool for your a...

Page 18: ...ot follow the recommended precautions WARNING signals a hazard that may cause serious injury or death if you do not follow the recommended precautions CAUTION signals a hazard that may cause minor or moderate injury if you do not follow the recommended precautions Regardless of the hazard be extremely careful when transporting and operating the snow shovel Restrict the use of this product to perso...

Page 19: ... cord away from heat oil and sharp objects SAFETY INSTRUCTIONS FOR ELECTRIC SNOW SHOVEL WARNING Keep guards in place and in working order Keep hands away from moving parts DO NOT FORCE SNOW SHOVEL It will perform better and safer at the rate for which it was designed DO NOT OVERREACH Keep proper footing and balance at all times If the snow shovel strikes a foreign object follow these steps Stop th...

Page 20: ... 2 On off trigger 3 Handle Grip 4 Handle Knob Fastener 5 Assist Handle 6 Fastening Knob 7 Extendable shaft 8 Rotor Blade 20 EST100 SHAFT ASSEMBLY 1 Loosen the fastening knob Fig 2 2 Hold the inner and outer pipe with both hands and pull them apart until the locking holes are exposed Fig 3 ASSEMBLY WARNIG The snow blower is to be assembled before operation To assemble the snow blower following the ...

Page 21: ...handle knob fastener and turn clockwise to tighten Fig 7 FASTENING THE SHAFT TO THE MAIN THROWER UNIT Fig 8 9 1 Locate the tube notch slot and align it with the notch track at the opening of the main thrower unit Insert the pole into the opening 2 Secure the tube to the main thrower unit using 2 bolts and nuts ASSEMBLY Figure 4 Figure 6 Figure 7 Figure 5 Figure 8 Figure 9 Tab Locking hole Remove s...

Page 22: ...re the machine s roll shaft and the snow blow rubber plates are all fixed firmly with screws and the rubber plates are facing to the correct direction STARTING SNOW SHOVEL 1 First press the button on the side of handle grip 2 Then squeeze the trigger 3 To stop the product release the trigger OPERATING SNOW SHOVEL Start the snow shovel and tilt it forward until the scraper blade contacts the ground...

Page 23: ...able is necessary please choose thick cables and the operation time should not be too long Generally you should choose an overall plated cable When an extension cable is used due to its current factors the maximum output power may not be achieved OPERATION MAINTENANCE AND STORAGE MAINTENANCE Do not attempt to repair the snow shovel Call Customer service for service and repair Check the shear bolts...

Page 24: ...nday to Friday Eastern time RONA reserves the right to repair or replace the defective tool at its discretion The product is guaranteed for 36 months if used for normal trade purposes Any guarantee is invalid if the product has been overloaded or subject to neglect improper use or an attempted repair other than by an authorized agent Heavy duty daily professional or hire usage are not guaranteed D...

Reviews: