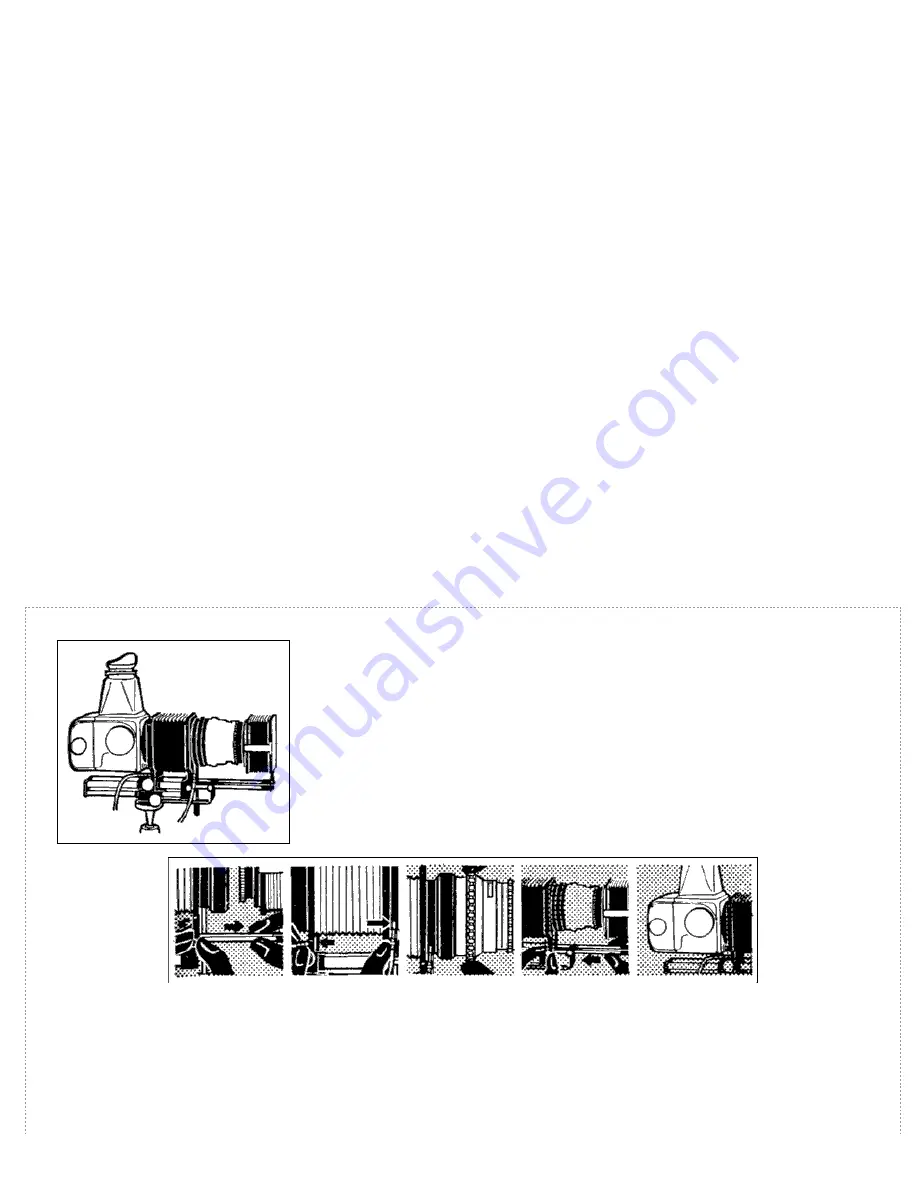
the lens mount on the bellows unit. A lens-hood front adapter is used in conjunction with the attachment. This adapter is essential
when working with the transparency copy holder (see below).
The bellows unit for Hasselblad 1600F and 1000F is similar to that of the Hasselblad 500C, but it has a screw mount for the
1600F/1000F lenses and does not employ the double cable release. (The lens and camera mechanisms on these models are
independent from each other.)
Assembling the Extension Bellows
1. Remove the front bellows-hood.
2. Screw the red cable of the twin cable release into the cable socket on the lower front, and the other cable into the corresponding
one on the back of the bellows unit. (This applies only to the bellows for the model 500C.)
3. Remove the camera lens from the body. Fit it (with the red dot of the lens lined up with the red dot on the bellows unit) to the
front of the unit. Mount the rear of the bellows (again lining up the red dots) on the camera body. (With the bellows unit for the
Hasselblad F models, screw the lens to the bellows and the bellows to the camera.)
4. Slide the front hood into the front tube of the unit. But first loosen the locking screw on the side of the tube.
5. Clip the rear ring of the bellows hood to the front bayonet mount of the lens and tighten the retaining screw on the rear of the
bellows hood unit.
Using the Extension Bellows
As the automatic tensioning system is disconnected when the bellows attachment is in use, the shutter requires tensioning after each
exposure.
Turn the tensioning arm on the front of the attachment through one full turn, Tension the camera by the film transport knob. (On the
Hasselblad F models the transport knob in any case tensions the shutter.) Focus with the lower knob on the left-hand side; set the
range and scale with the upper knob. Either movement can be locked by the corresponding knobs on the right-hand side of the
bellows unit.
The front bellows hood can be extended to the required shading effect by loosening its fixing screw and unclipping the hooks on both
sides of the hood.
To expose, depress the cable release button until the auxiliary shutter opens. This means also that the lens shutter is closed and the
aperture is set to the preselected opening. Wait with the final releasing until the camera has stopped vibrating and then release fully.
Keep the release depressed until the shutter mechanism has run down, otherwise the auxiliary shutter (of the Hasselblad 500C) will
close and break the exposure.
THE EXTENSION BELLOWS
The camera mount connects directly to the body of the Hasselblad. The rear unit is
movable and controls the extension of the bellows. Scales on the rails indicate the
necessary exposure increase with the various lenses. The lens fits into the front mount
on the bellows. A twin cable re lease is used with the bellows, to work the camera re
ease and the release of the automatic lens aperture control respectively. The tripod
mount moves the whole bellows unit forward and backward on the tripod, to permit
accurate focusing without varying the bellows extension.
Assembling the bellows. Remove the front hood (left, fit the cable releases at the front and the rear of the bellows unit (centre
left); mount the camera lens in the front mount (centre); replace the extension hood (centre right); and finally mount the camera
on the rear mount (right).
www.mr-alvandi.com
Summary of Contents for 1000 F
Page 18: ...WILD LIFE www mr alvandi com ...
Page 52: ...THE CUT FILM ADAPTOR www mr alvandi com ...
Page 54: ...Daylight Exposure Values www mr alvandi com ...
Page 55: ...Filters for Black and White Film www mr alvandi com ...
Page 59: ...Close Ranges with 50 60 mm Distagon and Planar 80 mm www mr alvandi com ...
Page 60: ...Close Ranges with 120mm S PLANAR 150 200 mm SONNAR www mr alvandi com ...
Page 62: ...Conversion of Film Speed Systems Colour Films www mr alvandi com ...
Page 63: ...Black and White Films www mr alvandi com ...
Page 64: ...www mr alvandi com ...


