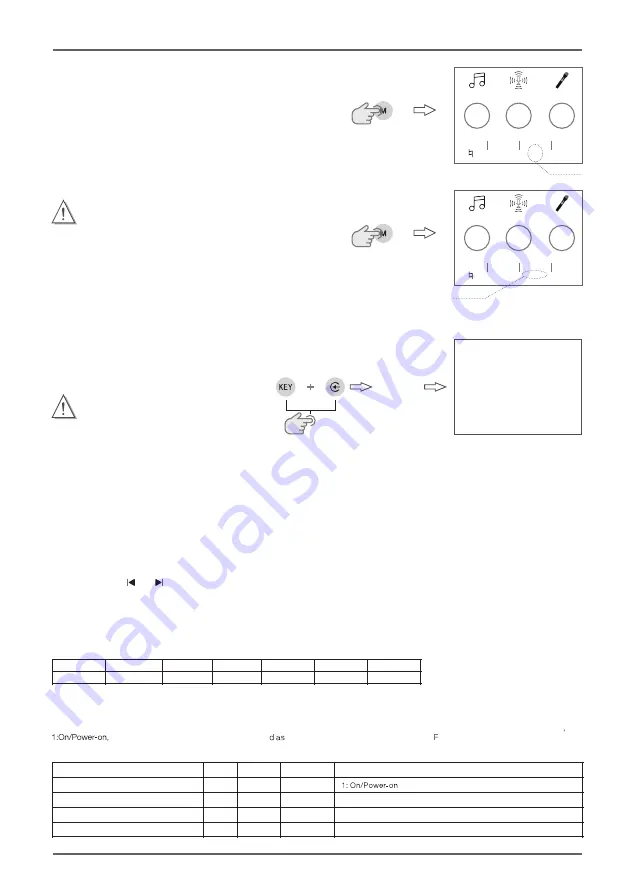
Keep blinking
Press
Saving the operating mode
Keep blinking
Press and hold
SAVE
08
Waiting For
Factory Restore
RS232 INTERFACE AND PROTOCOL
BEYOND
SERIES DIGITAL INTEGRATED AMPLIFIER
Item
Frame header Frame
length
SubItem
Parameter
SumCRC
Bytes
(0xFE)1
1
1
2
1
General data format:
Table of function code:
Function
ItemId
0x01
0x02
0x03
0x03
SubItem
0x01
0x01
0x01
0x02
Parameter
0x0000
0x0000
0x0000
0x0000
Description
Operating Mode Recalling and Saving
To recall:
Press the
M
button. The operating mode icon in the lower part of the
main screen begins blinking, as shown in the
fi
gure on the right. Rotate
the
ADJUST/ENTER
knob and select the desired operating mode.
Press the
ADJUST/ENTER
knob to confirm and exit.
The operating
mode icon stops blinking and displays the new operating mode.
Note:
The KTV, PRO, and SPCH operating modes are not customizable.
When saving the operating mode, you can select only USER1 to USER5
modes.
Saving the operating mode
Press the buttons simultaneously
Insert the
power cord
Panel Button/Knob Lock Setup
Press and hold the
ADJUST/ENTER
and
MIC
knobs simultaneously for 3s to lock all knobs and buttons
(except for the power button) on the panel. To unlock, press and hold the
ADJUST/ENTER
and
MIC
knobs simultaneously for 3s again.
Restore Factory Default Settings
Before performing this operation, check whether the power cord is connected with the equipment. If
connected, unplug the power cord.
Press and hold
KEY
and buttons simultaneously. Insert the power cord. The equipment automatically
restores to the factory defaults. The green indicator on the power switch blinks. After the restoration
is complete, the equipment enters standby, the screen is off, and the green indicator on the power
switch is on.
Linkage Control/Firmware Update over PC
After connecting the ampli
fi
er to the PC through the USB connector on the rear of the unit, you can manage the equipment using the operation software
(PC-GUI) or update the amplifier’s firmware.
Install the operation software as follows:
1. Log in to JBL of
fi
cial website https://www.jblpro.com/zh, enter the entertainment product category, select the BEYOND series digital
integrated ampli
fi
ers, and download the operation software.
2. Connect the PC and ampli
fi
er via USB.
3. Log in to the operation software UI of JBL BEYOND series digital integrated ampli
fi
ers.
Update th
e fi
rmware as follows:
1. Log in to JBL of
fi
cial website https://www.jblpro.com/zh, enter the entertainment product category, select the BEYOND series digital
integrated ampli
fi
ers, and download th
e fi
rmware updat
e fi
le.
2. Press and hold and buttons simultaneously. Insert the power cord. The equipment automatically enters the interface, which will
display the words “Software Updating”. Connect the PC and ampli
fi
er via USB.
3. Run th
e fi
rmware updat
e fi
le.
4. Restart the equipment as prompted.
Note:
Restoring factory defaults erased all
parameters and preset configur
ed by
the user.
The system restored to its default factory
configuration.
SumCRC: Checksum, which is the sum of all CRC data, that is, crc=data1+data2+data3+...
Note: When SumCRC is equal to or greater than 0xFE, SumCRC is set to 0.
Description of frame length: 0x07 represents 7 bytes (with checksum) and 0X06 represents 6 bytes (without checksum)
Description of parameter width: If the parameter contains two bytes, it is in big endian mode (the high bytes are a
t fi
rst). For example
(0x0001) ->0x00 0x01, w
FE 07 01 01 00 01 08
hich is presente
E 06 01 01 00 01 wihout check code .
Standby
Mute
Switch mode
Switch modes in cyclic mode
, 0: OFF/shutdown/standby
1: Mute, 0: Unmute
1: KTV, 2: PRO, 3: SPCH, 4:USER1,. .
. , 8: USER5
0: Switch to next mode
EFX
MIC
KEY
INPUT
MODE
AFE
BGM
2
20
35
23
EFX
MIC
KEY
INPUT
MODE
AFE
BGM
KTV
2
20
35
23
USER1
ItemId
1
Section1: Product Introduction
Operating mode saving:
Long press the
M
button. The operating mode icon in the lower part of the
main begins blinking, and "SAVE" is displayed below the icon, as shown in
the
fi
gure on the right. Rotate the
ADJUST/ENTER
knob and select the desired
operating mode to save. Press the
ADJUST/ENTER
knob to con
fi
rm and exit.
The operating mode icon stops blinking and "SAVE" disappears.
with check code
,
Summary of Contents for JBL BEYOND Series
Page 1: ......
Page 3: ...01 BEYOND SERIES DIGITAL INTEGRATED AMPLIFIER ...
Page 4: ......
Page 5: ......
Page 6: ......
Page 7: ...Effect Setting L_ch Vol Music Setting 80 80 33 1Hz 25 3Hz 0 0dB 1 00 1 off PEQ ...
Page 16: ...BEYOND SERIES DIGITAL INTEGRATED AMPLIFIER USER MANUAL ISSUED 07 2021 ...


