background image

Wiring and Device Connections

30

 Instruction Manual - Enova DVX-325xHD/22xxHD All-in-One Presentation Switchers

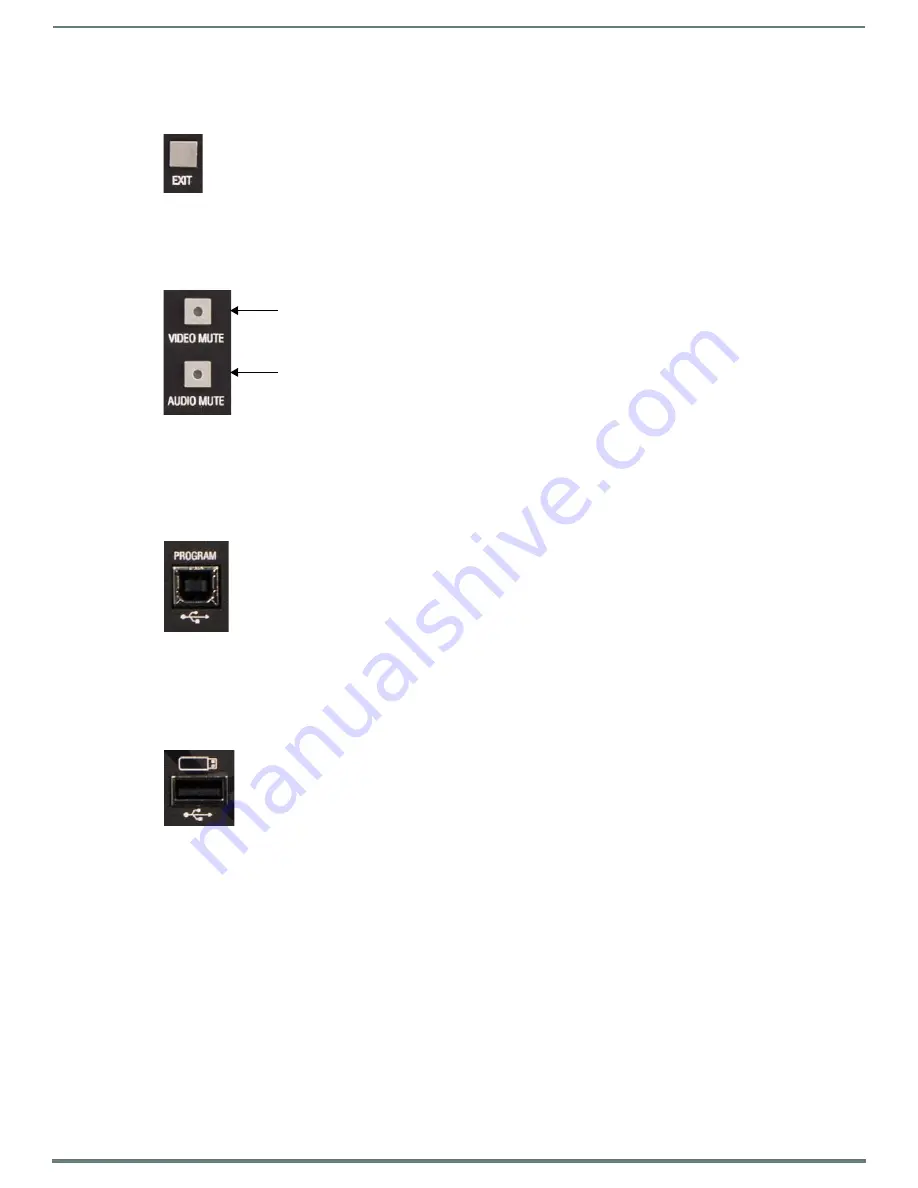
EXIT Pushbutton

Press the EXIT pushbutton to exit any menu on the LCD display.
FIG. 22 displays the EXIT pushbutton.

FIG. 22  

EXIT Pushbutton

VIDEO/AUDIO MUTE Pushbuttons



Press the VIDEO MUTE button to enable or disable video on all output displays.



Press the AUDIO MUTE button to enable or disable audio for all audio outputs.

FIG. 23 displays the VIDEO/AUDIO MUTE pushbuttons.

FIG. 23  

VIDEO/AUDIO MUTE Pushbuttons

The pushbuttons light (red) to indicate that Video and/or Audio muting is active.

Program Port

The front panel of all models features one Type-B USB port for connecting the controller to a PC via USB cable.
The Program port uses a standard Type-A-to-Type-B USB cable to connect to a PC. When connected, you can view your DVX among 

the listed Masters connected via USB in NetLinx Studio. See the Initial Configuration chapter in the 

NX-Series Controllers 

WebConsole and Programming Guide

 for more information.

FIG. 24  

Program port

USB Port

The front panel of all models features one Type-A USB port you can use to connect a mass storage device for loading .tkn files, 

reading or writing configuration files and log files, or updating the firmware on the unit.

NOTE: 

This USB port only supports a FAT32 file system.

This USB port (FIG. 25) uses standard USB cabling to connect to any mass storage or peripheral devices.

FIG. 25  

USB port

NOTE: 

USB hubs are not supported on this port.

Press to toggle mute (blank) video all display outputs

Press to toggle mute audio on all audio outputs

Summary of Contents for AMX ENOVA DVX-3250HD-SP

Page 1: ... MANUAL ENOVA DVX ALL IN ONE PRESENTATION SWITCHERS DVX 3250HD SP DVX 3250HD T DVX 3255HD SP DVX 3255HD T DVX 3256HD SP DVX 3256HD T DVX 2250HD SP DVX 2250HD T DVX 2255HD SP DVX 2255HD T DVX 2210HD SP DVX 2210HD T ...

Page 2: ...les and the point where they exit from the apparatus 11 ONLY USE attachments accessories specified by the manufacturer 12 USE ONLY with a cart stand tripod bracket or table specified by the manufacturer or sold with the apparatus When a cart is used use caution when moving the cart apparatus combination to avoid injury from tip over 13 UNPLUG this apparatus during lightning storms or when unused f...

Page 3: ...striction of Hazardous Substances Recast RoHS2 Directive 2011 65 EU European Union WEEE recast Directive 2012 19 EU This product contains batteries that are covered under the 2006 66 EC European Directive which cannot be disposed of with normal household waste Please follow local regulations You may obtain a free copy of the Declaration of Conformity by visiting http www amx com techcenter certifi...

Page 4: ...tation Switchers This device is designed and evaluated under the condition of altitude below 2000 meters above sea level it can only be used in locations below 2000 meters above sea level Using the device above 2000 meters could result in a potential safety hazard ...

Page 5: ... 2255HD 2210HD 19 Specifications 19 Port Numbers 22 Installation 23 Overview 23 Mounting the DVX into an Equipment Rack 23 Ventilation 23 Wiring and Device Connections 24 Overview 24 Front Panel Controls and Indicators 27 LEDs 27 LCD Display 28 SWITCH Pushbutton 28 TAKE Pushbutton 28 VIDEO MENU Pushbutton 28 AUDIO MENU Pushbutton 29 Navigation Pushbuttons 29 STATUS Pushbutton 29 EXIT Pushbutton 30...

Page 6: ...xLink Port and LED 4 pin captive wire 43 SDHC Card Slot 45 Configuration DIP Switch 45 Program Run Disable PRD Mode 45 ICSLAN Ports 45 Using the ICSLAN Network 45 DHCP Server 46 Opening LAN and ICSLAN Sockets from Code 46 USB Port 46 ID Pushbutton 46 Switching to Static or Dynamic IP Addressing 46 Restoring the Controller Settings to the Factory Defaults 46 Restoring the Controller s Factory Firmw...

Page 7: ...he Output Aspect Ratio 58 Selecting a Video Test Pattern 58 Audio Settings 59 Microphone Settings 60 Selecting an Audio Test Tone 60 Switch Menu 61 Status Menu 61 DVX WebConsole 62 Accessing the WebConsole 62 Master Controller Configuration Options 63 WebConsole System Configuration 63 WebConsole User Interface Additional Documentation 63 Using a Web Browser 63 Locating the IP Address of the DVX 6...

Page 8: ...22xxHD NetLinx Levels 83 SEND_COMMANDS 84 Port Functionality Mapping 84 Port Numbers 84 AUDIO SEND_COMMANDs 85 AI input O output 85 AUDIN_COMPRESSION 85 AUDIN_COMPRESSION 85 AUDIN_COMPRESSION_ATTACK 85 AUDIN_COMPRESSION_ATTACK 85 AUDIN_COMPRESSION_RATIO 85 AUDIN_COMPRESSION_RATIO 85 AUDIN_COMPRESSION_RELEASE 85 AUDIN_COMPRESSION_RELEASE 86 AUDIN_COMPRESSION_THRESH 86 AUDIN_COMPRESSION_THRESH 86 AU...

Page 9: ...ER 92 AUDMIC_LIMITER_ATTACK 92 AUDMIC_LIMITER_ATTACK 92 AUDMIC_LIMITER_RELEASE 92 AUDMIC_LIMITER_RELEASE 92 AUDMIC_LIMITER_THRESH 92 AUDMIC_LIMITER_THRESH 93 AUDMIC_ON 93 AUDMIC_ON 93 AUDMIC_PHANTOM_PWR 93 AUDMIC_PHANTOM_PWR 93 AUDMIC_PREAMP_GAIN 93 AUDMIC_PREAMP_GAIN 93 AUDMIC_STEREO 93 AUDMIC_STEREO 94 AUDOUT_BALANCE 94 AUDOUT_BALANCE 94 AUDOUT_DELAY 94 AUDOUT_DELAY 94 AUDOUT_DUCK_ATTACK 94 AUDO...

Page 10: ...0 INPUT 100 OSD 100 OSD 100 XPOINT 100 OUTPUT 101 VI input O output 101 VIDEO_MUTE 101 VIDEO_MUTE 101 VIDEO_TESTPATTERN 101 VIDEO_TESTPATTERN 101 VIDIN_BRIGHTNESS 101 VIDIN_BRIGHTNESS 101 VIDIN_BW 101 VIDIN_BW 101 VIDIN_COLOR 101 VIDIN_COLOR 101 VIDIN_CONTRAST 101 VIDIN_CONTRAST 102 VIDIN_EDID 102 VIDIN_EDID 102 VIDIN_EDID_AUTO 102 VIDIN_EDID_AUTO 102 VIDIN_FORMAT 102 VIDIN_FORMAT 102 VIDIN_HDCP 1...

Page 11: ...E 107 VIDOUT_ON 107 VIDOUT_ON 107 VIDOUT_OSD 108 VIDOUT_OSD 108 VIDOUT_OSD_COLOR 108 VIDOUT_OSD_COLOR 108 VIDOUT_OSD_POS 108 VIDOUT_OSD_POS 108 VIDOUT_RES 108 VIDOUT_RES_AUTO 108 VIDOUT_RES_AUTO 108 VIDOUT_RES_REF 108 VIDOUT_RES_REF 109 VIDOUT_SCALE 109 VIDOUT_SCALE 109 VIDOUT_TESTPAT 109 VIDOUT_TESTPAT 109 VIDOUT_VSHIFT 109 VIDOUT_VSHIFT 109 VIDOUT_VSIZE 109 VIDOUT_VSIZE 110 VIDOUT_ZOOM 110 VIDOU...

Page 12: ...ay and Refresh Rates 113 DVI HDMI and VGA Supported Input Resolutions 113 Composite and S Video Supported Input Resolutions 114 Component Video Supported Input Resolutions 115 Appendix B Output Resolutions 116 Available Pixel Display and Refresh Rates 116 DVI and HDMI Supported Output Resolutions 116 Appendix C Volume Attenuation Table 117 Overview 117 ...

Page 13: ... level outputs each with its own mixing and equalization settings Enova All in One Presentation Switchers Name FG Description Page Ref DVX 3250HD SP FG1906 15 10x4 All In One Presentation Switchers Multi Format HDMI Inputs 2x25W 8 Ohm page 15 DVX 3250HD T FG1906 17 10x4 All In One Presentation Switchers Multi Format HDMI Inputs 75W 70 100V page 15 DVX 3255HD SP FG1906 16 10x4 All In One Presentati...

Page 14: ...r environment and third party equipment Battery Life Enova 325x and 22xx series All in One Presentation Switchers use a combination lithium battery and clock crystal package The battery is a commonly available CR2032 lithium battery The battery has an average shelf life of 10 years In normal use the time will be shorter than the average shelf life depending on the amount of time the unit has no ex...

Page 15: ...ted correctly and blinks when receiving Ethernet data packets STATUS green Status LED blinks to indicate that the system is programmed and communicating properly INPUT yellow Input LED blinks to indicate that the Controller is receiving data OUTPUT red Output LED blinks to indicate that the Controller is transmitting data ICSLAN red ICSLAN LED blinks when the category cable to port 1 is connected ...

Page 16: ...cy carriers of up to 1 142 MHz with each output being capable of two electrical formats IR or Serial 8 IR Serial data signals can be generated simultaneously IR ports support data mode at limited baud rates and wiring distances SDHC Slot 1 SDHC card slot for future use Configuration DIP Switch The Configuration DIP Switch allows you to set boot time operations see the Configuration DIP Switch sect...

Page 17: ...connectors 1 4 each provide HDMI digital audio and video output 2 DXLink outputs 1 3 mirror HDMI outputs 1 and 3 See the DXLINK HDMI OUTPUTS section on page 38 for more information and important cable recommendations AxLink Port 2 4 pin 3 5 mm mini Phoenix male connectors that provides data and power to external AxLink control devices Green AxLink LED indicates the state of the AxLink port See the...

Page 18: ...ent and composite connections FG10 2170 09 CC DVI SVID DVI to S Video adapter cable FG10 2170 10 CC DVIM VGAF DVI to HD15 female adapter cable FG10 2170 13 CC 3 5ST5 RCA2F 2 RCA Female to 5 Pin Phoenix Cable FG10 003 20 AVB RX DXLINK HDMI DXLink HDMI Receiver Module FG1010 500 AVB TX HDMI DXLINK DXLink HDMI Transmitter Module FG1010 300 AVB TX MULTI DXLINK DXLink Multi Format Transmitters FG1010 3...

Page 19: ...ted correctly and blinks when receiving Ethernet data packets STATUS green Status LED blinks to indicate that the system is programmed and communicating properly INPUT yellow Input LED blinks to indicate that the Controller is receiving data OUTPUT red Output LED blinks to indicate that the Controller is transmitting data ICSLAN red ICSLAN LED blinks when the category cable to port 1 is connected ...

Page 20: ...put being capable of two electrical formats IR or Serial 4 IR Serial data signals can be generated simultaneously IR ports support data mode at limited baud rates and wiring distances AxLink Port 4 pin 3 5 mm mini Phoenix male connector that provides data and power to external AxLink control devices Green AxLink LED indicates the state of the AxLink port Configuration DIP Switch The Configuration ...

Page 21: ...ment Storage temperature 10º C to 70º C 14º F to 158º F Operating Temperature 0º C to 40º C 32º F to 104º F Operating Relative Humidity 5 to 85 non condensing Supported Video Resolutions HD resolutions up to 1080p and RGB resolutions up to 1920x1200 60Hz Higher resolutions are supported in pass through mode See the Available Pixel Display and Refresh Rates section on page 113 for a complete listin...

Page 22: ...ers 22 Instruction Manual Enova DVX 325xHD 22xxHD All in One Presentation Switchers Port Numbers The following table lists the port numbers for the DVX 22xxHD DVX 22xxHD Port Numbers RS 232 RS 232 422 485 IR Serial I O Relay 2 4 1 11 14 22 21 ...

Page 23: ...e wires to the DVX Refer to the Wiring and Device Connections section on page 24 for wiring diagrams and pinout descriptions CAUTION DO NOT stand other units directly on top of the DVX when it is rack mounted as this will place excessive strain on the mounting brackets Ventilation ALWAYS ensure that the rack enclosure is adequately ventilated Do not block any ventilation openings Sufficient airflo...

Page 24: ...3255HD SP features the same options on the rear panel as the DVX 3250HD SP with the exception that two DXLink inputs appear in place of two of the HDMI inputs VIDEO MUTE AUDIO MUTE EXIT pushbutton STATUS pushbutton VIDEO MENU AUDIO MENU TAKE pushbutton SWITCH pushbutton Navigational pushbuttons LCD display RS232 422 485 LEDs Relay LEDs IR Serial LEDs I O LEDs MASTER LEDs USB port PROGRAM port RS 2...

Page 25: ...jacks and two DVI inputs on ports 3 and 4 and two DXLink inputs appear in place of two HDMI inputs on ports 7 and 8 FIG 8 displays the rear panel of the DVX 3256HD SP FIG 8 DVX 3256HD SP rear panel FIG 9 displays the front panel of the DVX 2250HD SP and DVX 2255HD SP FIG 9 DVX 2250HD SP front panel DXLINK INPUTS EXIT pushbutton STATUS pushbutton VIDEO MENU AUDIO MENU TAKE pushbutton SWITCH pushbut...

Page 26: ... inputs FIG 10 DVX 2250HD SP rear panel FIG 11 displays the rear panel of the DVX 2255HD SP FIG 11 DVX 2255HD SP rear panel FIG 12 displays the rear panel of the DVX 2210HD SP FIG 12 DVX 2210HD SP rear panel MULTI FORMAT VIDEO INPUTS AUDIO HDMI INPUTS INPUTS AMP OUTPUT AUX OUTPUTS Power RS 232 422 485 ports RELAYS port 21 I O Port 22 IR SERIAL Ports 11 14 AUDIO OUTPUTS AxLink Port LED Config DIP s...

Page 27: ...erly INPUT yellow Blinks to indicate that the Controller is receiving data OUTPUT red Blinks to indicate that the Controller is transmitting data ICSLAN red Blinks when the category cable to port 1 is connected and terminated correctly The LED also blinks when receiving LAN data packets SERIAL 1 8 red yellow 8 sets of LEDs indicate that the RS 232 ports 2 4 6 8 and RS 232 422 485 ports 1 5 are tra...

Page 28: ...menu on the LCD display When in an audio or video menu press the button to cycle through audio and video inputs or outputs depending on the menu This button does not access the menus or change the currently selected menu FIG 17 displays the TAKE pushbutton FIG 17 TAKE Pushbutton VIDEO MENU Pushbutton Press the VIDEO MENU pushbutton to access the video options displayed on the LCD display There are...

Page 29: ... you to the previous configuration parameter Pressing DOWN takes you to the next configuration parameter These buttons do not change the currently selected menu The LEFT and RIGHT navigation buttons are used to change the setting of the displayed parameter If the parameter is read only the value cannot change Pressing LEFT decreases the value displayed if the setting is numeric or goes to the prev...

Page 30: ...ontroller to a PC via USB cable The Program port uses a standard Type A to Type B USB cable to connect to a PC When connected you can view your DVX among the listed Masters connected via USB in NetLinx Studio See the Initial Configuration chapter in the NX Series Controllers WebConsole and Programming Guide for more information FIG 24 Program port USB Port The front panel of all models features on...

Page 31: ...o the connected output devices These inputs support the following audio formats For more information about these connectors including wiring see the HDMI INPUTS section on page 36 Some DVX models have DXLink input ports which support embedded audio in place of HDMI input ports See the Supported Video Settings section on page 37 for more information The following table lists the number of digital a...

Page 32: ...s The following table lists the number of ports and the port numbers for each model of DVX Source devices require either balanced differential or unbalanced single ended connections FIG 28 illustrates options for wiring between sources and input connectors More than one option can be used in the same system FIG 28 Stereo 5 terminal wiring FIG 29 provides details for wiring from an audio input to a...

Page 33: ... XLR output FIG 31 RCA mono and XLR output wiring AMP OUT The AMP OUT amplified audio output differs according to the DVX model you are using The 4 position captive wire connector for SP models provides amplified variable mono or stereo audio output The two 2 position captive wire connectors for T models provide 70V or 100V mono amplified audio output Connect a speaker to either the 70V or 100V te...

Page 34: ...udio outputs each ports 2 3 FIG 35 displays the AUDIO OUTPUTS connectors FIG 35 AUDIO OUTPUTS Destination devices require either balanced differential or unbalanced single ended connections FIG 36 illustrates options for wiring between output connectors and the destinations FIG 36 Stereo 5 terminal wiring CAUTION Do not connect the negative terminals to the source connector Doing so can cause dama...

Page 35: ...d VGA inputs using the appropriate conversion cables Refer to the Cable Details and Pinout Information section on page 49 for cable details and pinout information for each cable type section on page 49 DVI A Male to 5 BNC Male Cable section on page 51 DVI A Male to Triple RCA Male Cable section on page 52 DVI A Male to S Video Male Cable section on page 53 DVI A Male to HD15 VGA Male Adapter secti...

Page 36: ...nnectors Supported Video Settings Type Phase Shift Hue Saturation Contrast Brightness S Video X X Composite X X Component X X RGB DVI X X HDMI X X NOTE Deep Color pass through is not supported on the MULTI FORMAT VIDEO INPUTS Digital Audio Ports DVX Model No of HDMI Ports Port Numbers No of DXLink Ports Port Numbers DVX 3250HD 6 5 10 0 N A DVX 3255HD 4 5 8 2 9 10 DVX 3256HD 4 3 6 4 7 10 DVX 2250HD...

Page 37: ... digitally transcoded analog video signals Both inputs support HDCP 1 4 These connectors are not available on all DVX models Consult the Digital Audio Ports table on page 36 for a list of DVX models that feature DXLink INPUTS connectors FIG 41 displays the DXLINK INPUTS connectors FIG 41 DXLINK INPUTS See the Important Twisted Pair Cabling Requirements and Recommendations section on page 39 for in...

Page 38: ...s used to determine the SmartScale resolution and timing FIG 42 displays the HDMI and DXLink audio video output ports FIG 42 DXLINK HDMI OUTPUTS NOTE All video output ports support HDCP 1 4 22xx Video Outputs The VIDEO OUTPUTS for the 22xx DVX models include 2 different types of connectors 2 HDMI Output connectors 1 2 each provide scaled digital DVI video and HDMI audio and video output 1 DXLink T...

Page 39: ...nnectors DXLink cable runs require shielded category cable STP of Cat6 or better DXLink twisted pair cable runs for DXLink equipment shall only be run within a common building DXLink delivers 10 2 Gb s throughput over shielded category cable Based on this bandwidth requirement we recommend following industry standard practices designed for 10 Gigabit Ethernet when designing and installing the cabl...

Page 40: ...X FIG 46 RS 232 ports The following table lists the pinouts for the RS 232 ports In the above table pin 1 is located on the right side of the port and the pinouts count up to the left RS 232 422 485 Ports The RS 232 422 485 ports ports 1 and 5 on the DVX 325x port 1 on the DVX 22xx are 10 pin 3 5 mm mini Phoenix male connectors used for connecting A V sources and displays By default these ports ar...

Page 41: ... A and B are shorted together Relay Connections Use connectors A for common and B for output FIG 48 Each relay is isolated and normally open A metal connector strip is also provided to common multiple relays FIG 48 RELAY connector male 8 channel single pole single throw relay ports Each relay is independently controlled Supports up to 8 independent external relay devices 4 on the DVX 22xxHD Channe...

Page 42: ...outputs the I O port acts as a switch to GND and is rated for 200mA 12 VDC The DVX 22xxHD can use up to 4 I O ports The DVX 325xHD can use up to 8 I O ports The PWR pin provides 12 VDC 200 mA and is designed as a power output for the PCS Power Current Sensors VSS2 Video Sync Sensors or equivalent The GND connector is a common ground and is shared by all I O ports A common ground is shared with I O...

Page 43: ... SERIAL connector male NOTE The maximum baud rate for ports using DATA mode is 19200 Also DATA mode works best when using a short cable length 10 feet NOTE For each data signal the negative terminal is for Signal GND and the positive terminal is for IR Serial data The IR Serial connector wiring specifications are listed in the following table AxLink Port and LED 4 pin captive wire The AxLink port ...

Page 44: ...olled independently Refer to the following table for the wiring length information used with the central controller FIG 52 provides wiring requirements for the AxLink connector FIG 52 Mini Phoenix connector wiring diagram direct data and power To use the 4 pin 3 5 mm mini Phoenix male captive wire connector for data communication and power transfer the incoming PWR and GND cable from the 12 VDC co...

Page 45: ...uating PRD Mode to a PC s SAFE Mode setting With PRD mode you can continue to power a unit update the firmware and download a new program while circumventing any problems with a currently downloaded program You must power cycle the unit after activating deactivating PRD mode on Program Port DIP switch 1 ICSLAN Ports All DVX models have two types of Ethernet ports LAN and ICSLAN The LAN port is use...

Page 46: ... devices FIG 58 USB port NOTE USB hubs are not supported on this port ID Pushbutton All DVX models feature an ID pushbutton which you can use to toggle between static and dynamic IP addressing You can also use the pushbutton to reset the default settings on the controller or restore the controller to its factory firmware image FIG 59 displays the ID pushbutton for the DVX FIG 59 ID pushbutton Swit...

Page 47: ...1 provides the pinouts and signals for the LAN connector and cable FIG 61 RJ 45 wiring diagram FIG 62 describes the blink activity for the LAN connector and cable FIG 62 LAN connector LEDs The LAN port gets its IP address es in one or more of the following ways IPv4 Static assignment by the user Dynamic assignment by an IPv4 DHCP server Link local as a fall back when configured for DHCP but unable...

Page 48: ... in One Presentation Switchers CAUTION This unit should only have one source of incoming power Using more than one source of power to the Controller can result in damage to the internal components and a possible burn out Apply power to the unit only after installation is complete ...

Page 49: ...ideo Composite VGA Component and HDMI to the DVI Input connectors the following optional adapter cables are required DVI Input Adapter Cables Name Description Length FG CC DVI 5BNCM DVI to 5 BNC Male NOTE Used for VGA Component or Composite inputs When used for composite inputs connect the green plug on the adapter cable to the composite video output jack on the source device 6 1 828m FG10 2170 08...

Page 50: ...ected for this cable 9 TMDS DATA 1 N TMDS DATA 1 N 9 28AWG twisted pair 1 10 TMDS DATA 1 P TMDS DATA 1 P 10 28AWG twisted pair 1 11 TMDS SHIELD 1 3 TMDS SHIELD 1 3 11 28AWG twisted pair 1 drain 12 TMDS DATA 3 N TMDS DATA 3 N 12 Pin not populated in DVI D connector 13 TMDS DATA 3 P TMDS DATA 3 P 13 Pin not populated in DVI D connector 14 5VDC 5VDC 14 28AWG 15 GROUND GROUND 15 28AWG 16 HOT PLUG DETE...

Page 51: ...lack BNC center pin 9 TMDS DATA 1 N Pin not populated in DVI A connector 10 TMDS DATA 1 P Pin not populated in DVI A connector 11 TMDS SHIELD 1 3 Pin not populated in DVI A connector 12 TMDS DATA 3 N Pin not populated in DVI A connector 13 TMDS DATA 3 P Pin not populated in DVI A connector 14 5VDC Pin populated in DVI A connector but not connected for this cable 15 GROUND VSync HSync Returns shiel...

Page 52: ...C CLOCK Pin populated in DVI A connector but not connected for this cable 7 DDC DATA Pin populated in DVI A connector but not connected for this cable 8 ANALOG VERTICAL SYNC Pin populated in DVI A connector but not connected for this cable 9 TMDS DATA 1 N Pin not populated in DVI A connector 10 TMDS DATA 1 P Pin not populated in DVI A connector 11 TMDS SHIELD 1 3 Pin not populated in DVI A connect...

Page 53: ...ame S Video Connector Pin Notes 1 TMDS DATA 2 N Pin populated in DVI A connector but not connected for this cable 2 TMDS DATA 2 P Pin populated in DVI A connector but not connected for this cable 3 TMDS SHIELD 2 4 Pin not populated in DVI A connector 4 TMDS DATA 4 N Pin not populated in DVI A connector 5 TMDS DATA 4 P Pin not populated in DVI A connector 6 DDC CLOCK Pin populated in DVI A connecto...

Page 54: ...VI A connector but not connected for this cable C1 C1 ANALOG RED Pin populated in DVI A connector but not connected for this cable C2 C2 ANALOG GREEN Luminance Y Signal center conductor 3 C3 C3 ANALOG BLUE Chrominance C Signal center conductor 4 C4 C4 ANALOG HSYNC Pin populated in DVI A connector but not connected for this cable C5 C5 ANALOG GROUND Y C Returns shields 1 2 BACKSHELL SHIELD Pin popu...

Page 55: ...CK P Pin populated in DVI A connector but not connected for this cable 24 TMDS CLOCK N Pin populated in DVI A connector but not connected for this cable C1 C1 ANALOG RED RED Coax Signal 1 Red mini coax signal C2 C2 ANALOG GREEN GREEN Coax Signal 2 Green mini coax signal C3 C3 ANALOG BLUE BLUE Coax Signal 3 Blue mini coax signal C4 C4 ANALOG HSYNC HSYNC Signal 13 28AWG C5 C5 ANALOG GROUND RGB Coax ...

Page 56: ...s Output Select Use the left and right navigational buttons to manually select which video output you want to use You can choose from 1 2 3 4 or ALL 1 2 or ALL on 22xx DVX models Scaling Use the left and right navigational buttons to toggle whether you want to scale the output image You can choose from AUTO MANUAL and BYPASS The default setting is AUTO Resolution Use the left and right navigationa...

Page 57: ...e left and right navigational buttons to move the location of the video output from left to right You can set the shift from 127 to 127 The default setting is 0 V Size Use the left and right navigational buttons to set the vertical size of the image for the selected output You can set the size from 25 to 800 The default setting is 100 V Shift Use the left and right navigational buttons to move the...

Page 58: ...uts use the left and right navigational buttons to indicate whether you want the EDID going to the source to update anytime the output EDID changes or only when an update is requested manually You can choose from AUTO and OFF The default setting is AUTO Source Input Video Adjust NOTE The following input video adjustments have no effect on the display of the internally generated test patterns Refer...

Page 59: ...te which analog audio output to embed in the selected HDMI output You can choose from Out1 Out2 Out3 Out4 Pass thru and Off HDMI EQ Use the left and right navigational buttons to toggle whether the equalizer settings for the selected analog output should be applied to the HDMI output You can choose from On or Off The default value is Off SPDIF Use the left and right navigational buttons to indicat...

Page 60: ...r default settings Mic Input Menu Options Mic Input Mode Use the left and right navigational buttons to manually select Single Stereo to adjust both microphone inputs or Dual Mono Mode to adjust the microphone settings individually If you select Dual Mono Mode be sure to select the desired microphone from the Mic Input Select option before adjusting the available settings for the microphone Mic In...

Page 61: ...o on the Switch Level option Select Audio Input Use the SWITCH button to cycle through the available audio inputs This option is only available if you select Audio on the Switch Level option Select Audio Output Use the SWITCH button to cycle through the available audio outputs This option is only available if you select Audio on the Switch Level option Status Menu Vid Status Displays which video i...

Page 62: ...ser and type the IP Address of the target Master in the Address Bar 2 Press Enter to access WebConsole for that Master The initial view is the Web Control page FIG 67 FIG 67 WebConsole WebControl Page initial view When using the Microsoft Internet Explorer browser in Windows 8 you may not be able to login and connect to the Master via the WebConsole If you cannot login and connect try any of the f...

Page 63: ...users and roles System Click to access the System Details page The options on this page allow you to view and configure various aspects of the NetLinx System Modules Click to access several different device related pages Switcher Click to access the Enova Switcher Configuration page WebConsole User Interface Additional Documentation For a full description of all System Configuration pages refer to...

Page 64: ...rent TCP IP settings using the UP and DOWN navigational buttons Default User Names and Passwords The following table lists the default user names and passwords for accessing the DVX through NetLinx Studio or the WebConsole General Options The WebConsole Configuration page contains settings that are accessible from each tab FIG 70 indicates the universally accessible options available on the web pa...

Page 65: ...rner of the screen whenever you select a new input source From the available menus in the same area you can select the color scheme and location of the OSD 4 Select Input Use the menu to select a video input to be switched to the selected video output 5 Logo Test Pattern Use the menu to choose an image logo or output test pattern to display on the video output Select Off to disable the logo or tes...

Page 66: ...ck Upload File You can click any of the three available buttons 5 Select an image file from a location accessible to the DVX and click OK 6 Once the file is uploaded click Flash Logos to load the images files into memory CAUTION Using concurrent web browsers or users while uploading or flashing image files can cause corruption in your images It is a best practice to use only a single web browser w...

Page 67: ... indicate the type of connection used to connect the video source to the switcher For Multi Format inputs you can choose from HDMI DVI VGA Component S Video and Composite The default setting is Component For HDMI inputs you can choose from HDMI or DVI 4 Select Output Use the menu to select the video output you want to use 5 Resolution Click Auto to have the unit automatically detect the video reso...

Page 68: ...can set the volume from 0 to 100 The default setting is 20 Min Max Use the sliders to adjust the minimum and maximum volume of the audio output There are separate sliders on this option for minimum and maximum volume You can set the maximum volume from 0 to 100 in increments of 1 The default value is 100 You can set the minimum volume from 0 to 100 in increments of 1 The default value is 0 Balance...

Page 69: ...rect text entry to set the center frequency for the selected equalizer band You can set the center frequency to any value between 20Hz and 20KHz Gain Use the up and down arrow buttons or direct text entry to adjust the gain attention level of the selected band You can set the gain from 12 to 12dB in 1dB increments The default setting is 0 Q Q factor adjusts the filter from wider to narrower smooth...

Page 70: ...lease Sets the duration in milliseconds of the release phase while compressing You can set a value between 1 and 5000 Ratio Sets the ratio while compressing You can set a value between 1 and 20 Threshold Sets the threshold while compressing You can set a value between 0 and 60 7 Microphone Mode Click Dual Mono when using independent microphones Each mono microphone input is mixed onto both the rig...

Page 71: ...KHz The default center frequencies are 500Hz 1000Hz and 3000Hz Each band is set individually by selecting the band from the Band menu then adjusting the remaining settings A dynamics chart displays any activity on the equalizer band Changing the Gain Frequency or Q settings can change the chart display Use the following options to change the settings on the equalizer Band Use the menu to select wh...

Page 72: ...ct an audio source to one of the microphone inputs on the DVX 2 See Using a Web Browser section on page 63 and follow the instructions to open the DVX Web Configuration page 3 On the Audio In Microphone tab select the appropriate Pre Amp gain setting for the input type you are using see item 7 in the Audio In Microphone section on page 70 for more information If the input source connected to the m...

Page 73: ...Inputs 1 and 2 when in Dual Mode or the L R Microphone when in Single Stereo Mode 4 Front Panel Lockout Mode Click the check box to activate a lockout of some or all of the buttons on the front panel Select the type of lockout in the Lockout Mode section Select Full Lockout if you want the lockout to block the use of all front panel buttons Select Menu only Lockout if you want the lockout to only ...

Page 74: ...ed to the DVX is 0 zero The Master device number is always 0 and cannot be changed The Device Number can be viewed on the DVX Configuration Manager Device Configuration page 6 Launch NetLinx Studio and open the Online Device Tree Verifying the Current Firmware Version Use the Online Tree in NetLinx Studio see FIG 76 on page 74 to verify which version of each firmware file is currently installed 1 ...

Page 75: ... that process is complete upgrade the Device firmware NOTE ALWAYS consult the Readme TXT file bundled with the firmware file for any special instructions before upgrading to a newer firmware version If no specifics are provided use the order provided above Sending Firmware KIT Files to the DVX Use the Firmware Transfers options in the Tools menu to update the firmware in the DVX NetLinx Devices su...

Page 76: ... Tools Firmware Transfers Send to NetLinx Device to open the Send To NetLinx Device dialog box FIG 78 FIG 78 Send to NetLinx Device dialog box NetLinx Studio 2 Click the Browse button to navigate to the target directory in the Browse For Folder dialog box FIG 79 FIG 79 Browse For Folder dialog box NetLinx Studio Click to locate the KIT file ...

Page 77: ...ice Tree to determine the device s assigned IDs if it has been changed 5 Review the File Connection Address and Target Device information before you send 6 Click the Send button You can watch the progress of the transfer in the Send to NetLinx Device dialog box NetLinx Studio transfers the files to the DVX and then tells it to reboot After it reboots the DVX actually goes through the upgrade proce...

Page 78: ...ames on the DVX 325xHD and DVX 22xxHD The functionality of these commands are identical to their original counterparts The following table lists the commands which have changed and the new name of the command SEND_COMMAND Changes Original Command New Command AUDIO_MUTE AUDOUT_MUTE AUDIO_MUTE AUDOUT_MUTE GAIN AUDIN_GAIN GAIN AUDIN_GAIN INPUTEQ AUDMIC_EQ_GAIN INPUTEQ AUDMIC_EQ_GAIN PHANTOM_PWR AUDMI...

Page 79: ...3 1 4 Switches audio input 3 to the video output specified in the DPS 44 1 4 Switches audio input 4 to the video output specified in the DPS 45 1 4 Switches audio input 5 to the video output specified in the DPS 46 1 4 Switches audio input 6 to the video output specified in the DPS 47 1 4 Switches audio input 7 to the video output specified in the DPS 48 1 4 Switches audio input 8 to the video out...

Page 80: ...he DPS 34 1 3 Switches video input 4 to the video output specified in the DPS 35 1 3 Switches video input 5 to the video output specified in the DPS 36 1 3 Switches video input 6 to the video output specified in the DPS 41 1 3 Switches audio input 1 to the video output specified in the DPS 42 1 3 Switches audio input 2 to the video output specified in the DPS 43 1 3 Switches audio input 3 to the v...

Page 81: ... The DVX does not produce a video or audio output signal in low power state The 5002 Device stays online when Standby Mode is active All switch and configuration commands sent while in Standby Mode are implemented and any changes will be noticed after the DVX exits Standby Mode All audio and video signals are restored in less than 10 seconds after exiting Standby Mode The DVX exits Standby Mode on...

Page 82: ... 127 127 Video Output Vertical Shift 32 1 4 12 12 Audio EQ Band 1 32 1 4 12 12 Audio EQ Band 2 33 1 4 12 12 Audio EQ Band 3 34 1 4 12 12 Audio EQ Band 4 35 1 4 12 12 Audio EQ Band 5 36 1 4 12 12 Audio EQ Band 6 37 1 4 12 12 Audio EQ Band 7 38 1 4 12 12 Audio EQ Band 8 39 1 4 12 12 Audio EQ Band 9 40 1 4 12 12 Audio EQ Band 10 41 1 4 100 0 Audio Program Source Mixing Level 42 1 4 100 0 Audio Line M...

Page 83: ... 127 Video Output Vertical Shift 32 1 3 12 12 Audio EQ Band 1 32 1 3 12 12 Audio EQ Band 2 33 1 3 12 12 Audio EQ Band 3 34 1 3 12 12 Audio EQ Band 4 35 1 3 12 12 Audio EQ Band 5 36 1 3 12 12 Audio EQ Band 6 37 1 3 12 12 Audio EQ Band 7 38 1 3 12 12 Audio EQ Band 8 39 1 3 12 12 Audio EQ Band 9 40 1 3 12 12 Audio EQ Band 10 41 1 3 100 0 Audio Program Source Mixing Level 42 1 3 100 0 Audio Line Mic 1...

Page 84: ...stinctions are disambiguated from the overlapped port numbers by combining them with the command name Port Functionality Mapping The following table lists the port functionality mapping for the audio video ports on the DVX not all ports available on each DVX model Port Numbers The following table lists the port numbers for the DVX Port Functionality Mapping Port Number Description Address 1 Audio ...

Page 85: ... the compression attack for the audio port Syntax SEND_COMMAND DEV AUDIN_COMPRESSION_ATTACK Example SEND_COMMAND AUDIO_1 AUDIN_COMPRESSION_ATTACK Returns a COMMAND string of the form AUDIN_COMPRESSION_ATTACK attack AUDIN_COMPRESSION _ATTACK Sets the duration of the attack phase while compressing for the audio port addressed by the D P S Syntax SEND_COMMAND DEV AUDIN_COMPRESSION_ATTACK attack Varia...

Page 86: ...ort 1 based on D P S to 10dB AUDIN_DIGITAL Requests the format of the audio port addressed by the D P S Syntax SEND_COMMAND DEV AUDIN_DIGITAL Example SEND_COMMAND AUDIO_INPUT_1 AUDIN_DIGITAL Returns a string of the form AUDIN_DIGITAL format AUDIN_DIGITAL Sets the format for the audio input port addressed by the D P S Syntax SEND_COMMAND DEV AUDIN_DIGITAL format Variable format PCM 2ch PCM 8ch AC3 ...

Page 87: ...hone Syntax SEND_COMMAND DEV AUDMIC_COMPRESSION_ATTACK Example SEND_COMMAND MICROPHONE_1 AUDMIC_COMPRESSION_ATTACK Returns a COMMAND string of the form AUDMIC_COMPRESSION ATTACK attack AUDMIC_COMPRESSION _ATTACK Sets the duration of the attack phase while compressing for the microphone port addressed by the D P S Syntax SEND_COMMAND DEV AUDMIC_COMPRESSION_ATTACK attack Variable attack 1 to 2000 Ex...

Page 88: ...o 20 AUDMIC_DUCK_ATTACK Sets the duration of the attack phase while ducking for the microphone port addressed by the D P S Syntax SEND_COMMAND DEV AUDMIC_DUCK_ATTACK attack Variable attack 1 to 2000 Example SEND_COMMAND MICROPHONE_1 AUDMIC_DUCK_ATTACK 200 Sets the ducking attack for the microphone port 1 based on the D P S to 200 AUDMIC_DUCK_HOLD Sets the duration of the hold phase while ducking f...

Page 89: ...turns a COMMAND string of the form AUDMIC_EQ_FT band value AUDMIC_EQ_FT Set the filter type of any of the specified microphone band of the equalizer for the microphone port addressed by the D P S Syntax SEND_COMMAND DEV AUDMIC_EQ_FT band type Variables band 1 3 on the microphone inputs type bell band pass band stop high pass low pass treble shelf bass shelf Example SEND_COMMAND MICROPHONE_1 AUDMIC...

Page 90: ...1 based on D P S to 1 AUDMIC_GAIN Requests the gain setting for the microphone Syntax SEND_COMMAND DEV AUDMIC_GAIN Example SEND_COMMAND MICROPHONE_1 AUDMIC_GAIN Returns a COMMAND string of the form AUDMIC_GAIN gain AUDMIC_GAIN Sets the gain of the microphone port addressed by the D P S to gain Syntax SEND_COMMAND DEV AUDMIC_GAIN gain Variable gain 24 to 24 in dB Example SEND_COMMAND MICROPHONE_1 A...

Page 91: ...AND DEV AUDMIC_GATING_HOLD Example SEND_COMMAND MIC_1 AUDMIC_GATING_HOLD Returns a string of the form AUDMIC_GATING_HOLD value AUDMIC_GATING_HOLD Sets the duration of the hold phase while gating for the microphone port addressed by the D P S Syntax SEND_COMMAND DEV AUDMIC_GATING_HOLD hold Variable hold 0 to 2000 Example SEND_COMMAND MICROPHONE_1 AUDMIC_GATING_HOLD 200 Sets the gating hold for the ...

Page 92: ...MAND MIC_1 AUDMIC_LIMITER_ATTACK Returns a string of the form AUDMIC_LIMITER_ ATTACK value AUDMIC_LIMITER_ATTACK Sets the duration of the attack phase while limiting for the microphone port addressed by the D P S Syntax SEND_COMMAND DEV AUDMIC_LIMITER_ATTACK attack Variable attack 1 to 2000 Example SEND_COMMAND MICROPHONE_1 AUDMIC_LIMITER_ATTACK 200 Sets the limiter attack for the microphone port ...

Page 93: ...D DEV AUDMIC_PHANTOM_PWR Example SEND_COMMAND MICROPHONE_1 AUDMIC_PHANTOM_PWR Returns a COMMAND string of the form AUDMIC_PHANTOM_PWR result AUDMIC_PHANTOM_PWR Enables or disables phantom power for the microphone port addressed by the D P S Syntax SEND_COMMAND DEV AUDMIC_PHANTOM_PWR setting Variable setting on off Example SEND_COMMAND MICROPHONE_1 AUDMIC_PHANTOM_PWR on Allows phantom power for the...

Page 94: ...SEND_COMMAND AUDIO_OUTPUT_1 AUDOUT_DELAY Returns a COMMAND string of the form AUDOUT_DELAY delay AUDOUT_DELAY Sets the delay in regards to the input for the audio port addressed by the D P S Syntax SEND_COMMAND DEV AUDOUT_DELAY delay Variable delay 0 to 200 in milliseconds Example SEND_COMMAND AUDIO_OUTPUT_1 AUDOUT_DELAY 50 Sets the delay for the audio output port 1 based on D P S to 50 AUDOUT_DUC...

Page 95: ...SEND_COMMAND AUDIO_OUTPUT_1 AUDOUT_DUCKING Returns a COMMAND string of the form AUDOUT_DUCKING setting AUDOUT_DUCKING Sets the setting of ducking for the audio port addressed by the D P S Syntax SEND_COMMAND DEV AUDOUT_DUCKING setting Variable setting off low medium high custom Example SEND_COMMAND AUDIO_OUTPUT_1 AUDOUT_DUCKING low Sets the ducking for the audio output port 1 based on D P S to low...

Page 96: ...DEV AUDOUT_EQ_GAIN band value Variables band 1 10 if on the audio output port value 12 12 The units are in dB Example SEND_COMMAND AUDIO_OUTPUT_1 AUDOUT_EQ_GAIN 1 8 Sets the gain on band 1 of audio port 1 equalizer to 8 SEND_COMMAND AUDIO_OUTPUT_2 AUDOUT_EQ_GAIN 5 10 Sets the gain on band 5 of audio port 2 equalizer to 10 AUDOUT_EQ_MODE Request the current mode of the equalizer for the audio port ...

Page 97: ...ssed by the D P S Syntax SEND_COMMAND DEV AUDOUT_MAXVOL maximum Variable maximum 0 to 100 in percent Example SEND_COMMAND AUDIO_OUTPUT_1 AUDOUT_MAXVOL 75 Sets the maximum for the audio output port 1 based on D P S to 75 AUDOUT_MINVOL Requests the current minimum volume for the audio port addressed by the D P S Syntax SEND_COMMAND DEV AUDOUT_MINVOL Example SEND_COMMAND AUDIO_OUTPUT_1 AUDOUT_MINVOL ...

Page 98: ...eturns a COMMAND string of the form AUDOUT_TESTTONE frequency AUDOUT_TESTTONE Sets the frequency if any of a test tone for the audio port addressed by the D P S Syntax SEND_COMMAND DEV AUDOUT_TESTTONE frequency Variable frequency off 60Hz 250Hz 400Hz 1KHz 3KHz 5KHz 10KHz PINK NOISE WHITE NOISE Example SEND_COMMAND AUDIO_OUTPUT_1 AUDOUT_TESTTONE 250Hz Sets a test tone of 250Hz to play for the audio...

Page 99: ... the AUDMIC_EQ_GAIN section on page 89 PHANTOM_PWR See the AUDMIC_PHANTOM_PWR section on page 93 PHANTOM_PWR See the AUDMIC_PHANTOM_PWR section on page 93 SPDIFOUT_AUDIO Requests to which output the audio port addressed by the D P S is connected Syntax SEND_COMMAND DEV SPDIFOUT_AUDIO Example SEND_COMMAND AUDIO_OUTPUT_1 SPDIFOUT_AUDIO Returns a COMMAND string of the form SPDIFOUT_AUDIO option SPDIF...

Page 100: ...t port 2 SEND_COMMAND SWITCHER CI3O1 2 Switches video input port 3 to output video ports 1 and 2 Switches audio input port 3 to audio output port 1 and 2 CL sl I input O output Switches the audio or video or both inputs to the output port Syntax SEND_COMMAND DEV CL sl I input O output Variables sl AUDIO or VIDEO or ALL ALL both AUDIO and VIDEO input The source input port number output The output p...

Page 101: ...9 VIDIN_BRIGHTNESS Requests the input brightness of the video port addressed by the D P S Syntax SEND_COMMAND DEV VIDIN_BRIGHTNESS Example SEND_COMMAND VIDEO_INPUT_1 VIDIN_BRIGHTNESS Returns a COMMAND string of the form VIDIN_BRIGHTNESS value VIDIN_BRIGHTNESS Sets the input brightness of the video port addressed by the D P S to value Syntax SEND_COMMAND DEV VIDIN_BRIGHTNESS value Variables value 0...

Page 102: ...esolutions at regular intervals Syntax SEND_COMMAND DEV VIDIN_EDID_AUTO Example SEND_COMMAND VIDEO_INPUT_1 VIDIN_EDID_AUTO Returns a COMMAND string of the form VIDIN_EDID_AUTO status VIDIN_EDID_AUTO Sets whether you want the EDID source for the video input to update the list of available resolutions at regular intervals Syntax SEND_COMMAND DEV VIDIN_EDID_AUTO ENABLE DISABLE Example SEND_COMMAND VI...

Page 103: ..._HDMI_EQ Example SEND_COMMAND VIDEO_INPUT_1 VIDIN_HDMI_EQ Returns a COMMAND string of the form VIDIN_HDMI_EQ DISABLE VIDIN_HDMI_EQ Enables disables the equalizer on the HDMI port addressed by D P S Syntax SEND_COMMAND DEV VIDIN_HDMI_EQ ENABLE DISBALE Example SEND_COMMAND VIDIN_HDMI_EQ DISABLE Disables the equalizer on the HDMI port VIDIN_HSHIFT Requests the input Horizontal shift of the VGA video ...

Page 104: ..._PHASE Example SEND_COMMAND VIDEO_INPUT_1 VIDIN_PHASE Returns a COMMAND string of the form VIDIN_PHASE value VIDIN_PHASE Sets the input phase of the video port addressed by the D P S to value This command is valid only for inputs whose format is set to VGA Syntax SEND_COMMAND DEV VIDIN_PHASE value Variables value 0 32 Example SEND_COMMAND VIDEO_INPUT_1 VIDIN_PHASE 23 Sets the phase of video input ...

Page 105: ... input saturation of the video port addressed by the D P S Syntax SEND_COMMAND DEV VIDIN_SATURATION Example SEND_COMMAND VIDEO_INPUT_1 VIDIN_SATURATION Returns a COMMAND string of the form VIDIN_SATURATION value VIDIN_SATURATION Sets the input saturation of the video port addressed by the D P S to value Syntax SEND_COMMAND DEV VIDIN_SATURATION value Variables value 0 100 Example SEND_COMMAND VIDEO...

Page 106: ...VIDOUT_BLANK Sets the image of the video blanking feature for the video output port addressed by the D P S Syntax SEND_COMMAND DEV VIDOUT_BLANK color Variables image black blue logo 1 logo 2 logo 3 Example SEND_COMMAND VIDEO_OUTPUT_1 VIDOUT_BLANK logo 1 VIDOUT_BRIGHTNESS Requests the output brightness of the video port addressed by the D P S Syntax SEND_COMMAND DEV VIDOUT_BRIGHTNESS Example SEND_C...

Page 107: ...sed on D P S to 2 shift to right SEND_COMMAND VIDOUT_VSHIFT 3 Sets the horizontal shifting of video output port 1 based on D P S to 3 shift to left VIDOUT_HSIZE Requests the horizontal size of the video port addressed by the D P S Syntax SEND_COMMAND DEV VIDOUT_HSIZE Example SEND_COMMAND VIDEO_OUTPUT_1 VIDOUT_HSIZE Returns a COMMAND string of the form VIDOUT_HSIZE value VIDOUT_HSIZE Sets the horiz...

Page 108: ...t Black Black White Blue Blue Yellow White White Black Yellow Yellow Blue Syntax SEND_COMMAND DEV VIDOUT_OSD_COLOR color Example SEND_COMMAND VIDEO_OUTPUT_1 VIDOUT_OSD_COLOR BLACK VIDOUT_OSD_POS Requests the On Screen Display OSD position on the display connected to the video port addressed by the D P S Syntax SEND_COMMAND DEV VIDOUT_OSD_POS Example SEND_COMMAND VIDEO_OUTPUT_1 VIDOUT_OSD_POS Retur...

Page 109: ... port Syntax SEND_COMMAND DEV VIDOUT_TESTPAT Example SEND_COMMAND VIDEO_OUTPUT_1 VIDOUT_TESTPAT Returns a COMMAND string of the form VIDOUT_TESTPAT pattern See the VIDOUT_TESTPAT command for the list of test patterns VIDOUT_TESTPAT Sets the test pattern to display for the video output port Syntax SEND_COMMAND DEV VIDOUT_TESTPAT pattern Variables pattern Off Color Bar Gray Ramp SMPTE Bar HiLoTrak P...

Page 110: ...o 100 VIDOUT_ZOOM Requests the zoom of the video port for the video output port addressed by the D P S Syntax SEND_COMMAND DEV VIDOUT_ZOOM Example SEND_COMMAND VIDEO_OUTPUT_1 VIDOUT_ZOOM Returns a COMMAND string of the form VIDOUT_ZOOM value VIDOUT_ZOOM Sets the zoom of the image on the video output port addressed by the D P S to value NOTE Adjusting the video output zoom also adjusts the horizont...

Page 111: ...WITCHER FP_LOCKTYPE 1 INTENSITY_LCD Requests the intensity setting of the LCD screen on the Front Panel Syntax SEND_COMMAND DEV INTENSITY_LCD Example SEND_COMMAND SWITCHER INTENSITY_LCD Returns a COMMAND string of the form INTENSITY_LCD value INTENSITY_LCD Sets the intensity of the lighting brightness of the LCD screen that is part of the Front Panel Syntax SEND_COMMAND DEV INTENSITY_LCD intensity...

Page 112: ... the control setting for the DXLINK input card Syntax SEND_COMMAND DEV DXLINK_IN_ETH Example SEND_COMMAND SWITCHER DXLINK_IN_ETH Returns a COMMAND string of the form DXLINK_IN_ETH auto off DXLINK_IN_ETH This command instructs the input DXLINK card to disable Ethernet traffic or go to auto mode In Auto mode Ethernet traffic is controlled after negotiation through PDIF Syntax SEND_COMMAND DEV DXLINK...

Page 113: ... 720 576 50 576p CEA 861 720x576p 100 720 576 100 576p CEA 861 720x576p 200 720 576 200 576p CEA 861 800x500 60 800 500 60 VESA CVT 800x600 56 800 600 56 VESA DMT 800x600 60 800 600 60 VESA DMT 800x600 72 800 600 72 VESA DMT 800x600 75 800 600 75 VESA DMT 800x600 85 800 600 85 VESA DMT 848x480 60 848 480 60 VESA DMT 848x480 75 848 480 75 VESA CVT 848x480 85 848 480 85 VESA CVT 1024x640 60 1024 640...

Page 114: ...0x1050 75 1400 1050 75 VESA DMT 1440x900 60 1440 900 60 VESA DMT 1440x900 75 1440 900 75 VESA DMT 1440x900 85 1440 900 85 VESA DMT 1600x1200 60 1600 1200 60 VESA DMT 1680x1050 60 1680 1050 60 VESA CVT 1920x1080i 50 1920 540 50 HDMI DVI only 1080i CEA 861 1920x1080i 60 1920 540 60 HDMI DVI only 1080i CEA 861 1920x1080p 25 1920 1080 25 1080p CEA 861 1920x1080p 30 1920 1080 30 1080p CEA 861 1920x1080...

Page 115: ...ts Video Standard 720x480i 60 720 240 59 9 480i CEA 770 2 720x480p 60 720 480 59 9 480p SMPTE 293M CEA 770 2 ITU R BT 1358 720x576i 50 720 288 50 576i 720x576p 50 720 576 50 576p ITU R BT 1358 1280x720p 50 1280 720 50 720p50 SMPTE 296M 1280x720p 60 1280 720 59 9 720p SMPTE 296M CEA 770 3 1920x1080i 50 1920 540 50 1080i50 SMPTE 274M 1920x1080i 60 1920 540 59 9 1080i SMPTE 274M CEA 770 3 1920x1080p ...

Page 116: ...40x480 60 640 480 60 VESA DMT 640x480 72 640 480 72 VESA DMT 640x480 75 640 480 75 VESA DMT 800x600 60 800 600 60 VESA DMT 800x600 72 800 600 72 VESA DMT 800x600 75 800 600 75 VESA DMT 1024x768 60 1024 768 60 VESA DMT 1024x768 70 1024 768 70 VESA DMT 1024x768 75 1024 768 75 VESA DMT 1280x720p 60 1280 720 60 720p CEA 861 1280x768 60 1280 768 60 1280x800 60 1280 800 60 VESA CVT 1280x1024 60 1280 102...

Page 117: ...the output slider Volume Attenuation Percent Decibels Percent Decibels 100 6 0 49 19 5 99 5 5 48 20 0 98 5 0 47 20 5 97 4 5 46 21 0 96 4 0 45 21 5 95 3 5 44 22 0 94 3 0 43 22 5 93 2 5 42 23 0 92 2 0 41 23 5 91 1 5 40 24 0 90 1 0 39 24 5 89 0 5 38 25 0 88 0 0 37 25 5 87 0 5 36 26 0 86 1 0 35 26 5 85 1 5 34 27 0 84 2 0 33 27 5 83 2 5 32 28 0 82 3 0 32 28 5 81 3 5 30 29 0 80 4 0 29 29 5 79 4 5 28 30 ...

Page 118: ...nova DVX 325xHD 22xxHD All in One Presentation Switchers Volume Attenuation Cont Percent Decibels Percent Decibels 59 14 5 8 46 0 58 15 0 7 51 0 57 15 5 6 56 0 56 16 0 5 61 0 55 16 5 4 66 0 54 17 0 3 71 0 53 17 5 2 76 0 52 18 0 1 81 0 51 18 5 0 Infinity 50 19 0 ...

Page 119: ...nies AMX does not assume responsibility for errors or omissions AMX also reserves the right to alter specifications without prior notice at any time The AMX Warranty and Return Policy and related documents can be viewed downloaded at www amx com 3000 RESEARCH DRIVE RICHARDSON TX 75082 AMX com 800 222 0193 469 624 8000 1 469 624 7400 fax 469 624 7153 AMX UK LTD AMX by HARMAN Unit C Auster Road Clif...

Reviews: