background image

SETUP AND CONNECTIONS  13

SETUP AND CONNECTIONS

• Ensure that the power switch of this unit (and of

other equipment to be connected) is set to “Off”
before commencing connection. We also strongly
recommend that you leave all system components
unplugged from AC power until after you have com-
pleted the interconnections described in this section.

• Do not block the ventilation holes of any of the

equipment and arrange them so that air can 
circulate freely.

• Read through the instructions before connecting

other equipment.

• Ensure that you observe the color-coding when con-

necting audio and video cables.

VIDEO NOTES:

• While we suggest the use of component video for

higher quality pictures, you may also use the stan-
dard S-video or composite video connection if your
TV does not have component video inputs. The
component and S-video outputs are not available
simultaneously.

• The composite video output (yellow) combines the

complete video signal (composite) and sends it to
the TV (or to the A/V receiver) by one cable only.
Use this video output when your TV set is equipped
with a video input jack only.

• The S (separate) video output connector separates

the color (C) and luminance (Y) signals before trans-
mitting them to the TV set in order to achieve a
sharper picture. Use the S-video cable when con-

necting the player to a TV equipped with an S-video
input for improved picture clarity.

• The component video outputs further separate the

color components of the video signal, optimizing the
DVD 27’s video performance. Component video
connections are preferred, when available on your
TV or receiver. If you are using a television or video
display that is compatible with high-resolution 480P
video signals, make sure to use the input jacks on
the video display marked “HD Component,” if avail-
able. Also, make sure to configure the display’s input
settings for use with “480P” video signals. You will
also need to change the scan type in the DVD 27’s
Video Setup menu from “Interlaced” to “Progressive.”
See page 20.

• Modern audio/video receivers are capable of con-

nection to several video source devices, such as 
the DVD 27 and a VCR, cable television set-top 
box, HDTV tuner or other device. The receiver is
equipped with video monitor outputs for connection
to your television, projector or plasma display. As
you select any input source device, the receiver
selects the correct video input and routes it to the
correct video monitor output to your television. It is
recommended that you connect one of the video
outputs from the DVD 27 to the corresponding input
on your receiver to simplify operation of your home
entertainment system. Refer to the owner’s guide for
your receiver for more information.

• If your receiver is capable of multiroom operation, it

is recommended that you connect both the compo-
nent and composite video outputs of the DVD 27 to

the receiver. This enables the highest-quality picture
(component video) for viewing in the main listening
room, while enabling the multiroom system, if it is
video-capable, to distribute the composite video sig-
nal to the remote zone. Consult the owner’s guide
for your receiver to determine whether it has video
multiroom capability.

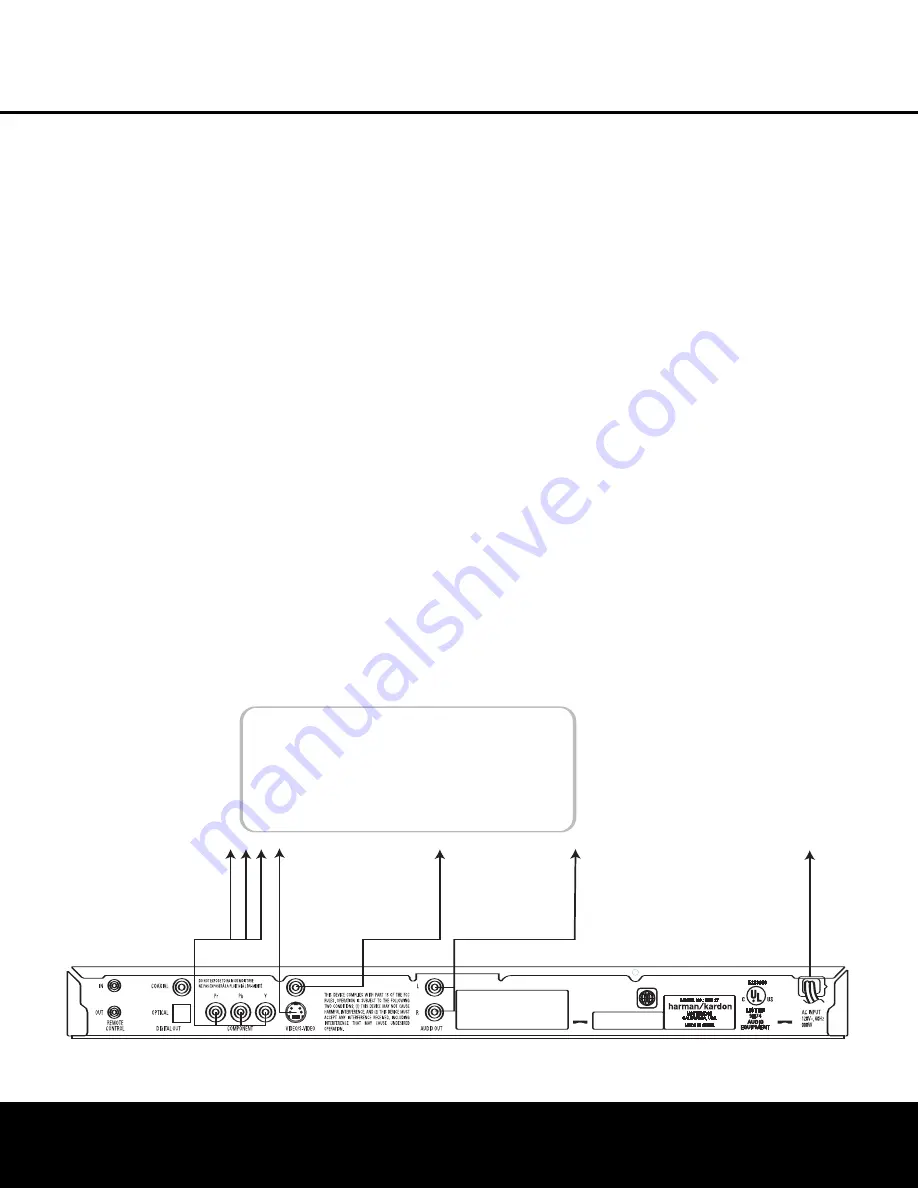
Connecting to a TV Only

When using the DVD 27 with a television but no audio
receiver or processor, connect it as follows. Make the

Analog Audio Connection

å

and one of the 

Video

Connections

(

Composite Video 

,

S-Video

ç

or 

Component Video

). Remember to plug in the

power cord.

TV

∂ç

å

To Y (green)/
Pb (blue)/Pr (red)
component video
connectors

To S-video
input
connectors
on the TV

To analog audio
input connectors
(red/white) on the TV

To video
input 
connectors
(yellow)
on the TV

To power outlet
(AC 120V/60Hz)

DVD 27 (120V) OM  12/20/05  2:18 PM  Page 13

Summary of Contents for DVD 27

Page 1: ...JPEG VCD DVD WMA REPEAT 1 ALL A B V OFF P SCAN TEST MP3 PROG RANDOM TITLE TRACK CHAP PBC HOUR MIN SEC Open Close DVD 27 DVD 27 PROGRESSIVE SCAN DVD PLAYER OWNER S MANUAL Power for the Digital Revolution ...

Page 2: ...ol front panel controls and rear panel connections certain conventions have been used EXAMPLE bold type indicates a specific remote control or front panel button or indicator or rear panel connection jack EXAMPLE OCR type refers to a message that is visible on the front panel information display or in the on screen display 1 number in a square refers to a specific front panel control a number in a...

Page 3: ...ers are the fastest growing consumer electronics products ever brought to market so this may be the first DVD player you own or a replacement for an early generation machine In either case while some of the DVD 27 s features and options resemble those of a CD player or your first DVD player there are likely to be a number of functions that you are unfamiliar with To ensure that you are able to tak...

Page 4: ...uring shipment were specially designed to cushion it from shock and vibration We suggest that you save the carton and packing materials for use in shipping if you move or should the unit ever need repair To minimize the size of the carton in storage you may wish to flatten it This is done by carefully slitting the tape seams on the bottom and collapsing the carton down to a more two dimensional ap...

Page 5: ... JPEG still images Video CD Version 2 0 Some discs may contain menus and chapters while other discs simply contain tracks Version 2 0 discs may offer interactive playback control PBC The DVD 27 will NOT play the following DVD discs with a Region Code other than 1 or 0 DVD ROM data discs DVD RAM discs SACD discs CD I discs CD G discs SVCD discs KodakPhoto CD discs Kodak Picture CD discs which are a...

Page 6: ...thin the disc Producers will usually insert some sort of icon or graphic in the picture to alert you to the availability of multiple angle scenes Progressive Scan Progressive scan playback takes the original video signal on the disc and formats it as a high scan rate output with twice the scan lines of con ventional video images Progressive scan outputs must be connected to digital ready or high d...

Page 7: ...ives com mands from the remote control is behind the front panel in this area To ensure proper operation of the player with the remote it is important that this area not be covered In the event that the player is enclosed in a cabinet or if the remote sensor is covered you may extend the remote sensor by connecting an optional external remote sensor to the Remote Control Input on the rear panel se...

Page 8: ...ed in order to prevent anyone from changing the rating level with out a code K Progressive Scan Indicator This indicator lights when the unit sends out a progressive scan signal L Playback Mode Indicators These indicators light to show the current playback mode Lights when a disc is playing in the normal mode This indicator will flash when the disc is in Forward Slow Play mode The on screen banner...

Page 9: ...rom the Product Support section for this product at www harmankardon com 0 Power On 1 Open Close 2 Audio Select 3 Clear 4 Playlist 5 Repeat 6 A B Repeat 7 Random 8 Info 9 Setup A Previous Step Skip B Search Slow Reverse C Angle D Navigation Buttons E Light F Video Off G Dimmer H Progressive Scan Interlaced I Enter J Pause K Zoom L Play M Search Slow Forward N Stop O Next Step Skip P Disc Menu Q St...

Page 10: ... be displayed in the upper right corner of the screen D M NK LNavigation Buttons Use to move the cursor in the on screen menu system E Light Press to illuminate the buttons on the remote controller F Video Off Press this button to turn off the video output for improved audio performance when playing discs Press it again to view the on screen menus It is highly recommended that you use this functio...

Page 11: ...le language or to turn subtitles off NOTE Due to the variations in how DVD discs are authored the subtitle languages displayed by the DVD 27 may not accurately reflect the actual lan guages available on the disc It is recommended that subtitles be selected using the disc s menu U Power Off Turns off the player to Standby mode V IR Emitter This small clear button like device sends the IR commands f...

Page 12: ... video signals for connection to display monitors with component video inputs For standard analog TVs or projectors with inputs marked Y Pr Pb or Y Cr Cb connect these outputs to the correspon ding inputs If you have a high definition television or projector that is compatible with high scan rate progressive video 480p or better connect these jacks to the HD component inputs If you are using a pro...

Page 13: ...n the video display marked HD Component if avail able Also make sure to configure the display s input settings for use with 480P video signals You will also need to change the scan type in the DVD 27 s Video Setup menu from Interlaced to Progressive See page 20 Modern audio video receivers are capable of con nection to several video source devices such as the DVD 27 and a VCR cable television set ...

Page 14: ...nal and routing it to the TV Connect the Component Composite or S Video output of the DVD 27 to the correct video input on your receiver and the video outputs of the receiver to your TV For more details see the manual for your audio video receiver Connecting to a Receiver When using the DVD 27 with an audio video receiver or processor connect it as follows First make one of the video connections S...

Page 15: ...the remote control unit and install new batteries If leakage should come into contact with your skin immediately wash it off thoroughly with water Batteries contain chemical substances and we rec ommend that you dispose of them properly and in compliance with any local regulations Remote Control Operation Range Point the remote control unit from no more than about 20 feet from the remote control s...

Page 16: ...it up to 96kHz 24 bit If you have a Dolby Pro Logic Surround decoder connected to the DVD 27 s analog audio out con nectors thanks to the Downmix function of the DVD 27 you will obtain the full benefit of Pro Logic from the same DVD movies that provide full 5 1 channel Dolby Digital soundtracks as well as from titles encoded with Dolby Surround The DVD 27 is designed to digitally output 96kHz PCM ...

Page 17: ...e picture settings On the Player Information Menu the Available Submenus Are The PLAYBACK INFO menu identified by an i icon includes the disc type and name if avail able on the disc and contains settings to control the playback mode The PROGRAM menu identified by an icon showing musical notes is used to program a playlist which lets you play back selected CD tracks in the order you choose Playlist...

Page 18: ... T as described on page 27 If you have selected a subtitle language and subtitles do not appear on screen press the Subtitle Button T to display the Subtitle banner Each press of the Enter Button s will cycle through the subtitle lan guages available on the disc If subtitles still do not appear press the Disc Menu Button z to make sure that subtitling has been selected in the disc s menu system NO...

Page 19: ... different camera angle Normally the angle icon will be displayed on screen during those scenes to inform you that you may press the Angle Button m to change to a different view If you would find the appearance of the icon on screen distracting select the Show Angle Icon setting in the System submenu and set it to OFF The Angle Indicator I will appear in the front panel display whenever multiple a...

Page 20: ...reen movies so that they fill the entire screen in the proper aspect ratio Note how ever that in this setting a disc recorded in the 4 3 aspect ratio will appear in the widescreen as a boxed image in the center with black columns on the left and right side of the screen Note that if the widescreen option is chosen and a widescreen movie is played on a conventional 4 3 aspect ratio set the image wi...

Page 21: ...nce in making picture adjustments To adjust the Brightness setting use the Navigation Buttons n until the area between the and signs is highlighted then use the Navigation Buttons n to increase or decrease the setting When adjusting the Black Level setting only two adjustments are available either the complete bar will appear which provides a full 0 to 100 black level setting or full which complie...

Page 22: ...t the same look as the surround ings in your room That way the eye is relaxed when watching the TV picture This contrast setting may be reduced when the surrounding light is dimmed thereby usually improving the sharpness of a video significantly 4 The gray scale in the middle line needs to have the same clear difference between each bar as before the contrast adjustment If not go back to Brightnes...

Page 23: ...in the Main Information Display B Any time a control button is pressed an icon will appear in the upper right corner of the screen to indicate the player s action These icons include the standard transport modes play stop pause forward and reverse fast and slow search track skip the open close disc drawer symbol the repeat and ran dom modes and the prohibit icon Ø if the command action is not avai...

Page 24: ...erse is not available When a camera icon shows on the screen or the Angle Indicator I appears this is your indication that there is multiple angle information on the disc being played To change the angle press the Angle Button C repeatedly until the desired angle view appears An on screen banner message will appear to indicate the angle view in use To illuminate the buttons on the remote control s...

Page 25: ...a button and the player displays the Feature Prohibited icon this is an indication that the disc has not been programmed for that feature In addition it is common for the producers of DVD discs to block the use of certain functions during only some parts of a disc For example many discs prohibit the use of fast play buttons or prohibit access to the Chapter Menu display during the playback of copy...

Page 26: ...ion that was applied to the video signal when the disc was created Thus as shown in Figure 12 when the disc is stopped or paused this line will remain blank When you have finished viewing the Player menus press the Info Button i to remove the displays from the screen and return to normal play Using the On Screen Status Display When a DVD is playing you may press the Status Button at any time to vi...

Page 27: ...ert you to the presence of multiple angles by showing a camera icon or other indication but in any case where multiple angle material is available the Angle Indicator I will light in the front panel Information Display and the Multiple Angle Icon will appear on screen if it has been turned on in the System Settings menu When multiple angle views are available as shown by any of the available icons...

Page 28: ... s will toggle between the elapsed and remaining settings The time displayed to the right and in the front panel Information Display will change accordingly The Time Search function enables you to start play back at any point in the program Use the Navigation Buttons n to highlight the time display Press the Numeric Keys R followed by the Enter Button s to select a new point in the track from whic...

Page 29: ...t corner of the screen followed by A to indicate the begin ning of the passage to be repeated 2 Press the A B Repeat Button 6 again to choose the end point Repeat A B has been set and the A B section will be played continuously 3 Press the A B Repeat Button 6 on the remote again to cancel Repeat A B mode Random Play The Random Play function will play all of the tracks on a CD in a random order as ...

Page 30: ... tracks on the disc and their names and to select them comfortably use the on screen display rather than the front panel display The front panel display will only show the num ber and the elapsed time of the track being played for WMA files The supported bit rate for WMA files is between 64k bits and 320k bits The supported bit rate for MP3 files is between 32k bits and 320k bits To select a folde...

Page 31: ... light in the Main Information Display The disc will immediately begin display ing the images on the disc in order When viewing JPEG images the Angle Button m may be used to rotate the image With the image on screen press the Angle Button m once to display the current orientation of the image usually 0 Press the Angle Button m again within one second to rotate the image clockwise 90 degrees The ne...

Page 32: ...verse Search functions are all avail able depending on how the disc was encoded However the Status Banner is not available for these types of VCDs Using the Status Bar for VCD Playback When playing VCD discs it is possible to access the disc s features using the Status Bar Press the Status Button Q to see the Status Bar Note however that when PBC is on some features may not be available with that ...

Page 33: ... press the Navigation Button D to move to step P02 5 Continue entering the disc track numbers into the desired program step positions Note that you need not do so in step order you may use the Navigation Buttons D to navigate to any step in the list 6 Although you may enter fewer programmed steps in your list than the number of tracks on the disc you may not repeat tracks within the list However w...

Page 34: ...ack on DVD discs during fast or slow modes Surround receiver not compatible Use analog audio outputs with 96kHz PCM audio Picture is distorted or jumps during MPEG 2 decoding It is a normal artifact of DVD playback for pictures to jump or show fast forward or reverse play some distortion during rapid play Some remote buttons do not operate Function not permitted at this time With most discs some f...

Page 35: ...5mm Weight 6 lb 2 7kg Shipping Dimensions H x W x D 5 x 14 3 8 x 20 127mm x 365mmx 508mm Shipping Weight 8 8 lb 4kg Depth measurement includes knobs and connectors Height measurement includes feet and chassis All specifications subject to change without notice Harman Kardon Harman International and Power for the Digital Revolution are registered trademarks of Harman International Industries Incorp...

Page 36: ...250 Crossways Park Drive Woodbury New York 11797 www harmankardon com 2006 Harman International Industries Incorporated All rights reserved Part No CQX1A1048Z ...

Reviews: