Printed in USA
4359 1/16
For additional safety, maintenance and warranty information see www.harken.com/
manuals or the Harken
®
catalog.
Maintenance
Warranty
Inspect
Frequently inspect line for deterioriation and replace as necessary. Check block for signs of
wear .
Traveler Cars:
Clean by frequently flushing with fresh water.
Periodically clean car by squirting a detergent/water solution into
center openings then flush with fresh water.
Apply one to two drops of McLube
®
OneDrop
™
to contact
surfaces of track. Slide car back and forth through OneDrop
™
several times to distribute. Too much oil attracts dirt.
Track:
Clean with detergent and water.
Important! Exposure to some teak cleaners and other caus-
tic solutions can result in discoloration of part and is not
covered under the Harken warranty.
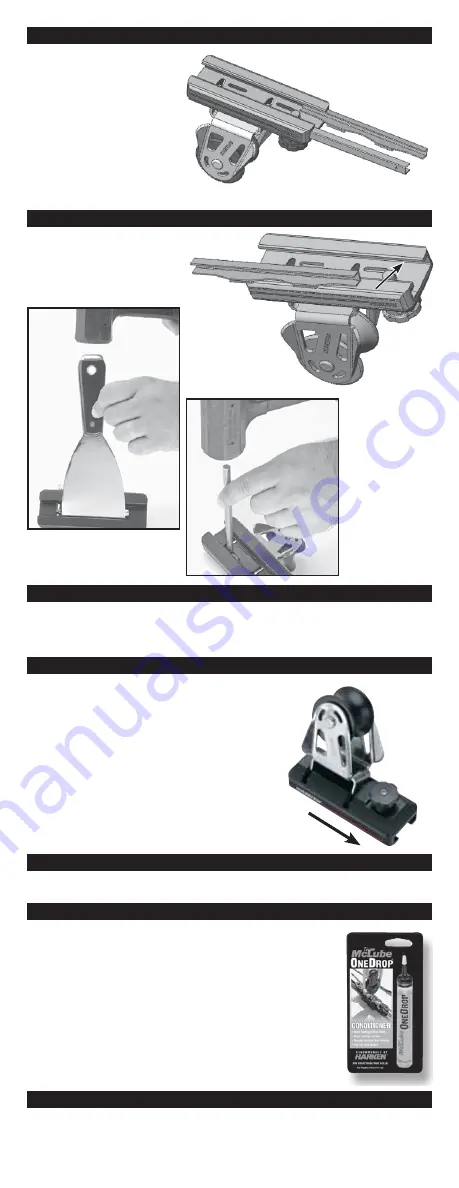
Start by slipping slider on
side overhangs of “T” part
of track. Slider should fit
easily without too much
play. To further check fit,
slip inserts length-wise
into one end of car about
1" (25mm) until tabs stop
them. Slide car with par-
tially inserted inserts onto
end of track.
Check Slider
Once slider is chosen, insert
it into interior channels in a
sideways direction as far as
you can.
To remove sliders for replacement, use a screwdriver to pry tops down to
dislodge bosses. Use a small screwdriver and small hammer to tap sliders out.
Check chart for replacement part number.
Remove Sliders for Replacememt
Slide the car onto track so pinstop knob is
forward.
Lift knob and adjust position, using various
pinstop holes as required.
Tip: As a starting point, position car so that
sheet points at center of sail luff. While
under sail closehauled, check telltales and
work towards having all lifting slightly with
outside telltales flowing straight.
Forward
Install Car
Use a thin flat device
like a putty knife
and use a small
hammer to lightly
tap slider into car
as far as it will go.
Once slider is
in channel, use
a rod or screw-
driver and tap
the bosses into
the recess on
underside of car.
Install Slider


