background image

Operation

This metal detector distinguishes between ferrous and non-ferrous metals.  Ferrous metals contain iron.
Non-ferrous metals do not (examples:  gold, silver, copper, platinum, aluminum, lead, and zinc).
When the Metal Detector senses a metallic object, the meter reading changes and the detector might
sound a tone.  The reaction depends on what metal is detected.

Turning On The Metal Detector:

1.  Set the 

BATT TEST

 to 

OPERATE.

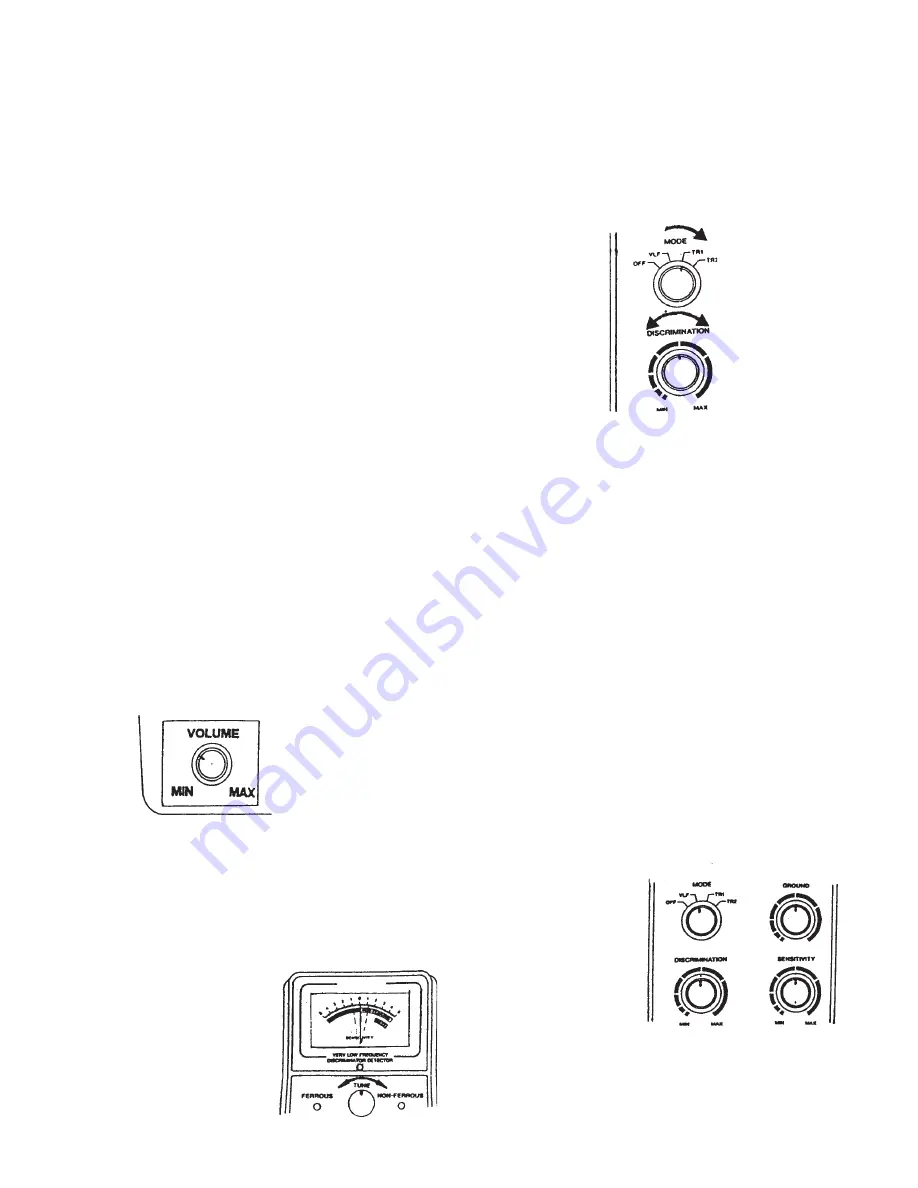
2.  Hold the detector comfortably, then as shown in Figure 13,
rotate 

MODE

 to the desired position.

 Set it to 

VLF

 to test the

battery power and adjust 

TUNE

 and 

GROUND

(see directions below and on page 8 ).

Set it to 

TR1

 to detect extreme differences in metals, such

as between gold and iron.  The difference shows on the meter (iron as a ferrous metal, gold as a
non-ferrous metal).

Set it to 

TR2

 to detect finer distincions between metals.  For example, between aluminum and

gold.

Tuning the Metal Detector:

TUNE

 fine tunes the balance between the metal detector’s receiver and the transmitter circuitry, to

provide consistent pointer and tone indications.

To set the 

TUNE

, please do the following and see Figure 14 and 15:

1.  Rotate 

VOLUME

 to the 10 o’clock position.

2.  Set 

MODE

 to 

VLF.

3.  Set 

GROUND

DISCRIMINATION

, and 

SENSITIVITY 

to mid-

range.

4.  Hold the search coil at least 1 foot away from the ground and any
metal object.  Hold down the red button on the handle and slowly
rotate 

TUNE

 until the viewmeter pointer rests at or near 0 (see Figure 16).

Figure 13

Figure 14

Figure 15

Figure 16

#43149                                                                                                                                              Page 6

Summary of Contents for 43149

Page 1: ...CA 93011 Copyright 2000 by Harbor Freight Tools All rights reserved No portion of this manual or any artwork contained herein may be reproduced in any shape or form without the express written consent of Harbor Freight Tools For technical questions and replacement parts please call 1 800 444 3353 ...

Page 2: ...e this product in areas where there might be underground electric lines or pipes buried at shallow depths Never search in military zones where bombs or other explosives may be buried Avoid striking any line known or suspected to be carrying electric power Do not search any pipeline particularly if it could contain a flammable gas or liquid In areas of uncertain conditions use reasonable caution be...

Page 3: ...le with pacemakers should consult their physician s before using this product Electromagnetic fields in close proximity to a heart pacemaker could cause interference to or failure of the pacemaker Warning The warnings cautions and instructions discussed in this instruction manual cannot coverall possible condi tionsandsituationsthatmayoccur Itmustbeunderstoodbytheoperatorthatcommonsenseandcautiona...

Page 4: ...wobbling 8 To insert the arm support see Figure 5 loosen the knob at the base of the handle Insert the arm support and tighten the knob to hold the arm support in place Figure 3 Figure 4 Figure 5 To Install Batteries The Metal Detector is powered by a quantity of three 9 Volt batteries Battery installation is described below 1 If the Metal Detector is on turn MODE to OFF see Figure 6 2 Press the r...

Page 5: ...igure 9 If the pointer on the viewmeter is within the BATT scale s green area the batteries have enough power If the pointer is not within the green area the batteries need to be replaced see Figure 10 Figure 9 Figure 10 To Adjust the Meter Set MODE to OFF Using a screwdriver adjust the alignment control until the pointer lines up with O on the scale see Figure 11 Figure 11 Using Earphones Stereo ...

Page 6: ... differences in metals such as between gold and iron The difference shows on the meter iron as a ferrous metal gold as a non ferrous metal Set it to TR2 to detect finer distincions between metals For example between aluminum and gold Tuning the Metal Detector TUNE fine tunes the balance between the metal detector s receiver and the transmitter circuitry to provide consistent pointer and tone indic...

Page 7: ...detects the material the NON FERROUS and FERROUS indicators flash and the pointer moves to FERROUS or NON FERROUS while the detector determines the type of metal it is detecting If it detects non ferrous metal it also sounds a tone 4 If the Metal Detector does not detect the material check the battery power and verify that the search coil is properly connected Also you might need to fine tune the ...

Page 8: ...TY until the noise stops Adjusting GROUND For accurate operation it is critical that you take the time to correctly set GROUND GROUND tunes out false signals from mineralized soil To set GROUND 1 Met MODE to VLF and lower the search coil to 1 2 to 2 inches above the ground 2 If the pointer swings to the right turn GROUND to the left If the pointer swings to the left turn GROUND to the right 3 Lift...

Page 9: ...ze of the object To accurately pinpoint a target 1 Once the detector detects a target that is buried continue to sweep the search coil over the target in a narrowing side to side motion 2 Stop the search coil directly over the spot on the ground Then move the search coil straight forward away from you and straight back towards you Make a mental note of the exact spot on the surface where the detec...

Page 10: ... 43149 Page 10 ...

Page 11: ... 43149 Page 11 ...

Page 12: ...O REPLACE ANY PARTS OF THE PRODUCT IN FACT THE MANUFACTURER AND OR DISTRIBUTOR EXPRESSLY STATES THAT ALL REPAIRS AND PARTS REPLACEMENTS SHOULD BE UNDERTAKEN BY CERTIFIED AND LICENSED TECHNICIANS AND NOT BY THE BUYER THE BUYER ASSUMES ALL RISK AND LIABILITY ARISING OUT OF HIS OR HER REPAIRS TO THE ORIGINAL PRODUCT OR REPLACEMENT PARTS THERETO OR ARISING OUT OF HIS OR HER INSTALLATION OF REPLACE MEN...

Page 13: ... 43149 Page 13 ...

Page 14: ... 43149 Page 14 ...

Page 15: ... 43149 Page 15 ...

Page 16: ... 43149 Page 16 Parts Diagram Caution Service and maintenance should only be performed by a qualified technician ...

Page 17: ... 43149 Page 17 Wiring Diagram continued on next page ...

Page 18: ... 43149 Page 18 Wiring Diagram continued from prior page ...

Reviews: