background image

1

Lowes.com/harborbreeze

Questions, problems, missing parts?

 Before returning to your retailer, call our customer 

service department at 1-800-643-0067, 8 a.m. - 6 p.m., EST, Monday - Thursday, 8 a.m. - 5 p.m., 

EST, Friday.

ATTACH YOUR RECEIPT HERE

Serial Number _________________________     Purchase Date _________________________

Harbor Breeze® is a registered trademark  

of LF, LLC. All Rights Reserved.

EB14695

ITEM #0651842

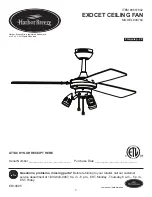
EXOCET CEILING FAN 

MODEL #40764

H

arbor Breez

e

H

arbor Breez

e

Français p. 20

Summary of Contents for EXOCET 40764

Page 1: ...643 0067 8 a m 6 p m EST Monday Thursday 8 a m 5 p m EST Friday ATTACH YOUR RECEIPT HERE Serial Number _________________________ Purchase Date _________________________ Harbor Breeze is a registered t...

Page 2: ...Hardware Contents 4 Safety Information 5 Preparation 6 Initial Installation 7 Secondary Hanging System 11 Wiring 12 Final Installation 13 Operating Instructions 16 Care and Maintenance 17 Troubleshoot...

Page 3: ...r Assembly 1 H Fitter Plate preassembled to Motor Assembly G 1 I Yoke Cover 1 J Light Kit 1 K Shade Cover 3 L Halogen Bulb 3 M Blade Arm 3 N Blade 3 O Motor Screw preassembled to Motor Assembly G 6 1...

Page 4: ...ra Blade Screw Qty 9 1 extra Blade Washer Qty 9 1 extra Blade Screw Cap Qty 9 1 extra Pull Chain Extension Qty 2 Secondary Support Screw Qty 1 Support Washer Qty 1 Secondary Spring Washer Qty 1 FF GG...

Page 5: ...necessary while handling fan parts with sharp edges WARNING To reduce the risk of fire electric shock or personal injury mount the fan to an oulet box marked ACCEPTABLE FOR FAN SUPPORT and use the mo...

Page 6: ...ing the assembly of this product ensure that all parts are present Compare all parts with the package contents list and hardware contents list If any part is missing or damaged do not attempt to assem...

Page 7: ...ncluded Angle Mounting is best suited for angled or vaulted ceilings A longer downrod is sometimes necessary to ensure proper blade clearance Important If using the angle mount check to ensure the cei...

Page 8: ...angle mount ensure the open end of the mounting bracket D is installed facing the higher point of the ceiling 5 Remove the downrod clip C and downrod pin B from the downrod A Then partially loosen the...

Page 9: ...sted you do so in the following manner Take the lead wires and make sure you have pulled them all the way through the top of the downrod Measure 8 inches of lead wire then cut the excess wire off with...

Page 10: ...he mounting bracket D Align a slot in the ball with the tab in the mounting bracket D Important The downrod A should not rotate if installed correctly DANGER Failure to align a slot in the ball with t...

Page 11: ...oop of the braided cable around the secondary support screw FF Note The ceiling support brace may not be accessible from below If not it must be accessed from above Important The braided cable must ma...

Page 12: ...m the fan to the Black hot supply wire Secure all wiring connections together with wire connectors AA Note If a second hot power wire is available from outlet box connect it to the blue light power wi...

Page 13: ...of the canopy screw Q preassembled to the mounting bracket D Twist the canopy E clockwise to lock Replace the canopy screw Q in the round hole in the bottom of the canopy E and tighten 2 Slide the key...

Page 14: ...top of the motor assembly G Align the two holes in the blade arm M with two motor screw holes in the top of the motor assembly G Secure the blade arm M to motor assembly G using two motor screws O Co...

Page 15: ...ulbs L and lightkit J to cool before you replace the bulbs L 7 Snap the end of the pull chain extensions EE onto the ends of the appropriate pull chains The pull chain extending from the center of the...

Page 16: ...ermostat setting in winter without feeling a difference in your comfort Note Wait for the fan to stop before moving the reverse switch 2a In warmer weather push the reverse switch left to display a Su...

Page 17: ...loose 2 The blades are unbalanced 3 The fan mounting is not secure 4 The fan is too close to vaulted ceiling 5 Set screw on the yoke of the motor housing is loose 1 Check and tighten all screws that...

Page 18: ...by this warranty The manufacturer assumes no responsibility whatsoever for fan installation during the limited lifetime warranty Any service performed by an unauthorized person will render the warrant...

Page 19: ...parts call the customer service department at 1 800 643 0067 8 a m 6 p m EST Monday Thursday 8 a m 5 p m EST Friday PART DESCRIPTION PART A Downrod 0651842 A D Mounting Bracket 0651842 D E Canopy 065...

Reviews: