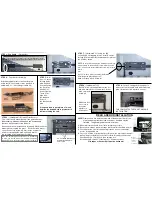
STEP 8
– [
Hardware Kit D
]
Drill 3/8” dia. Hole through frame brace foot ,
bed, and frame/bed cross member 3 inches
back from bed
front wall.
Make sure drill
is as close to
vertical as
possible in
all directions.
STEP 7
– [
Hardware Kit J
] Using the #10
self drilling & self tapping screws, install 2 screws
through bed front wall into the black anchor plate at
the locations shown.
NOTE:
A small pilot hole may be drilled but is normally
not necessary as this particular screw will drill it's own
pilot. Use a punch to start either the screw or pilot bit to
avoid
drift.
Set 1-3/4" each side of a center line drawn
from the guide plate & approx. 1"
back from bend in bed front wall.
.
.
.
.
Mounting Holes
A
B
A
B
A
B
A
B
#10 Sheet Metal Screw
(4 Places)
Front A
nchor
Plate
Backing
Plate
Short
Flange
STEP 3 - Continued
(Illustrations)
STEP 6
– [
Hardware Kit B
] Install Front Anchors.
This is most easily accomplished if one person pushes
the bracket up between the bed and cab from beneath
the truck, while another starts the bolts.
Remove board from between bed & cab and slide black front
anchor plate assembly into place. Reset the frame braces
on each end of the assembly. Start but do not tighten
all 4 bolts through guide plate and frame braces.
into threaded holes in black anchor plate.
Hint: The bolts will start easier if prior to installation
on truck, you run the bolts or a 3/8-24 tap through the
threaded holes in the anchor plate to clear out paint.
Cab
Anchor
Plate
x
STEP 9
– Insert 5” carriage bolt through hole
and secure from beneath truck with reinforcing
plate, flat washer, lock washer & hex nut.
THIS COMPLETES THE FRONT ANCHOR
INSTALLATION.
Bed cross
member
Grounding strap
REAR ANCHOR INSTALLATION
NOTE:
Rear anchors are installed in the end of the bumper. There is no
precise mounting location since a variety of bumpers may be
installed. The general guidelines are as follows:
1.
Mounting location should be as flat & vertical as possible.
2.
Be sure no moldings or bumper caps interfere with removable coupler.
3.
Check back side of selected mounting location to ensure adequate
access for tightening nut.
4.
Choose a location as far back as possible from the front edge of bumper
while giving consideration to the other criteria listed above and center
punch and drill a
1
/
8
” pilot hole, then enlarge to
1
/
2
”.
Install Anchor Bolt with 2” fender washer, lock washer & nut.
Flat edges of Anchor Bolt must be horizontal.
Remove
coupler
when not
in use to
prevent loss.
Flats Horizontal
Place well back
From front edge
Of bumper
STEP 4
– Front Anchor Assembly
Attach backing bracket to front anchor plate
using the1/4" sheet metal screws provided in
hardware Kit J. (Short flange toward tip)
Remove the frame braces from the ends of the assembly and using the
sheet metal screws provided, secure the assembly to the front wall of the
Truck bed.
Remove frame braces
STEP 5
– Drill
four
7
/
16
" holes
through guide
plate and bed
front wall using
the four large
round holes
as a drill guide.
These holes
align with
the threaded
holes in
the black anchor
plate.
It is a good idea to put a piece of wood
between the bed and cab to prevent drill
bit from striking the cab.
7/16”
3/8” fine thread bolts through
bed front wall into black
anchor plate
.
.


