

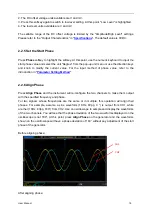
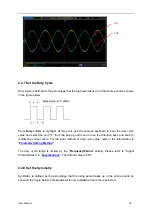


User Manual 22
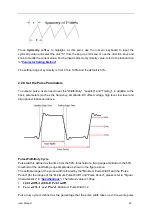
5mV
DC
DC offset, 200ns pulse width, 75ns leading (rising) edge time and 100ns trailing (falling)
edge time.
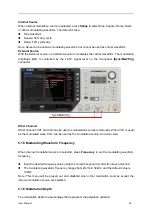
1. Press
CH1/CH2
at the front panel and select CH1. The corresponding area of CH1 in the user
interface is illuminated.
2. Press
Pulse
at the front panel and the backlight turns on, indicating that Pulse waveform is
selected.
3. Press
Frequency/Period
to highlight "Frequency". Use the numeric keyboard to input the
frequency value "1.5" and select the unit "MHz" from the pop-up menu.
4. Press
Amplitude/HiLevel
to highlight "Amplitude". Use the numeric keyboard to input the
amplitude value "500" and select the unit "mV" from the pop-up menu.
5. Press
Offset/LoLevel
to highlight "Offset". Use the numeric keyboard to input the offset value
"5" and select the unit "mV" from the pop-up menu.
6. Press
Width/Duty
to highlight "Width". Use the numeric keyboard to input "200" and select
the unit "ns" from the pop-up menu. At this point, the pulse duty cycle changes accordingly.
7. Press
Leading/Trailing
to highlight
“Leading”. Use the numeric keyboard to input "75" and
select the unit "ns" from the pop-up menu.
8. Press
Leading/Trailing
to highlight
“Trailing”. Use the numeric keyboard to input "100" and
select the unit "ns" from the pop-up menu.
9. Press
1Output
at the front panel to turn the CH1 output on. At this point, the instrument
outputs the specified waveform from CH1 according to the current configuration. Connect the
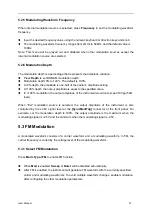
output terminal of CH1 to the oscilloscope and the waveform is as shown in the figure below.


