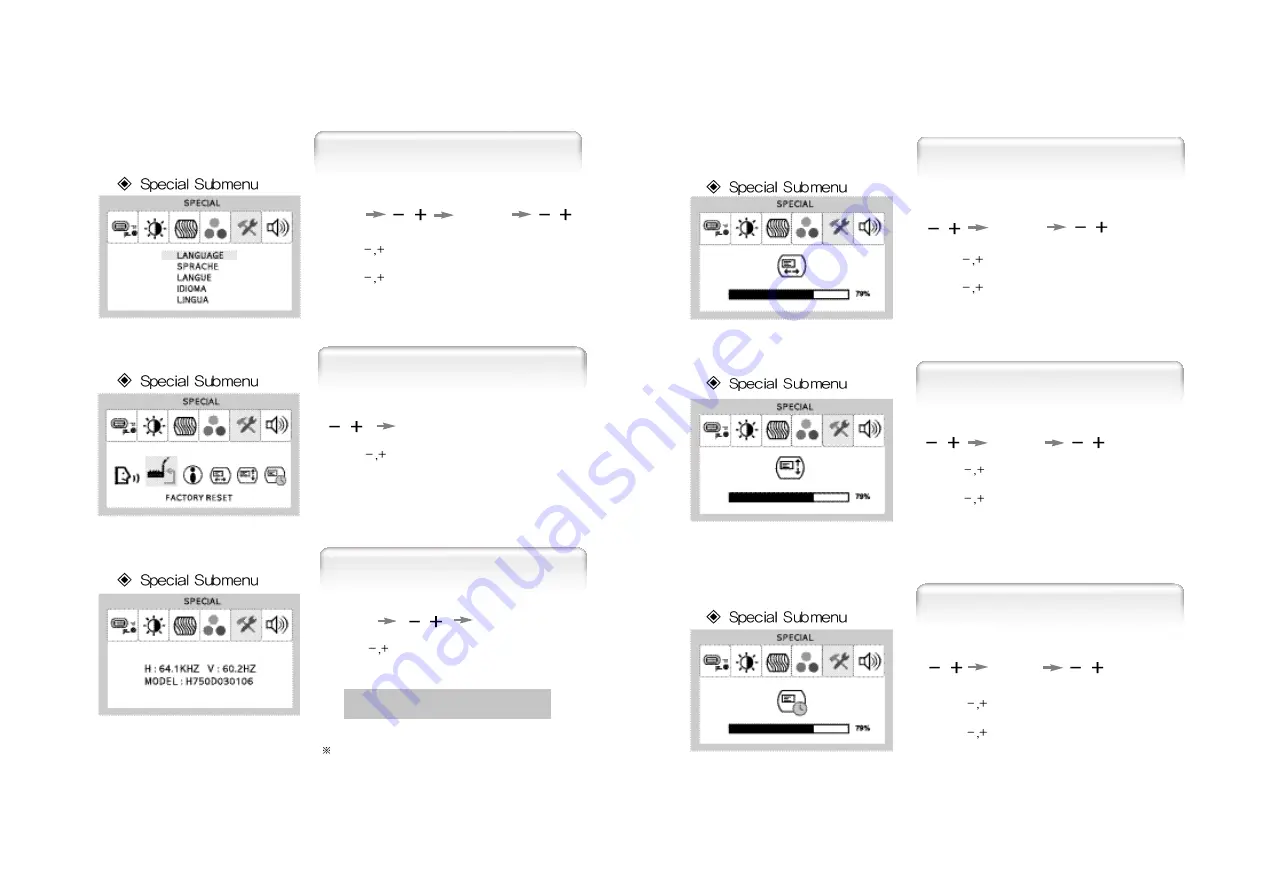
Hansol H750D Manual Download Page 9

English - 17

16 - English

1. Use 

to move Language ICON.

2. Press SELECT button to select it.
3. Use 

to select language.

MENU

SELECT

Language

1. Use 

to move OSD V-Position ICON.

2. Press SELECT button to select it.
3. Use 

to adjust OSD upward or downward.

SELECT

OSD V-Position

1. Use 

to move OSD H-Position ICON.

2. Press SELECT button to select it.
3. Use 

to adjust OSD left or right.

SELECT

OSD H-Position

1. Use 

to move OSD Time ICON.

2. Press SELECT button to select it.
3. Use 

to adjust OSD display time.

OSD Time

SELECT

1. Use 

to move the Information ICON.

2. Press SELECT button to select it.

MENU

Auto-Config

Information

1. Use 

to move the Factory Reset ICON.

2. Press SELECT button to return to default setting.

Auto-Config

Factory Reset

SELECT

SELECT

You can know display information

Accoding to the characteristic of video card, 

display information can be incorrect

Summary of Contents for H750D

Page 1: ...er there is no guarantee that interference will not occur in a particular installation if this equipment does cause harmful interference to radio or television reception which can be determined by det...

Page 2: ...ure about 50cm Look down the monitor below the horizon Relax shoulders and arms and sit back on the chair Adjust the monitor to prevent reflection Adjust the monitor stand to acquire required angle Ke...

Page 3: ...the table on the rear side of the optional Macintosh adapter and adjust DIP switch by the resolution The range of control Angle Power source connection Signal cable connection Basic Connection How to...

Page 4: ...Floppy Diskette driver 2 Double click Install exe 3 Select the model and click OK button 4 Select inf file and then click OK button 5 Click Exit button to close the installation Automatic Installatio...

Page 5: ...ou can switch display to the previous menu and exit menu SELECT AUTO Press this button when OSD is not displayed to perform automatic setting When OSD is displayed You can select icons POWER Power but...

Page 6: ...confirms to the world standard Display Power Manager Signalling DPMS mode of Video Electronics Standard Association VESA The power management feature requires that the video card of the computer shoul...

Page 7: ...ve V Position ICON 2 Press SELECT button to select it 3 Use to adjust display upward or downward SELECT Vertical Position According to the characteristic of video card control range can be changed Bri...

Page 8: ...MENU MENU SELECT Preset Color 1 Press MENU button to access main menu 2 Use to move Specal ICON 3 Press SELECT button into the submenu MENU SELECT Special 1 Press to move Clock Phase ICON 2 Use SELEC...

Page 9: ...select it 3 Use to adjust OSD left or right SELECT OSD H Position 1 Use to move OSD Time ICON 2 Press SELECT button to select it 3 Use to adjust OSD display time OSD Time SELECT 1 Use to move the Info...

Page 10: ...after DVI input message 3 No signal input message will be displayed when video card output is not mated with monitor source Standard Signal Table VGA 720 X 400 VGA 640 X 480 VGA 640 X 480 SVGA 800 X...

Page 11: ...TO SELECT POWER VOL MUTE Normal 1W Ch Max 1 5W Ch Input 100 240Vac 50 60 Hz 0 6A VESA Standard Safety Standard UL CE TUV CB EMI FCC RRL Low Radiation MPR II Size and Weight 380 176 368 5 8kg LCD Panel...

Page 12: ...or Menu Color is irregular Troubleshooting Check the power connection Refer to page 4 Power LED is dark No picture Perform Auto_config Check the computer power is on OSD check cable is displayed on th...

Page 13: ...e do not connect a large number of equipments in a single line To prevent fire and electric shock pull out the plug in case of thunder and lightening To prevent fire and electric shock do not try to t...

Reviews: