background image

Operation 

Page EN-12

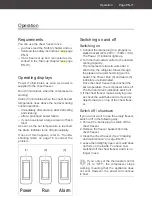
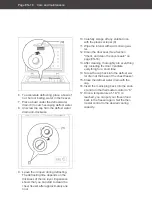
Switching on again

If the running operation has been interrupted, 
the freezer can not be restarted immediately. 
It is interrupted,
– if  you  set  the  thermostat  control  (3)  to 

“OFF”.

– if you unplug the mains plug from the sock-

et.

– in the event of a power failure.

•  Wait 4 to 5 minutes before restarting the 

chest freezer.

If the lid of your freezer does not open 
again after closing, it has formed a vac-

uum inside. Wait for 1 to 2 minutes, and then 
the lid can be easily opened again.

Thermostat control

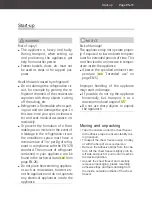
 CAUTION

Health hazard!
The appliance may not operate proper-
ly if exposed to low ambient tempera-
tures for extended periods of time. This 
can then lead to an increase in temper-
ature inside the appliance.

Observe the specifi ed ambient tem-
perature (see "Intended use" on 
page EN-5).

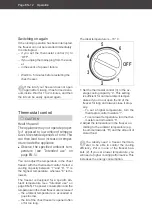
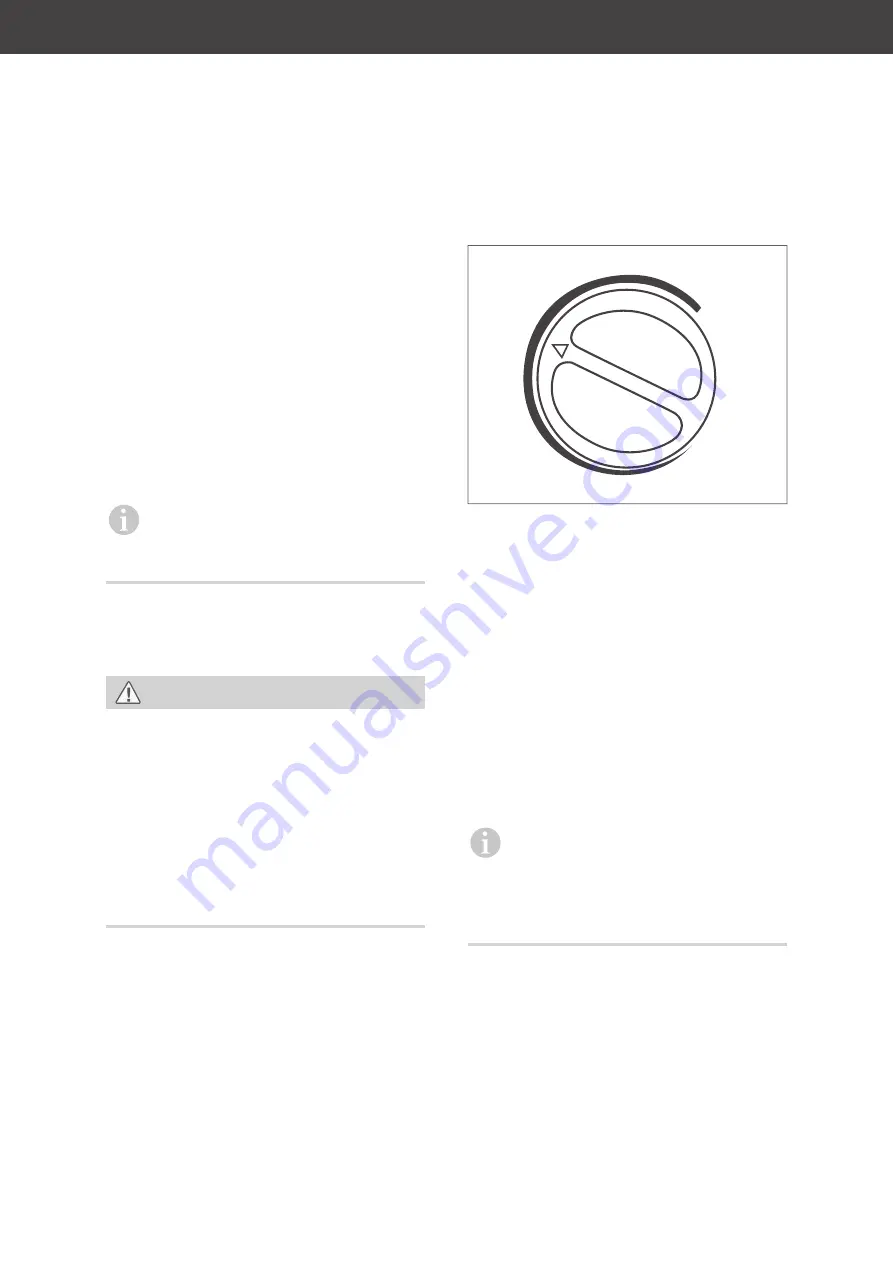
You can adjust the temperature in the chest 
freezer with the thermostat control. Select a 
cooling capacity between “1’”and “6”. “1” is 
the highest temperature, whereas “6” is the 
lowest.

The  freezer  is  designed  for  a  specific  am-
bient  temperature  (see  "Intended  use"  on 
page EN-5). The power consumption and the 
temperature in the chest freezer can increase if
– the ambient temperature is exceeded or 

goes too low, 

– the lid of the chest freezer is opened often 

or for too long.

The ideal temperature is –18 °C.

OFF

6

5

4

3

2

1

1. Set the thermostat control (3) to the av-

erage cooling capacity “4”. This setting 
is sufficient for normal ambient temper-
atures if you do not open the lid of the 
freezer for long and always close it prop-
erly. 
– To  set  a  higher  temperature,  turn  the 

thermostat control towards “1”. 

– To set a lower temperature, turn the ther-

mostat control towards “6”.

2. Adjust the temperature in the freezer ac-

cording to the ambient temperature (e.g. 
in summer towards “6”) and the amount of 
stored food.

You  ideally  need  a  freezer  thermom-
eter  to  be  able  to  control  the  cooling 

effi  ciency.  Put  it  in  one  of  the  freezer  bas-
kets (2). If you set a lower temperature, you 
will need a higher cooling performance. This 
increases the energy consumption.

Summary of Contents for HGT8595D

Page 1: ...Gefriertruhe Gebrauchsanleitung HGT8595D Anleitung Version 2001 01002_DE_20200818 Bestell Nr 70193937 Nachdruck auch auszugs weise nicht gestattet Power Run Alarm OFF 6 5 4 3 2 1...

Page 2: ...n Sie alle Sicherheitshinweise und Anweisungen an den nachfolgenden Ver wender des Produkts weiter Informationen zur Installation und Inbetriebnahme nden Sie ab Seite DE 19 Nahrungsmittel einfrieren T...

Page 3: ...DE 19 2 Entfernen Sie alle Verpackungsteile Kunststoffprofile Klebestreifen und Schaumpolster 3 Pr fen Sie ob die Lieferung vollst ndig ist 4 Kontrollieren Sie ob das Ger t Transport sch den aufweist...

Page 4: ...eile Bedienelemente 1 2 3 4 5 1 Innenraumbeleuchtung 2 Gefrierk rbe 3 Temperaturregler 4 Betriebsanzeigen 5 ALARM Leuchte 6 RUN Leuchte 7 POWER Leuchte 8 Tauwasserabfluss 9 Plastikschaber Power Run Al...

Page 5: ...us tzlich die Warn hinweise in den einzelnen Kapiteln zu Bedie nung Aufbau etc Bestimmungsm er Gebrauch Das Ger t dient zum Einlagern handels blicher Tiefk hlkost Tiefk hlen frischer zimmerwarmer Lebe...

Page 6: ...ennt wer den kann Bei der Aufstellung des Ger tes ist si cherzustellen dass die Netzanschluss leitung nicht eingeklemmt oder be sch digt wird Netzanschlussleitung nicht knicken und nicht ber scharfe K...

Page 7: ...er empfohle nen benutzen Z B keine elektrischen Heizger te Messer oder Ger te mit offener Flamme wie z B Kerzen ver wenden Die W rmed mmung und der Innenbeh lter sind kratz und hit zeemp ndlich oder k...

Page 8: ...und Gefrierschubladen nicht herausneh men T r Deckel abschrauben Risiken f r bestimmte Personengruppen VORSICHT Gefahren f r Kinder und Personen mit eingeschr nkten physischen senso rischen oder geis...

Page 9: ...rpr fen ob die eingelagerten Lebensmittel noch genie bar sind Auf oder angetaute Lebensmittel nicht wieder einfrieren sondern sofort verbrauchen Gesundheitsgefahr Das Ger t arbeitet eventuell nicht ei...

Page 10: ...n oder heben Ger t nur auf einem ebenen und festen Untergrund abstellen der das Gewicht des gef llten Ger tes tragen kann Beim Auspacken keine scharfen oder spitzen Gegenst nde verwenden Beim Auspacke...

Page 11: ...den Deckel leicht ge ffnet da mit sich im Innenraum kein Schimmel bildet Damit haben Sie die Gefriertruhe ausge schaltet und au er Betrieb genommen Wenn Sie nur den Temperaturregler 3 auf OFF stellen...

Page 12: ...s 1 ist dabei die h chste Tempe ratur 6 die niedrigste Die Gefriertruhe ist f r eine bestimmte Um gebungstemperatur ausgelegt siehe Bestim mungsm er Gebrauch auf Seite DE 5 Der Energieverbrauch und di...

Page 13: ...e T r f r eine l ngere Zeit ge ffnet wird kann es zu einem erheb lichen Temperaturanstieg in den F chern des Ger tes kommen Die Fl chen die mit Lebensmitteln und zug nglichen Ablaufsystemen in Ber hru...

Page 14: ...en Kern gefroren ber dem angegebenen maximalen Gefrierverm gen Wenn Sie ausnahmsweise mehr Ware auf einmal einfrieren wollen dauert das Einfrie ren l nger Dabei darf die frische Ware keinen Kontakt mi...

Page 15: ...ndurchl ssig nicht zu steif gut verschlie bar und zu beschriften ist Beim Einlagern fertiger Tiefk hlkost beach ten Sie die Anweisungen des Herstellers Frieren Sie auch Fertiggerichte m glichst in Por...

Page 16: ...ck Papier an verschiedenen Stellen ein Das Papier muss sich an allen Stellen gleich schwer durchziehen lassen 2 Falls die Dichtung nicht berall gleichm ig anliegt Erw rmen Sie die Dichtung an den ents...

Page 17: ...der Tiefk hlkost ein trockenes Hand tuch HINWEIS Beim Reinigen beachten Auf keinen Fall Seife scharfe k rnige soda oder l semittelhaltige oder schmirgelnden Putzmittel verwenden Empfehlenswert sind Al...

Page 18: ...sschicht ab Erfahrungsgem k nnen Sie nach ca einer Stunde mit dem Reini gen der Gefriertruhe beginnen 10 Schaben Sie vorsichtig mit dem Plastik schaber 9 festsitzende Eisschichten ab 11 Wischen Sie de...

Page 19: ...stellen und keine elektrischen Ge r te innerhalb des Ger ts betreiben HINWEIS Besch digungsgefahr Das Ger t arbeitet eventuell nicht ein wandfrei wenn es ber l ngere Zeit zu geringer Umgebungstempera...

Page 20: ...iert legen Sie eine Isolierplatte aus festem Material unter die Gefriertruhe ber Klimaklassen Halten Sie immer die vorgeschriebene Umgebungstemperatur ein siehe Bestim mungsm er Gebrauch auf Seite DE...

Page 21: ...Schraubf e hinein bzw heraus bis die Gefriertruhe senkrecht ausgerichtet ist und stellen Sie die Ge friertruhe wieder gerade hin 4 Pr fen Sie die Ausrichtung mit einer Was serwaage Beim ffnen des Dec...

Page 22: ...llung Das Ger t ben tigt 2 Stunden um das K l temittel zur Ruhe kommen zu lassen Ger t k hlt zu stark Temperaturregler steht auf einer zu hohen K hlstufe Temperaturregler herunterdrehen siehe Bedienun...

Page 23: ...gte Betriebsger usche Diese zeigen keine St rung an Rauschen K lteaggregat l uft Flie ger usche K ltemittel flie t durch die Rohre Klicken Motor schaltet ein oder aus St rende Ger usche die Sie beseit...

Page 24: ...rkehrbringen des letzten Exemplars des Modells zur Ver f gung T rdichtungen stehen f r einen Zeit raum von zehn Jahren zur Verf gung Kunden in Deutschland Wenden Sie sich bitte an unseren Technik Serv...

Page 25: ...i Austritt von K ltemittel besteht Brandgefahr Achten Sie darauf dass an einem K hlger t bis zur fachgerechten Ent sorgung keine K hlrippen oder Rohre besch digt werden Unser Beitrag zum Schutz der Oz...

Page 26: ...nung Ihres Ger ts finden Sie unter Technische Daten Technische Daten Bestellnummer 70193937 Ger tebezeichnung Gefriertruhe Modellkennung HGT8595D Ger tema e H he Breite Tiefe 850 mm 945 mm 696 mm Leer...

Page 27: ...Chest freezer User manual HGT8595D Manual version 2001 01002_EN_20200818 Article no 70193937 Reproduction even of ex cerpts is not permitted Power Run Alarm OFF 6 5 4 3 2 1...

Page 28: ...regulations specified in this user manual Keep all safety notices and instructions for future reference Pass all safety notic es and instructions on to the subsequent user of the product Information o...

Page 29: ...page EN 19 2 Remove all parts of the packaging plastic profiles tape and foam padding 3 Check that the delivery is complete 4 Check whether the appliance was dam aged during transit 5 If the delivery...

Page 30: ...arts control elements 1 2 3 4 5 1 Interior lighting 2 Freezer baskets 3 Temperature controller 4 Operating displays 5 ALARM light 6 RUN light 7 POWER light 8 Defrost water drain 9 Plastic scraper Powe...

Page 31: ...e of this appliance is to store ordinary commercially available deep frozen food to deep freeze fresh room temperature foods and to make ice cubes This refrigerator is not designed for use as a built...

Page 32: ...cord is not trapped or damaged Do not kink the supply cord or lay it over sharp edges Keep the supply cord away from na ked ames and hot surfaces Always pull on the mains plug and not the mains cable...

Page 33: ...efrig eration system must only be carried out by authorised specialists Do not damage the refrigerant cir cuit e g by puncturing the refrigerant channels of the condensate evapora tor with sharp objec...

Page 34: ...e appli ance Cleaning and user maintenance shall not be made by children without su pervision Make sure children do not have unsu pervised access to the appliance Risks associated with using freezers...

Page 35: ...t from the freezer NOTICE Risk of damage to property Improper handling of the appliance can lead to damage to property Do not store glass or metal contain ers containing water lemonade beer etc Water...

Page 36: ...cal devices or oth er means to accelerate the defrost ing process other than those recom mended by the manufacturer Do not place any objects in the fan and please also ensure that children are unable...

Page 37: ...nce on page EN 16 4 Leave the lid slightly open so mould does not form on the inside You have now switched off the chest freezer and it is no longer in use If you only set the thermostat control 3 to...

Page 38: ...and 6 1 is the highest temperature whereas 6 is the lowest The freezer is designed for a specific am bient temperature see Intended use on page EN 5 The power consumption and the temperature in the c...

Page 39: ...an come in contact with food and acces sible drainage systems If the refrigerating appliance is left empty for long periods switch off defrost clean dry and leave the door open to prevent mould develo...

Page 40: ...act with stored food cannot be avoided we recommend that you create a cold reserve in the freezer before freezing the fresh goods 2 hours beforehand set the temperature controller to maximum Preparing...

Page 41: ...As well as this it is more cost efficient to freeze several small portions than to throw away the remainder of a large portion Adhere to the recommended storage times and temperatures When storing fre...

Page 42: ...so that no air can enter the chest freezer 1 To test them clamp a thin piece of paper in various places The paper should be difficult to pull through at all points 2 If the seal is not uniform everyw...

Page 43: ...sharp granular soda or solvent based or abrasive cleaning agents All purpose cleaners with a neutral pH are recommended The surfaces can be damaged by un suitable cleaning agents Use care products onl...

Page 44: ...one hour 10 Carefully scrape off any stubborn ice with the plastic scraper 9 11 Wipe the interior with warm rinsing wa ter 12 Clean the door seal See Section Check and clean the cover seals on page EN...

Page 45: ...ot place heat emitting applianc es such as microwaves toasters etc on the appliance and do not operate any electrical appliances inside the appliance NOTICE Risk of damage The appliance may not operat...

Page 46: ...st freezer is to be installed place an insulating plate of solid material un der the chest freezer About climate categories Always ensure the prescribed ambient temperature is maintained see Intended...

Page 47: ...wist the levelling screws in or out until the chest freezer is vertically level and set the chest freezer straight back down again 4 Check the alignment with a spirit level When opening the lid the ch...

Page 48: ...he appliance requires 2 hours to allow the refrigerant to settle Appliance cools too quickly Thermostat control is set at too cold a setting Turn down the thermostat control see Operation on page EN 1...

Page 49: ...noise These are not malfunctions Humming Refrigeration unit is running Flowing noise Refrigerant is flowing through the pipes Clicking Motor switching on or off Distracting noises that you can disrega...

Page 50: ...minimum peri od of seven years after the final version of the model has been placed on the market Door seals are available for a period of ten years Customers in Germany Please contact our technical...

Page 51: ...nd insulation must be proper ly disposed of Refrigerant leakage may cause a re hazard Until the point of proper disposal en sure that none of the cooling ns or tubes on a refrigerating appliance are d...

Page 52: ...ifications Technical specifications Item number 70193937 Name of appliance Chest Freezer Model identifier HGT8595D Device measurements Height Width Depth 850 mm 945 mm 696 mm Unloaded weight 42 kg Ref...

Reviews: