background image

Operation

Page EN-13

Requirements for safe use

– You have read chapter "Safety" from page 

EN-4 and understand all the safety notices.

– The appliance is set up and connected as 

described in chapter "Start-up" from page 
EN-16.

 Setting the temperature

 WARNING

Health hazard!
The appliance may not operate proper-
ly if exposed to low ambient tempera-
tures for extended periods of time. This 
can then lead to an increase in temper-
ature inside the appliance.

Always ensure the prescribed ambi-
ent temperature is maintained (see 
"Intended use" on page EN-4).

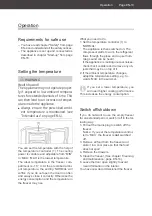
MED

MAX

MIN

(1)

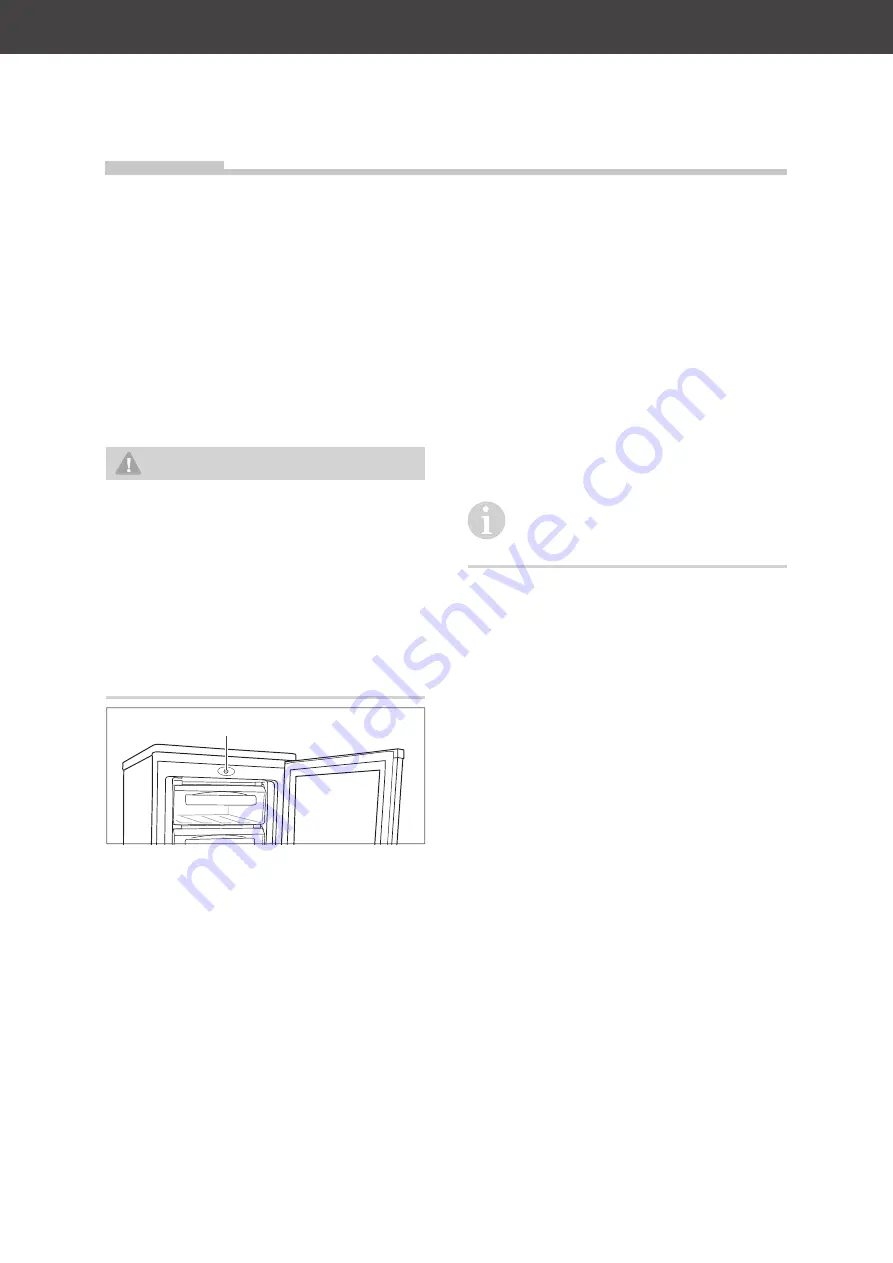
You can set the temperature with the help of 
the temperature controller (1). The cooling 
power is variable and adjustable from “MIN” 
to ‘MAX’. ‘MAX’ is the lowest temperature. 

The ideal temperature in the freezer com-
partment is –18 °C. At the prescribed ambi-
ent temperature, the setting ‘NORMAL’ will 
suffice if you do not open the door too often 
and always close it correctly. Otherwise the 
energy consumption and the temperature in 
the freezer may rise.

 Operation

What you need to do
1. Set the temperature controller (1) to 

‘NORMAL’.
The appliance is then switched on. The 
compressor starts to work, the refrigerant 
flows through the pipes and a quiet hum-
ming sound can be heard. 
If the appliance is making unusual noises, 
check that it is stable and remove any ob-
jects that may be on top of it.

2. If the ambient temperature changes, 

adapt the temperature setting, e.g. to-
wards ‘MAX’ in the summer.

If you set a lower temperature, you 
will need higher cooling performance. 

This increases the energy consumption.

Switch off/shutdown

If you do not want to use the empty freezer 
for an extended period, switch it off in the fol-
lowing way:
1. Pull out the mains plug to switch off the 

freezer. 
Notice: If you set the temperature control-
ler to ‘MAX’, the freezer is 

not

 switched 

off. 

3. Remove all food from the freezer and 

store it in a cool place so that the food 
does not spoil. 

4. Remove the drawers. 
5. Clean the freezer. (See chapter ‘Cleaning 

and maintenance’, page EN-14.)

6. Leave the door open slightly to avoid 

mould formation in the interior.

You have now decommissioned the freezer. 

Summary of Contents for 15266121

Page 1: ...Gefrierschrank Gebrauchsanleitung Anleitung Version 2001 00995_DE_20200818 Bestell Nr 5155 1544 1526 6121 Nachdruck auch auszugsweise nicht gestattet HGS8555EW HGS8555ES MED MAX MIN...

Page 2: ...17 T ranschlag wechseln DE 18 Gefrierschrank ausrichten DE 20 Grundreinigung DE 20 Ger t elektrisch anschlie en DE 20 Fehlersuchtabelle DE 22 Service DE 23 Beratung Reklamation und Bestellung DE 23 R...

Page 3: ...aufweist 5 Sollte die Lieferung unvollst ndig sein oder das Ger t einen Transportschaden aufweisen nehmen Sie bitte Kontakt mit unserem Service auf siehe Seite DE 23 WARNUNG Stromschlaggefahr Nie ein...

Page 4: ...et eine Gef hr dung mit einem mittleren Risikograd die wenn sie nicht vermieden wird den Tod oder eine schwere Verletzung zur Folge haben kann VORSICHT Dieser Signalbegriff bezeichnet eine Gef hr dung...

Page 5: ...ennt wer den kann Bei der Aufstellung des Ger tes ist si cherzustellen dass die Netzanschluss leitung nicht eingeklemmt oder be sch digt wird Netzanschlussleitung nicht knicken und nicht ber scharfe K...

Page 6: ...er empfohle nen benutzen Z B keine elektrischen Heizger te Messer oder Ger te mit offener Flamme wie z B Kerzen ver wenden Die W rmed mmung und der Innenbeh lter sind kratz und hit zeemp ndlich oder k...

Page 7: ...Mund zu stecken Bei der Entsorgung des Ger tes da rauf achten dass Kinder nicht im Ge r t ersticken k nnen z B K hl und Gefrierschubladen nicht herausneh men T r Deckel abschrauben Risiken f r bestimm...

Page 8: ...n Sie dem Typschild des Ger ts Bei l ngerem Stromausfall oder einer St rung am Ger t das eingelagerte Gefriergut aus dem Ger t nehmen und in einem ausreichend k hlen Raum oder einem anderen K hlger t...

Page 9: ...den Kompressor zur ck Unsachgem er Umgang mit dem Ge r t kann zu Sachsch den f hren Ger t nicht an den T ren oder T r griffen ziehen oder heben Ger t nur auf einem ebenen und festen Untergrund abstell...

Page 10: ...kann es zu einem erheb lichen Temperaturanstieg in den F chern des Ger tes kommen Die Fl chen die mit Lebensmitteln und zug nglichen Ablaufsystemen in Ber hrung kommen k nnen regel m ig reinigen Wenn...

Page 11: ...oren ber dem angegebenen maximalen Gefrierverm gen Wenn Sie ausnahmsweise mehr Ware auf einmal einfrieren wollen dauert das Einfrie ren l nger Dabei darf die frische Ware keinen Kontakt mit dem bereit...

Page 12: ...ndurchl ssig nicht zu steif gut verschlie bar und zu beschriften ist Beim Einlagern fertiger Tiefk hlkost beach ten Sie die Anweisungen des Herstellers Frieren Sie auch Fertiggerichte m glichst in Por...

Page 13: ...chrank ansteigen Bedienung So geht s 1 Stellen Sie den Temperatur Regler 1 auf NORMAL Das Ger t ist damit eingeschaltet Der Kompressor beginnt zu arbeiten das K l temittel str mt durch die Rohre und S...

Page 14: ...teteile aus Kunststoff sind emp ndlich gegen l und Fett Verunreinigungen m g lichst schnell entfernen Nur weiche T cher verwenden T rdichtungen kontrollieren und reinigen Die T rdichtungen m ssen rege...

Page 15: ...r dem Reinigen den Temperatur Regler 1 auf MAX Das Gefriergut erh lt so eine K ltereserve und taut nicht so schnell auf Abtauen 1 Stellen Sie den Temperatur Regler 1 auf MIN 2 Ziehen Sie den Netzsteck...

Page 16: ...er t m glichst nicht in die Horizontale kippen Zum Auspacken keine scharfen oder spitzen Gegenst nde verwenden 1 Transportieren Sie das Ger t mithilfe einer Transportkarre oder einer zweiten Person 2...

Page 17: ...ten 2 cm zu Wasch Geschirrsp lmaschinen2 cm M chten Sie diese Abst nde verringern k nnen Sie eine Isolierplatte zwischen den Ger ten anbringen ber Klimaklassen Halten Sie immer die vorgeschriebene Um...

Page 18: ...raubabdeckun gen auf der Oberseite der Abdeckung mit einem Schraubendreher 3 Drehen Sie die zwei Schrauben links und rechts aus der Oberseite der Abdeckung heraus Verwenden Sie daf r einen Kreuz schli...

Page 19: ...nach hin ten maximal 45 damit Sie auch das untere T rscharnier umsetzen k nnen 10 Schrauben Sie die beiden vorderen Stell f e heraus 11 Schrauben Sie die untere Schar nierplatte ab Verwenden Sie daf r...

Page 20: ...den Geruch zu entfernen der allen neu en Ger ten anhaftet reinigen Sie das Ger t bevor Sie es benutzen siehe Gefrierschrank abtauen und reinigen auf Seite DE 14 Ger t elektrisch anschlie en WARNUNG St...

Page 21: ...oder eine Mehrfach steckdose ist unzul ssig HINWEIS Besch digungsgefahr Wenn das Gefrierger t liegend trans portiert wurde kann Schmiermittel aus dem Kompressor in den K hlkreislauf gelangt sein Nach...

Page 22: ...ausreichend Temperatur Regler zu niedrig eingestellt H here Einstellung w hlen siehe Tempe ratur einstellen auf Seite DE 13 T r nicht fest verschlossen oder T rdichtung liegt nicht voll auf Siehe T r...

Page 23: ...sieben Jahren nach dem Inverkehrbringen des letzten Exemplars des Modells zur Ver f gung T rdichtungen stehen f r einen Zeit raum von zehn Jahren zur Verf gung Kunden in Deutschland Wenden Sie sich bi...

Page 24: ...i Austritt von K ltemittel besteht Brandgefahr Achten Sie darauf dass an einem K hlger t bis zur fachgerechten Ent sorgung keine K hlrippen oder Rohre besch digt werden Unser Beitrag zum Schutz der Oz...

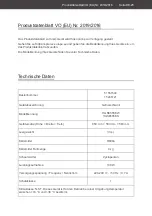
Page 25: ...odellkennung Ihres Ger ts finden Sie unter Technische Daten Bestellnummer 51551544 15266121 Ger tebezeichnung Gefrierschrank Modellkennung HGS8555EW HGS8555ES Ger tema e H he Breite Tiefe 850 mm 550 m...

Page 26: ...Technische Daten Seite DE 26...

Page 27: ...Freezer User manual Manual version 2001 00995_EN_20200818 Order no 51551544 15266121 Reproduction even of excerpts is not permitted HGS8555EW HGS8555ES MED MAX MIN...

Page 28: ...ng before use EN 20 Connecting the appliance to electricity EN 20 Troubleshooting table EN 22 Service EN 23 Advice complaints and orders EN 23 Repairs and spare parts EN 23 Environmental protection EN...

Page 29: ...5 If the delivery is incomplete or the appli ance has been damaged during transport please contact our Service Centre see page EN 23 WARNING Risk of electric shock Never use a damaged appliance Packa...

Page 30: ...NG This symbol indicates a hazard with a medi um level of risk which if not avoided could result in death or serious injury CAUTION This symbol indicates a hazard with a low lev el of risk which if no...

Page 31: ...cord is not trapped or damaged Do not kink the supply cord or lay it over sharp edges Keep the supply cord away from na ked ames and hot surfaces Always pull on the mains plug and not the mains cable...

Page 32: ...efrig eration system must only be carried out by authorised specialists Do not damage the refrigerant cir cuit e g by puncturing the refrigerant channels of the condensate evapora tor with sharp objec...

Page 33: ...l not play with the appli ance Cleaning and user maintenance shall not be made by children without su pervision Make sure children do not have unsu pervised access to the appliance Risks associated wi...

Page 34: ...thaw a lit tle before eating do not put into your mouth straight from the freezer NOTICE Risk of damage to property Improper handling of the appliance can lead to damage to property Do not store glass...

Page 35: ...recom mended by the manufacturer When cleaning please note Never use harsh granular soda acid solvent based or abrasive cleaners These attack the plastic surfaces All purpose cleaners with a neutral...

Page 36: ...hat can come in contact with food and acces sible drainage systems If the fridge freezer is left empty for long periods switch off defrost clean dry and leave the door open to prevent mould developing...

Page 37: ...to defrost If contact with stored food cannot be avoided we recommend that you create a cold reserve in the freezer before freezing the fresh goods 2 hours beforehand set the temperature controller to...

Page 38: ...As well as this it is more cost efficient to freeze several small portions than to throw away the remainder of a large portion Adhere to the recommended storage times and temperatures When storing fre...

Page 39: ...and the temperature in the freezer may rise Operation What you need to do 1 Set the temperature controller 1 to NORMAL The appliance is then switched on The compressor starts to work the refrigerant...

Page 40: ...re recommended Door seals and plastic parts are sen sitive to oil and grease Remove con taminants as quickly as possible Only use soft cloths Checking and cleaning door seals The door seals must be ch...

Page 41: ...n Set the temperature controller 1 to MAX at least 3 hours before cleaning This way the frozen food retains a level of coldness and does not thaw so fast Defrosting 1 Set the temperature controller 1...

Page 42: ...ezer into a horizontal position Do not use sharp or pointed objects to unpack it 1 Move the appliance using a dolly or with a second person 2 Unpack the appliance and carefully re move all packaging p...

Page 43: ...il and coal burning stoves 30cm to other freezer appliances 2 cm from washing machines dishwashers 2 cm If you would like to reduce these distances you can fit an insulation plate between the applianc...

Page 44: ...en both screw covers on the top of the cover using a screwdriver 3 Unscrew the two screws on the left and right from the top of the cover To do this use a cross head screwdriver 4 Lever out the two si...

Page 45: ...5 so that you can also move the lower door hinge 10 Unscrew both front levelling feet 11 Unscrew the lower hinge plate To do this use an 8 mm spanner or a cross head screwdriver 1 12 Turn the hinge pl...

Page 46: ...ee Defrosting and cleaning the freezer on page EN 14 Connecting the appliance to electricity WARNING Risk of electric shock Touching live parts may result in severe injury or death Do not operate or c...

Page 47: ...e If the freezer has been transported hori zontally lubricant from the compressor may make its way into the cooling cir cuit Allow the appliance to stand upright for approx 2 hours after transport and...

Page 48: ...ance doesn t cool suffi ciently The temperature controller is set at too low a level Select a higher setting see Setting the tem perature on page EN 13 Door not tightly closed or door seal is not comp...

Page 49: ...parts are available for a minimum peri od of seven years after the final version of the model has been placed on the market Door seals are available for a period of ten years Customers in Germany Plea...

Page 50: ...nd insulation must be proper ly disposed of Refrigerant leakage may cause a re hazard Until the point of proper disposal en sure that none of the cooling ns or tubes on a refrigerating appliance are d...

Page 51: ...r your device can be found under Technical specifications Item number 51551544 15266121 Name of appliance Upright Freezer Model identifier HGS8555EW HGS8555ES Device measurements Height Width Depth 85...

Page 52: ......
Reviews: