background image

English

14

Tighten the safety screw using a 3 

mm Allen wrench.

Failure to tighten the safety screw 

may result in injury or product 

damage.

Showerhead removal

Loosen the three grub screws 3 complete rotations 
using a small screwdriver.

Grasp the showerhead firmly (1).

Use extreme caution: the shower-

head weights approximately 12 

lbs.

Loosen the safety screw using a 3 mm Allen wrench.

Pull the showerhead down and away from the arm.

3 mm

1.

2.

12 lb

3x

3x

3x

3 mm

Summary of Contents for PuraVida 27390 1 Series

Page 1: ... thermostatic cartridge volume control cartridge Flow rate 8 0 gpm 44 psi Maximum high temperature can be adjusted to comply with local plumbing codes Available Finishes Chrome 15775001 White Chrome 15775401 Required Accessories Universal iBox rough 01850181 PuraVida Thermostatic Mixer with Volume Control 15775XX1 Code Compliance This unit meets or exceeds the following ASME A112 18 1 CSA B125 1 L...

Page 2: ...x 10 spray face Solid brass Extra wide Rain AIR spray mode AIR injection technology Includes 15 showerarm with quick connect 2 5 GPM Available Finishes Chrome 27437001 White Chrome 27437401 PuraVida 400 AIR Showerhead with Showerarm 27437xx1 Code Compliance This unit meets or exceeds the following ASME A112 18 1 CSA B125 1 Listed by IAPMO Approved for use in Massachusetts ...

Page 3: ... Specification sheet revised 10 2010 Product Features NPT female inlet Fits all hoses Backflow prevention provided by double check valve Available Finishes Chrome 27414001 PuraVida Wall Outlet with Check Valve 27414001 Code Compliance This unit meets or exceeds the following ASME A112 18 1 CSA B125 1 Listed by IAPMO ...

Page 4: ...PuraVida 27390XX1 PuraVida 27437XX1 Installation Instructions Warranty ...

Page 5: ...us les codes de plomberie locaux applicables pour le réglage de la température du chauffe eau Debe conocer y cumplir todos los códigos locales aplicables para ajustar la temperatura del calentador de agua Flow rate Capacité nominale Caudal máximo 2 5 gpm Technical Information Données techniques Datos tecnicos PuraVida 27390XX1 PuraVida 27437XX1 ...

Page 6: ...ans une cabine de douche en fibre de verre ou en acrylique veuillez contacter le fabricant de la cabine pour connaître les pièces de fixation et positions de montage recommandées Pour empêcher des blessures par ébouillante ment la température de sortie maximale du robinet de douche ne doit pas excéder 120 F Au Massachusetts la température de sortie maximale du robinet de douche ne doit pas excéder...

Page 7: ...e the surface of the finished ceiling Wrap the threads on NPT part of the nipple with Teflon tape Install the mounting nipple using a Allen wrench not included Seal the ceiling around the nipple using waterproof sealant Install the mounting ring Mark the positions of four screw holes ...

Page 8: ... du raccord à l aide d un agent d étanchéité Installez l anneau de montage Marquez les positions des quatre trous de vissage Instalación 27390XX1 Piezas interiores Instale una conexión hembra NPT de embutida dentro de la superficie del cielo raso acabado Envuelva las roscas en una pieza NPT de del niple con cinta de Teflon Instale el niple de montaje con una llave de no incluida Selle el cielo ras...

Page 9: ...move the mounting ring Drill the screw holes using a 6 mm bit 1 Install the anchors 2 Seal the ceiling around the anchors using waterproof sealant 3 Install the mounting ring Install the screws 1 2 3 Silikon 6 mm ...

Page 10: ...r des chevilles à l aide d un agent d étanchéité 3 Installez l anneau de montage Installez les vis Elimine el aro de montaje Perfore los orificios para los tornillos con una broca de 6 mm 1 Instale los pernos de anclaje 2 Selle el cielo raso alrededor de los pernos de anc laje con un sellador impermeable 3 Instale el aro de montaje Instale los tornillos ...

Page 11: ...l the extension pipe Make sure that the filter is installed in the showerhead Push the showerhead against the extension pipe until it clicks Tighten the safety screw using a 3 mm Allen wrench Failure to tighten the safety screw may result in injury or product damage c l i c k 3 mm 30 mm ...

Page 12: ... d une clé hexagonale de 3 mm Le fait de ne pas serrer la vis de sûreté peut entraîner des bles sures ou endommager le produit Instale el escudo Envuelva las roscas del niple con la cinta de Teflon Instale el caño de extensión Asegúrese de que el filtro está instalado en el cabezal de ducha Presione el cabezal de ducha contra el caño de extensión hasta que calce Apriete el tornillo de seguridad co...

Page 13: ...st the wall over the fitting Make sure that it is level Mark the positions of the screw holes Drill the screw holes using a 6 mm bit 1 Install the anchors 2 Seal the wall around the anchors using waterproof sealant 3 Failure to seal the wall may lead to water damage Wrap the threads on the nipple using Teflon tape Install the nipple 6 mm 1 2 3 15 mm ...

Page 14: ...auser des dommages Enveloppez les filets du raccord avec du ruban Téflon Installez le raccord fileté Instalación 27437XX1 Piezas interiores Instale una conexión hembra NPT de embutida detrás de la superficie de la pared acabada Coloque el brazo de ducha contra la pared sobre el accesorio Asegúrese de que esté nivelado Marque las posiciones de los orificios para tornillos Perfore los orificios para...

Page 15: ...g waterproof sealant Failure to seal the wall may lead to water damage Push the shower arm over the nipple Install the washers and screws Push the escutcheon against the wall Make sure that the filter is installed in the showerhead Push the showerhead up against the shower arm until it clicks 8 mm click ...

Page 16: ...z vous que le filtre soit installé dans la pomme de douche Poussez la pomme de douche contre le bras de douche jusqu à ce qu elle s enclenche El niple debe extenderse 2 3 fuera de la pared acabada Selle la pared alrededor del niple con un sellador impermeable Si no se sella la pared pueden producirse daños por acción del agua Presione el brazo de ducha sobre el niple Instale las arandelas y los to...

Page 17: ...duct damage Showerhead removal Loosen the three grub screws 3 complete rotations using a small screwdriver Grasp the showerhead firmly 1 Use extreme caution the shower head weights approximately 12 lbs Loosen the safety screw using a 3 mm Allen wrench Pull the showerhead down and away from the arm 3 mm 1 2 12 lb 3x 3x 3x 3 mm ...

Page 18: ...z la vis de sûreté à l aide d une clé hexago nale de 3 mm Tirez la pomme de douche vers le bas en l éloignant du bras Apriete el tornillo de seguridad con una llave Allen de 3 mm No ajustar el tornillo de seguri dad puede causar una lesión o daño del producto Desmontaje del cabezal de ducha Afloje los tres tornillos sin cabeza con 3 rotaciones completas utilizando un destornillador pequeño Sosteng...

Page 19: ...move scale deposits from the spray face pour approximately of a commercial scale remover such as Lime Away or CLR into a shallow dish Soak the spray face in the scale remover Always follow the label instructions on the scale remover Rinse the showerhead with clear water Install the showerhead Flush the showerhead with clear water for at least one minute 1 minute QUICK CLEAN ...

Page 20: ...es la tremper dans un détartrant commercial tel que Lime Away ou CLR Suivez les instructions figurant sur l étiquette du produit Rincez la pomme de douche à l eau claire Installez la pomme de douche et rincez au moins une minute Elimine los depósitos calcificados de la superficie de rociado remojándola en un desincrustante comercial como Lime Away o CLR Siga las instrucciones de la etiqu eta del p...

Page 21: ...English 18 Remove the screw using a 4 mm Allen wrench Rinse the screw using clear water Install the screw Tighten using a 4 mm Allen wrench 4 mm 1 5 ft lb 2 Nm 4 mm ...

Page 22: ...ide d un clé hexagonale de 4 mm Rincez le à l eau claire Installez le vis à l aide d un clé hexagonale de 4 mm Retire el tornillo con una llave Allen de 4 mm Enjuague el tornillo con agua limpia Instale el tornillo con una llave Allen de 4 mm ...

Page 23: ...20 Replacement Parts Pièces détachées Repuestos 97735000 94074000 95416001 96526000 95208000 97735000 2x9 94074000 95415000 95416001 96526000 95414001 ...

Page 24: ...lity To avoid damage and returns it is necessary to consider certain criteria when cleaning Cleaning Materials for Faucets and Showers Acids are a necessary ingredient of cleaning materials for removing lime however please pay attention to the following points when cleaning faucets and showers Only use cleaning materials which are explicitly intended for this type of application Never use cleaning...

Page 25: ...impiadores a vapor no está permitida las altas temperaturas pueden dañar los productos Indicaciones importantes Los residuos de productos de aseo como jabón líquido champús y gel de ducha pueden dañar también los materiales Por lo que también se deberá prestar atención a lo siguiente aclarar con abundante agua después del uso Con materiales ya dañados la acción de detergentes incrementará el desga...

Page 26: ...cts in material or workmanship B Conditions malfunctions or damage resulting from 1 normal wear and tear improper installation improper maintenance misuse abuse negligence accident or alteration or 2 the use of abrasive or caustic cleaning agents or no rinse cleaning products or the use of the product in any manner contrary to the product instructions 3 Conditions in the home such as excessive wat...

Page 27: ...ired by law to give us a reasonable opportunity to correct or cure any failure to comply before you can bring any action in court against us under the Magnuson Moss Warranty Act PRODUCT INSTRUCTIONS AND QUESTIONS Upon purchase or prior to installation please carefully inspect your Hansgrohe product for any damage or visible defect Prior to installing always carefully study the enclosed instruction...

Page 28: ...sting Revolutionary solid color finish Finish Model no List Price chrome 28276003 42 00 USD oil rubbed bronze 28276623 72 00 USD brushed nickel 28276823 72 00 USD polished nickel 28276833 62 00 USD polished brass 28276933 62 00 USD steel optik 28276803 72 00 USD Product image www hansgrohe usa com ...

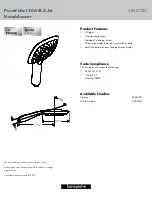
Page 29: ...uct Features 2 5 gpm Oversized spray face Quiclean cleaning system Three spray modes RainAIR CaresseAIR MixAIR EasyClick button for easy change of spray modes Available Finishes Chrome 28557001 White Chrome 28557401 PuraVida 150 AIR 3 Jet Handshower 28557XX1 Code Compliance This unit meets or exceeds the following ASME A112 18 1 CSA B125 1 Listed by IAPMO ...

Reviews: