1
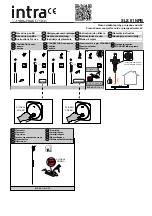
1. Measure the desired space for the fixation points
of the wall support. Adjust the dimensions to the
tile pattern if required (fig. 1).
2. Using a centre punch mark the hole positions
and using a 6mm suitable drill bit drill a hole to
a depth of 45mm (fig.1).
Handy Hint: Mark the drill hole positions on a pi-
ece of masking tape on the wall. The drill bit will
be less likely to slip when you start drilling.
3. Insert wall plugs into the holes (beyond the depth
of the supports) and seal around the hole. Fix the
porter in position using the 50mm fixing screws
and washers. (fig. 1).
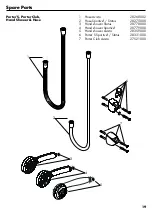
4. Attach the hose to the hand shower head ensu-
ring a mesh washer is inserted (where shown)
to protect against any incoming dirt. Attach
the other end of the hose to the connection on
the mixer ensuring a rubber washer is inserted
where shown.
Place the hand shower into the hand shower
slider (fig.2).
Where the contractor mounts the product,
he should ensure that the entire area of
the wall to which the mounting plate is to
be fitted, is flat (no projecting joints or tiles
sticking out), that the structure of the wall
is suitable for the installation of the prod-
uct and has no weak points. The delivered
mountig kit is suitable for:
• Concrete
• Natural stone with dense structure
• Solid brick
• Sand-lime solid brick
• Solid pumice bricks
• Aircrete
• Porous bricks
• Vertically perforated brick
• Sand-lime perforated block
• Hollow block made from lightweight concrete
• Solid panel made from gypsum
• Standard gypsum wallboard / plaster fiber board
• Chipboard
Suitable fixing material must be used at
other wall constructions!
Summary of Contents for Avista 31756000
Page 10: ... Pumped System ...
Page 13: ...12 2 1b 1a Installation ...


